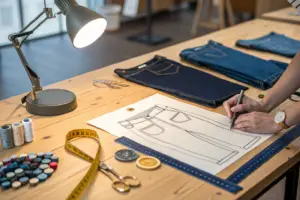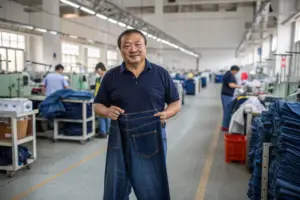
You have built a brand. You have a logo you are proud of. You have a vision for how it should look on a pair of premium denim shorts. Then the factory tells you the logo can only go on the back patch. Or the embroidery file you sent is not compatible with their machines. Or the minimum order for custom buttons is 10,000 units and you only need 2,000. The customization process that was supposed to make the shorts uniquely yours becomes a series of "no, we cannot do that" responses. I have heard this frustration from brand owners who came to us after bad experiences with factories that offered "customization" but only meant a basic hangtag swap.
You can customize your logo on Fumao Clothing denim shorts through seven application methods. We offer embroidered logos on the back waistband or pocket, debossed or foil-stamped leather patches, custom-engraved metal buttons and rivets, woven labels sewn into the waistband, screen-printed logos on the pocket lining, custom zipper pullers with your brand mark, and heat-transfer prints on the inside or outside of the garment. Each method has specific artwork requirements, minimum order quantities, and cost implications that we walk you through before sampling begins.
Customization is not an afterthought in our factory. It is a planned stage in the product development process. At Shanghai Fumao, we have an in-house embellishment department with embroidery machines, a laser engraver for leather patches, and a heat press for transfer applications. We also partner with a metal hardware factory for custom buttons and zipper pullers. I want to show you every logo customization option we offer, the technical requirements for each, the costs and timelines, and how to choose the right method for your brand identity and budget.
What Logo Customization Options Do We Offer for Denim Shorts?
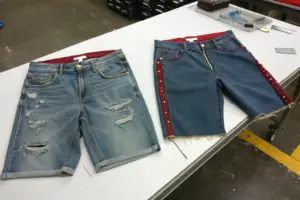
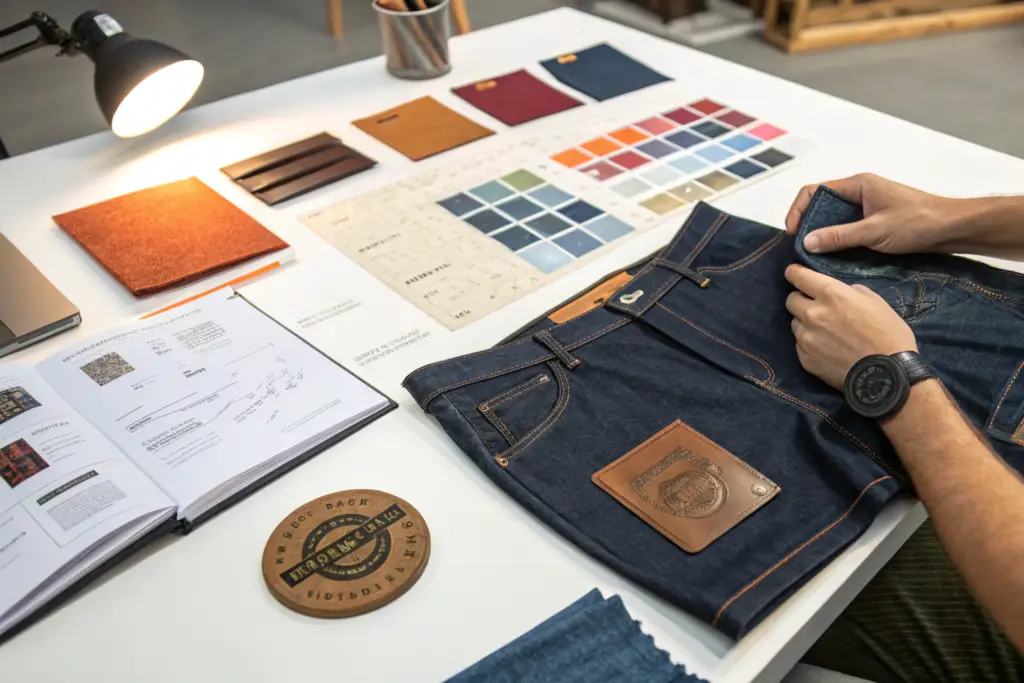
Customization is not one thing. It is a menu of techniques, each with a different visual effect, different tactile quality, and different cost structure. A leather patch conveys heritage and craftsmanship. A metal button conveys premium hardware quality. An embroidered logo conveys a soft, textural brand mark. A screen-printed inside pocket logo is a subtle surprise that adds perceived value. The best brand programs use two or three of these methods together to create a cohesive, premium identity.
The choice of method should be driven by your brand positioning. A minimalist luxury brand might choose a small debossed leather patch and a custom-engraved button, with no other visible branding. A streetwear brand might choose a bold embroidered logo across the back waistband, a custom zipper puller, and a printed logo on the pocket bag. A mass-market brand might choose a simple woven label and a standard metal button with no custom engraving, to keep costs down. The combination communicates your brand's personality. We help you select the right combination based on your target retail price, your brand aesthetic, and your budget.
Let me walk through the seven application methods we offer, with the specific details you need to make an informed choice.

What Are the Seven Logo Application Methods Available for Denim Shorts?
Here is a structured breakdown of each method, the equipment we use, and the visual result.
| Method | Application Location | Equipment Used | Visual Result | Best For |
|---|---|---|---|---|
| Embroidery | Back waistband, pocket, hem | Tajima 6-head embroidery machine | Raised, textural, soft sheen | Streetwear, casual brands |
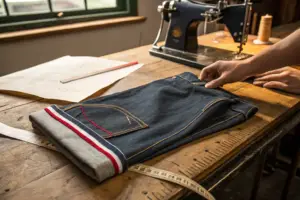
| Leather Patch | Back waistband center | Laser engraver, hot foil stamp | Premium, tactile, heritage | Premium, heritage, western |
| Metal Button | Center front waistband | Custom die-cast mold | Engraved, metallic, durable | All brand levels |
| Woven Label | Inside waistband, side seam | Jacquard loom | Fine detail, soft, foldable | All brand levels |
| Screen Print | Pocket lining, inside waistband | Manual screen press | Flat, opaque, subtle | Streetwear, surprise detail |
| Zipper Puller | Fly zipper | Custom zinc alloy mold | 3D shape, metallic, functional | Premium, streetwear |
| Heat Transfer | Inside waistband, outside pocket | Heat press machine | Flat, full color, soft feel | Complex logos with gradients |
Each method has different artwork requirements. Embroidery requires a digitized DST or EMB file. Leather patches require a vector AI or EPS file for the engraving or foil stamp mold. Metal buttons require a 3D CAD file for the mold. Woven labels require a high-resolution PDF of the logo. Screen print requires a color-separated AI file. Zipper pullers require a 3D drawing with dimensions. Heat transfer requires a high-resolution PNG or AI file in CMYK color mode. Providing the correct file format eliminates delays in the sampling process. The garment embellishment techniques vary in complexity, and the artwork preparation is often the longest lead time component.
How Do the Costs Compare Across Different Customization Methods?
Cost is a function of three variables. The setup cost, which is a one-time fee for creating the mold, die, or digitized file. The per-unit cost, which is the cost added to each pair of shorts. And the minimum order quantity, which is the smallest number of units we can produce with that customization.
| Method | Setup Cost (USD) | Per-Unit Cost (USD) | MOQ |
|---|---|---|---|
| Embroidery | $50-$80 (digitizing) | $0.30-$0.80 | 300 pcs |
| Leather Patch | $60-$120 (laser/foil mold) | $0.40-$1.20 | 500 pcs |
| Metal Button | $150-$300 (mold) | $0.08-$0.20 | 2,000 pcs |
| Woven Label | $40-$70 (setup) | $0.05-$0.15 | 1,000 pcs |
| Screen Print | $30-$50 (screen) | $0.10-$0.25 | 300 pcs |
| Zipper Puller | $200-$400 (mold) | $0.12-$0.30 | 3,000 pcs |
| Heat Transfer | $20-$40 (plate) | $0.15-$0.35 | 300 pcs |
These are approximate ranges. The exact cost depends on the complexity of your logo, the number of colors, and the size of the application. A simple one-color embroidery is at the low end. A large, multi-color back patch embroidery is at the high end. The metal button mold cost is the highest setup fee, but the per-unit cost is among the lowest. This makes custom buttons economical for larger orders. The custom apparel costing process accounts for these trade-offs between setup amortization and unit cost. We help you calculate the total landed cost impact of each customization combination so you can make a data-driven decision, not just an aesthetic one.
What Are the Artwork and Technical Requirements for Logo Submission?
A beautiful logo on a business card does not translate automatically to a beautiful logo on denim. The fabric texture, the thread thickness, the engraving depth, the stitch density. These variables affect how your logo will look in physical form. A logo with very thin lines and small text may be readable on paper but will blur into an unreadable blob when embroidered on textured denim. A logo with color gradients will not reproduce in a single-color metal engraving. The artwork must be adapted to the specific application method.
This adaptation is part of our value. We do not just take your file and send it to the embroidery machine. We review it. We identify potential reproduction issues. We suggest modifications. We create a digital proof that shows exactly how the logo will look in the chosen application method. You approve the proof before we make anything physical. This review process prevents the disappointment of receiving a sample where your logo looks wrong.
Here are the specific technical requirements and the design adaptation advice we provide for each major method.

What File Formats and Resolution Are Required for Each Method?
Submitting the correct file format is the first step to a smooth customization process. Here is a detailed breakdown.
For embroidery, we require a vector file of your logo in AI, EPS, or high-resolution PDF format. Our digitizer converts this into a DST or EMB machine file. The digitizing process translates your 2D artwork into a stitch map that tells the embroidery machine where to place each needle penetration. The stitch type, stitch direction, and thread density are all defined in this step. We ask for a minimum line thickness of 1mm in your logo. Thinner lines cannot be reliably reproduced in thread. Small text below 5mm in height will be illegible. We advise simplifying complex logos for embroidery. Remove very small details and thin serifs. The embroidery digitizing requirements are well-established in the industry.
For leather patches, we require a vector file in AI or EPS format. The file must have clearly defined paths for the debossing or foil stamping areas. If your logo has multiple layers, like an outer shape and inner text, specify which elements are debossed and which are flat. For debossing, the minimum line thickness is 0.8mm. For foil stamping, the minimum is 1.2mm because the foil needs a slightly wider surface to adhere properly. The leather patch itself comes in several standard sizes. Our most common patch dimension is 35mm by 70mm, but we can accommodate custom sizes with a minor setup adjustment.
For metal buttons and zipper pullers, we require a 3D design file or a detailed 2D drawing with front, side, and back views with all dimensions in millimeters. The mold maker uses this to create the die-cast mold. The engraving depth is typically 0.3mm to 0.5mm. Very fine details may not reproduce well in metal. We recommend a minimum line thickness of 0.5mm for engraved metal. The metal hardware customization standards are similar across major hardware suppliers.
How Does the Denim Fabric Texture Affect Logo Reproduction Quality?
Denim is not a smooth canvas. It has a pronounced twill weave with diagonal ridges. This texture affects how logos appear. An embroidered logo on denim will sink slightly into the valleys of the twill. The stitching must be dense enough to create a raised surface that sits above the fabric texture. We use a standard stitch density of 0.4mm between stitches for denim embroidery. This is tighter than the standard 0.5mm used on smooth fabrics like poplin.
A screen-printed logo on denim will have a slightly textured, uneven edge because the ink sits on top of the twill ridges and does not fully penetrate the valleys. This is actually a desirable vintage effect for many brands, but it is important to know before you approve the sample. A heat transfer logo adheres to the surface of the denim and can fill the twill valleys better than screen printing, resulting in a smoother finish. However, heat transfer on denim is less durable than embroidery or woven labels. It will crack and fade over many wash cycles. We recommend heat transfer for inside waistband logos, where durability is less critical because the area does not rub against other surfaces.
A leather patch sits on top of the denim and is sewn around the edges. It is not affected by the denim texture. The debossing or foil stamping quality depends entirely on the leather surface. We use full-grain cowhide leather for our premium patches. The smooth, consistent surface takes debossing and foil stamping cleanly. Split leather or bonded leather has a rougher, less predictable surface. We do not recommend it for logos with fine detail. The fabric texture and print quality relationship is a key consideration in garment decoration. A knowledgeable factory will advise you on which method works best for your specific logo design, rather than just accepting your file and producing a poor result.
What Is the Step-by-Step Logo Customization Process?
Knowing the options is step one. Understanding the process from your initial idea to the approved bulk production is step two. Many buyers are anxious about customization because they have been burned by a process that was opaque and uncontrolled. They sent their logo. They waited. They received a sample. The logo was wrong. They sent feedback. They waited again. The second sample was slightly less wrong but still not right. The back-and-forth consumed weeks. The production deadline passed.
Our logo customization process is designed to eliminate this anxiety through transparency and structured approvals. It has five defined stages. Each stage ends with a deliverable that you review and approve before we proceed. You always know what is happening and when you will see the next result. This is project management applied to a creative process.
Let me walk you through the five stages so you know exactly what to expect when you initiate a logo customization order.

How Does the Artwork Review and Digitization Stage Work?
Stage one begins when you send us your logo file. Our artwork specialist reviews it within 24 hours. They check the file format, the resolution, the line thicknesses, and the color specifications. They compare the logo to the requirements of your chosen application methods.
If the logo needs modification, the specialist prepares a feedback document. It is a simple PDF with your logo annotated. "This text is 3mm tall. Minimum for embroidery is 5mm. Suggest enlarging or removing." "This gradient cannot be reproduced in metal engraving. Suggest converting to solid black." "This thin line is 0.3mm. Minimum for leather debossing is 0.8mm. Suggest thickening." You review the feedback. You decide which suggestions to accept. The revised artwork is prepared. For embroidery, the digitizing step follows. The vector file is loaded into the digitizing software. The digitizer assigns stitch types. Satin stitch for borders. Tatami stitch for filled areas. Running stitch for fine lines. The thread colors are matched to Pantone numbers. A digital stitch simulation is generated. This simulation shows exactly how the embroidery will look, stitch by stitch. The digitizing for embroidery process is a specialized skill that can make or break the final result. We employ an in-house digitizer with 12 years of experience. She knows how stitches behave on denim.
What Happens During the Sampling and Approval Stage?
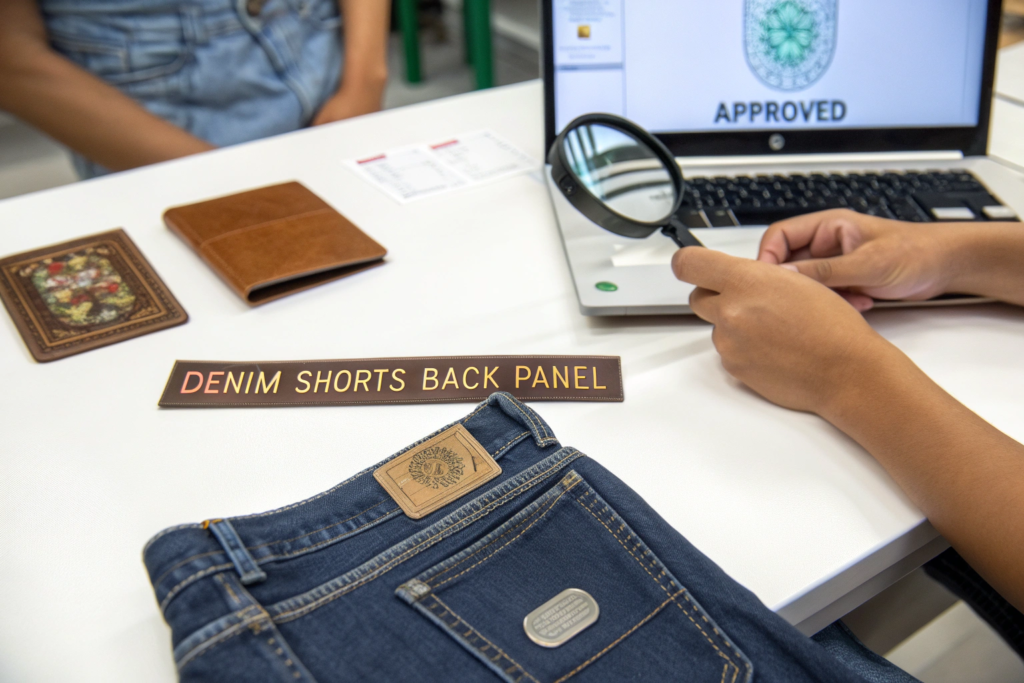
Stage two is the physical sample. After you approve the digital proof, we create a physical sample of each customization method on the actual denim fabric that will be used for your shorts. This is not a mock-up on a different material. It is the real application on your real fabric.
For embroidery, the digitized file is loaded onto the Tajima machine. A test stitch-out is run on a swatch of your denim. The thread tension, the stitch density, and the registration are checked. The sample is washed once to test for shrinkage or distortion. For leather patches, the debossing or foil stamping die is created. A sample patch is pressed and sewn onto a denim swatch. For metal buttons, a wax mold sample is created first for your approval of the 3D shape. After you approve the wax mold, the metal production mold is made and a sample button is cast. The physical samples are shipped to you by international courier. You touch them. You feel them. You check the size, the color, the placement. You either approve them or send feedback for revision. One round of revisions is included in our standard sampling cost. Most logos are approved on the first round because the digital proof stage catches the major issues. The pre-production sample approval stage is the final quality gate before bulk production.
How Do We Ensure Logo Quality and Durability Across Bulk Production?
A perfect sample is a promise. The bulk order is the fulfillment. If the sample looks great but the 5,000 pairs you receive have crooked patches, faded embroidery, or buttons with shallow engraving, the sample was a lie. Logo quality must be consistent across every single unit. Achieving this consistency requires process controls, not just a skilled sampling technician.
Our approach to logo quality control mirrors our approach to garment quality control. We use defined standards, objective measurements, and multiple inspection gates. The embroidery thread tension is measured with a tension gauge. The leather patch placement is controlled with a laser alignment guide on the sewing machine. The metal button engraving depth is spot-checked with a depth micrometer. These are not subjective judgments. They are measurements against a specification.
Here is how we maintain logo quality from the first production piece to the last, and what happens if something goes wrong.
What Quality Checks Are Performed on Customized Logos During Production?
Logo quality checks occur at three points during production. The first is at the embellishment station. When an operator finishes embroidering a waistband or attaching a leather patch, a line inspector checks the first piece and then checks every 50th piece thereafter. The inspector compares the production piece to the approved sample, which is kept in a clear plastic sleeve at the workstation.
The inspection criteria are specific. For embroidery, the inspector checks for thread breaks, missed stitches, incorrect thread color, incorrect placement, and puckering of the surrounding fabric. Placement is checked with a clear plastic template that is overlaid on the waistband. The template has crosshairs that must align with the center back seam and the top of the waistband. Tolerance is plus or minus 2mm. For leather patches, the inspector checks the attachment stitching. The patch must be sewn with exactly 3mm seam allowance. The stitches must be even, with no skipped needle holes. The patch itself is checked for scratches or blemishes on the debossed or foil-stamped area. For metal buttons, the inspector checks the attachment strength. A random sample of five buttons per hour is tested with a pull-force gauge. The button must withstand 15 pounds of force without detaching. The engraving depth is checked on a sample button with a depth micrometer. The in-process quality control methods for embellishments are similar to those for garment construction. The key is frequency. Checking every 50th piece means a defect is caught within 50 pieces, not 500.
How Durable Are Our Logo Applications After Repeated Washing?
A logo that looks great on the rack but disappears after three washes is a liability. Your customer wears the shorts. They wash the shorts. The logo fades, cracks, or peels off. They feel cheated. The perceived value of your brand drops.
We test the durability of every customization method. For embroidery, we run the shorts through five home laundry cycles and measure the thread color against the original Pantone standard. The Delta E must be below 2.0. The thread tension is re-checked. No loose loops or pulled stitches are acceptable. For leather patches, the patch is inspected after five wash cycles for delamination, color bleeding onto the denim, or cracking of the debossed area. Our full-grain leather with a protective finish coating passes this test with minimal change. For screen-printed and heat-transfer logos, we run an AATCC 61 accelerated wash test. The logo is evaluated for cracking, peeling, and color loss. Screen printing on denim typically shows minor cracking after 10 wash cycles, which is an acceptable vintage aesthetic for many brands. Heat transfer logos on the inside waistband show minimal change because the inside waistband experiences less abrasion than the outside of the garment. For metal buttons, we test the finish after five wash cycles. The engraving should remain clear. The plating should not tarnish or wear off. Our buttons use an anti-tarnish coating that is standard on all YKK and SBS hardware. The garment care durability testing standards provide the methodology. Our internal standards are equal to or tighter than the industry norms. We share the test results with you so you can make durability claims to your customers with confidence.
Conclusion
Customizing your logo on denim shorts is a collaboration between your brand vision and our technical execution. We offer seven application methods, from the soft texture of embroidery to the premium weight of a debossed leather patch to the subtle detail of a custom-engraved metal button. Each method has specific artwork requirements, cost structures, and durability characteristics. Our job is to guide you through these choices, adapt your logo artwork to the chosen methods, produce a physical sample that you approve, and then replicate that approved sample consistently across every unit in your bulk order.
The process is transparent. You submit your logo. We review it within 24 hours and provide feedback if modifications are needed. The artwork is digitized or prepared for mold-making. A digital proof is sent for your approval. A physical sample is created on your actual denim fabric. You approve the sample or request revisions. Then production begins, with in-line quality checks every 50 pieces to ensure the logo placement, thread tension, engraving depth, and attachment strength all match the approved sample.
I have seen a well-executed logo customization transform a generic pair of denim shorts into a powerful brand statement. The moment a customer touches the debossed leather patch or feels the weight of the engraved metal button, their perception of the product shifts. They are not holding a commodity short. They are holding a branded piece from a company that cares about details. That perception is what builds repeat purchases and word-of-mouth referrals.
If you are ready to see your logo on a pair of our denim shorts, the first step is to send your artwork to our Business Director, Elaine. She will route it to our artwork specialist for the initial review. She can also send you our physical sample kit, which includes swatches of all seven customization methods so you can touch and compare them before making your decision. Reach her at elaine@fumaoclothing.com. Let Shanghai Fumao turn your logo into a tactile brand experience that your customers will remember.