You just received your bulk shipment. You open the first carton with excitement. You pull out a dress. It looks beautiful. You lay it flat on a table to measure the chest. Your spec sheet says 20 inches across. The tape measure says 19 inches. Your stomach drops. You measure another piece. 19.25 inches. Another piece. 18.75 inches. The entire shipment is a full size too small. You cannot sell these. Your launch date is in two weeks. You email the supplier. Their response is slow. They ask for "photos with a ruler." You send them. They say, "This is within our tolerance of 1 inch." You want to scream. A one-inch tolerance on a chest measurement is a different clothing size. This is not a minor inconvenience. This is a business crisis. I know this panic because I have been on the receiving end of these calls from our clients. I also know how to fix it fast.
The fastest way to resolve sizing discrepancies with a garment supplier is to immediately escalate the communication from email to a live video inspection call and provide a “Golden Sample” comparison measurement report. You must stop arguing about tolerance definitions and start creating a shared, objective reality. The four-step rapid resolution protocol is: (1) Stop unpacking and isolate the inventory immediately, (2) Create a video evidence file showing the tape measure placement on the garment compared to the approved pre-production sample, (3) Request a live video walkthrough of the factory’s remaining inventory or cutting room floor using WhatsApp or Zoom, and (4) Propose a concrete remediation plan with three options: return for rework, partial refund to cover local alteration, or credit on future order. The goal is to shift the conversation from “who is wrong” to “how we salvage this business relationship and the inventory.”
At Shanghai Fumao, we have a specific protocol for these situations. We do not hide behind email delays. We pick up the video call. In the next few minutes, I will give you the exact script and evidence package you need to get a resolution within 48 hours, not two months.
Why Do Sizing Discrepancies Happen Even With Approved Samples?
You approved a sample three months ago. It fit perfectly. The factory used that exact sample as the “sealed sample” for production. So why does the bulk order measure smaller? You assume the factory cut corners. You assume they used a different pattern. Sometimes that is true. But more often, the discrepancy comes from a process variable that neither you nor the factory salesperson considered. Fabric relaxation. Shrinkage from steam ironing. Cutting room spreading tension. These invisible forces change the size of a garment between the sample room and the production floor. If you do not understand these forces, you will keep having this fight with every supplier.
Sizing discrepancies between approved samples and bulk production occur primarily due to differences in the manufacturing environment rather than intentional pattern changes. The three most common technical causes are: (1) Fabric Relaxation Shrinkage, where rolled fabric stored under tension contracts after cutting and before sewing, (2) Inconsistent Steam Iron Pressure, where the sample maker uses a heavy industrial press but the production line uses a lighter hand iron, and (3) Cutting Room Spread Tension, where the fabric is stretched as it is laid out in 50-layer stacks, causing the cut panels to “spring back” smaller when released. Understanding these mechanical causes is essential because it changes your negotiation strategy from accusation to collaborative problem-solving.
When a client comes to Shanghai Fumao with a sizing issue, we walk backwards through the production ticket to find exactly where the inches were lost.
How Does Fabric Relaxation Change Garment Measurements?
Fabric is not a static material. It is a textile under tension. When fabric is woven or knitted, it is wound onto large rolls under high tension. It sits in a warehouse for weeks under that tension. When you cut into that roll and relax the fabric, it “breathes out.” The fibers contract. The piece gets smaller.
In the sample room, a single garment is cut from a small piece of fabric that has been sitting on a shelf. It has already relaxed. In bulk production, the cutting master unrolls a 60-yard bolt and spreads it 50 layers high on the cutting table. The fabric is under tension from the spreading machine. The cutter cuts the stack. The top layer is cut slightly larger than the bottom layer because of the compression.
Here is a real case from last June. A client in Vancouver received 400 units of viscose challis blouses. The sample measured 38 inches at the chest. The bulk production measured 37 inches. A full inch difference. We investigated immediately. The cutting room had spread the viscose with a standard tension setting for cotton shirting. Viscose is much more slippery and stretchy than cotton. It needed a lower tension setting on the spreading machine. The fabric was stretched during spreading and then shrank back after the panels were cut and relaxed overnight. We corrected the issue for the next run by reducing the spreading tension and adding a 24-hour “relaxation period” after cutting before sewing. The second batch was within 1/4 inch of spec.
Why Is Steam Ironing a Hidden Source of Size Variation?
Steam and heat change fabric dimensions. In the sample room, a single seamstress might press a collar with a heavy industrial press that applies 30 PSI of pressure and high heat. The fabric compresses. The collar measures exactly 16 inches.
On the production floor, 20 different workers are pressing. They use hand irons. Some press harder. Some press lighter. Some use more steam. Some use less. A heavy press flattens the seam allowance and “gains” you 1/8 inch of width. A light press leaves the seam allowance raised and “loses” you that 1/8 inch. Across a 40-inch chest measurement with multiple seams, this variation can accumulate to 1/2 inch.
We had a situation with a men’s poplin dress shirt order. The collar band was consistently 1/4 inch too short in bulk. The pattern was correct. The sewing was correct. The problem was the pressing stage. The sample maker had used a collar pressing jig that stretched the collar band slightly under heat. The production workers were not using the jig. They were pressing freehand. We created a simple wooden jig for the line and the collar measurement returned to spec within one day. This is why I tell clients to always ask: “Is the pressing method standardized for this style?”
How Should You Document Sizing Errors to Get Fast Action?
You sent an email. “The shirts are small.” The factory replies: “Please send photo.” You take a photo of the shirt on a hanger. They reply: “Cannot see measurement.” You take a photo of the tape measure. It is blurry. The angle is wrong. The metal end of the tape is not at the edge. They reply: “Please use correct method.” Three days have passed. You are angry. They are frustrated. Nothing is resolved. This is the most common communication breakdown in this industry. You are speaking different measurement languages.
Documenting sizing errors for rapid supplier resolution requires creating a “Measurement Evidence Package” that eliminates ambiguity. This package must include three specific files: (1) A video file (not just photos) showing the zero-point of the tape measure aligned with the garment edge and the measurement endpoint clearly visible, (2) A side-by-side flat lay photo of the bulk garment next to the approved pre-production sample with the tape measure placed identically on both, and (3) A spreadsheet listing five random measurements from the shipment against the spec tolerance. Video is non-negotiable because it proves the tape measure was not stretched or angled. Without this package, the supplier will legitimately claim “measurement error” because they receive dozens of false claims from buyers who measure incorrectly.
At Shanghai Fumao, we require our QC team to use this exact same method when they inspect outgoing goods. When a client sends us a video made the same way, we can resolve the issue in hours, not weeks.
What Is the Correct Way to Measure a Garment for a Dispute?
There is a right way and a wrong way to lay a tape measure. Most people do it wrong. They hold the tape in the air. They do not smooth the fabric flat. They pull the tape tight. All of these actions change the measurement.
Here is the protocol we teach our clients:
- Surface: Lay the garment on a hard, flat table. Not a bed. Not a carpet.
- Smoothing: Smooth the fabric with your hand. Do not stretch it. Just remove wrinkles.
- Zero Point: Place the metal end of the tape measure exactly at the seam intersection or edge fold. This is the “zero point.”
- Tension: Let the tape measure lie flat. Do not pull it tight. Do not let it sag.
- Angle: Hold your phone camera directly above the tape measure. Not at an angle. Parallax error will make the measurement look wrong.
Last fall, a client sent us a photo showing a knit polo shirt chest was 1.5 inches small. We asked for a video using this protocol. The video revealed she was measuring from the underarm seam straight across. The spec required measuring 1 inch down from the underarm seam. That one inch difference in placement accounted for the entire 1.5 inch “error.” The shirts were actually correct. This saved us both a costly return shipment. Precision in documentation protects you and protects the factory.
What Should a Measurement Discrepancy Spreadsheet Include?
Do not just write “Size M is small.” Create a simple table. This shows the factory you are organized and serious. It also allows them to identify if the error is consistent across sizes or specific to one size.
Here is the exact format we ask clients to use when reporting a potential claim:
| Size Ordered | Sample Measurement (Inches) | Bulk Garment 1 (Inches) | Bulk Garment 2 (Inches) | Bulk Garment 3 (Inches) | Spec Tolerance (+/-) | Deviation |
|---|---|---|---|---|---|---|
| Medium (Chest) | 20.0 | 19.0 | 19.25 | 18.75 | 0.5 | -1.0 Avg |
| Medium (Length) | 28.0 | 27.5 | 27.5 | 27.25 | 0.5 | -0.5 Avg |
| Large (Chest) | 22.0 | 21.0 | 21.0 | 20.75 | 0.5 | -1.0 Avg |
| Large (Length) | 29.0 | 28.5 | 28.5 | 28.25 | 0.5 | -0.5 Avg |
This table tells a story. It shows the error is consistent across sizes. It is likely a pattern or fabric shrinkage issue, not a random sewing error. This data allows our pattern room at Shanghai Fumao to pinpoint the correction in minutes. We can see that the chest is off by 1 inch but the length is off by 0.5 inches. That specific ratio points to a particular type of grade rule error.
What Are the Fastest Remediation Options for Incorrectly Sized Stock?
You have documented the error. The supplier has admitted fault. Now you have 800 units of unsellable inventory sitting in your warehouse or at the port. You need a solution that gets you product to sell now, not in six months. The factory offers to “take them back and fix them.” That sounds reasonable. But you must calculate the real cost of that option. Shipping back to China takes 4 weeks by sea. Rework takes 2 weeks. Shipping back to you takes 4 weeks. That is a 10-week delay. You will miss the entire selling season. Sometimes a perfect fix is worse than a good compromise.
The fastest remediation options for incorrectly sized stock involve prioritizing local solutions over international returns. The four practical pathways, ranked by speed to market, are: (1) Factory-funded Local Alteration: The supplier pays for a local tailor or rework facility in your country to adjust the garments, (2) Partial Credit for Discounted Sale: The supplier issues a credit memo for 30-50% of the invoice value, allowing you to sell the goods as “irregular” or “slim fit” at a discount, (3) Split Shipment Rework: You return only 20% of the worst pieces for factory rework and keep the rest for immediate sale with a discount, and (4) Full Return and Remake: This is the slowest option and should only be used if the size error is greater than two full size deviations (e.g., a Medium measures like an XS).
At Shanghai Fumao, our goal is to keep our clients’ cash flow moving. We have funded local alteration shops in Los Angeles and London to avoid the 10-week round trip.
When Does a Local Alteration Make More Sense Than a Factory Return?
If the error is less than one full size and the garment construction is simple, local alteration is almost always the better business decision.
Let me share a specific case from this past February. A client in Texas ordered 500 units of linen trousers with an elastic waistband. The bulk shipment arrived with the waist elastic 2 inches tighter than the approved sample. Technically, this was a 2-inch error on a 32-inch waist. It was a 6% deviation. The pants were still wearable, but they were uncomfortable. Returning them to China would have cost $1,800 in freight and 8 weeks of lost sales. The spring season would be over.
Instead, we located a contract sewing shop in Dallas that specializes in alterations. We sent the shop a diagram of the waistband construction. The fix was simple: open the casing, remove 4 inches of the old elastic, insert a new longer piece of elastic, and close the casing. The cost per unit was $3.50. For 500 units, the total cost was $1,750. We credited the client’s account for that full amount on their next order. The client had the goods back in their warehouse and ready for sale in six business days. They sold through the inventory at full price. This solution preserved the brand’s reputation and the factory relationship.
How Do You Negotiate a Fair Credit for Size Deviations?
If the error is in the body fabric (chest too tight, length too short) and cannot be altered without remaking the garment, a partial credit is the standard resolution. You are not getting what you ordered. But you still have a physical product you can sell for some revenue.
The negotiation should be based on your lost gross margin. Do not just demand 100% refund. That is unrealistic unless the goods are literal rags.
Here is a fair formula:
- Calculate the original planned retail price. Let’s say $60.
- Calculate the new achievable price with the size issue. You might have to sell it as “Slim Fit” or mark it down to $40.
- The difference is $20 per unit.
- Your factory cost was $15 per unit.
- Ask the supplier for a credit of 40-50% of their invoice value. In this case, $6-$7.50 per unit.
This covers your lost margin while allowing the factory to avoid the total loss of a return shipment. It is a business compromise. Last year, we had a cotton poplin dress that was 1.5 inches shorter than spec. The client had to sell it as a “Tunic” instead of a “Dress.” We issued a 35% credit on the invoice. The client still made a small profit on the goods. We kept the relationship intact. That client has since placed four more orders with us.
| Remediation Option | Speed to Market | Cost to Supplier | Best Use Case |
|---|---|---|---|
| Local Alteration | 3-7 Days | Low-Medium | Simple seam adjustments; elastic replacement; hem fixes. |
| Partial Credit Memo | Immediate | Medium | Non-structural sizing issues; can be sold as a different fit. |
| Split Shipment Rework | 4-6 Weeks | High | Mixed batch with some units correct and some severely wrong. |
| Full Return/Remake | 8-12 Weeks | Very High | Catastrophic failure; error exceeds 2 full size grades. |
How Can You Prevent Sizing Discrepancies on Your Next Production Run?
You survived the sizing crisis. You got a credit or the goods were fixed. Now you are nervous about placing the next order. You do not want to go through this stress again. The solution is not to find a new supplier every time. The solution is to change the pre-production process with your current supplier. Most buyers rely entirely on the Pre-Shipment Inspection. That is like checking the temperature of a steak after you have already served it to the guest. It is too late. The prevention happens in the kitchen, during cooking.
Preventing sizing discrepancies requires shifting quality control from “End-of-Line” to “Start-of-Line” and “In-Line” inspections. The three preventative actions that eliminate 90% of bulk sizing errors are: (1) Require a “Cut Panel Audit” where the cut fabric pieces are measured against the hard paper pattern before sewing begins, (2) Demand an “Inline Measurement Report” for the first five pieces off the production line with photos, and (3) Establish a binding “Tolerance Table” in the purchase order that specifies acceptable variance per measurement point (e.g., Chest +/- 0.5 inch, Sleeve Length +/- 0.25 inch). These steps force the factory to catch drift in the first hour of production, not the last day of packing.
At Shanghai Fumao, we now offer these reports as a standard part of our men’s and women’s wear production service for brands that have experienced sizing issues before.
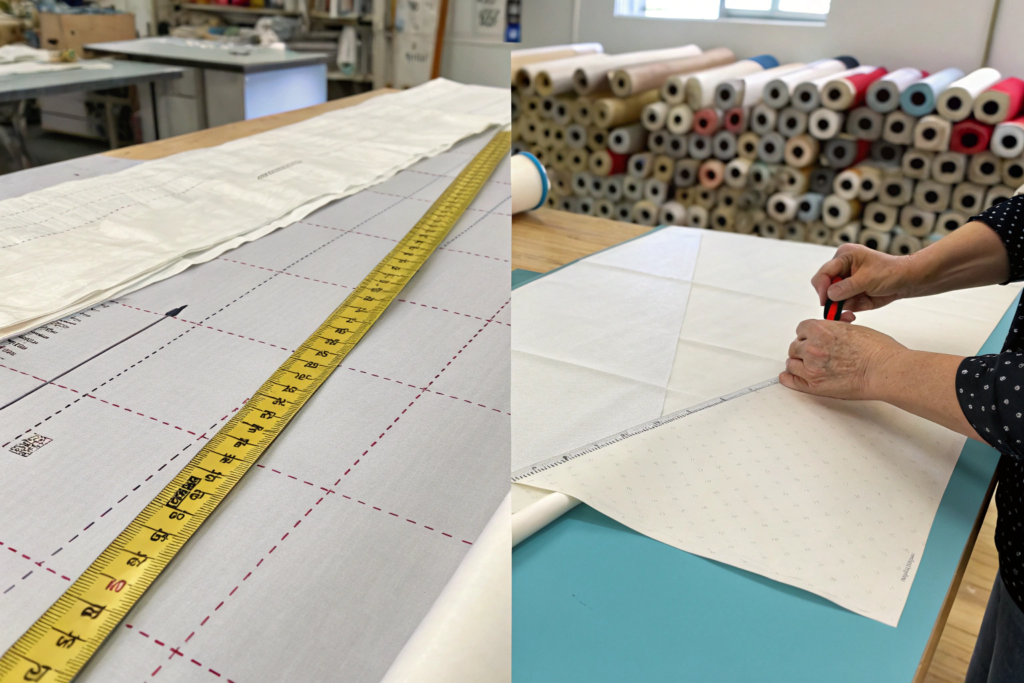
What Is a Cut Panel Audit and Why Does It Prevent Errors?
This is the single most effective tool that most buyers never request. A cut panel audit happens 48 hours after the fabric is cut but before it is distributed to the sewing line.
The QC team takes a random bundle of cut pieces for each size. They lay the cut fabric panel flat on a table. They lay the original hard paper pattern on top of it. They trace the perimeter. If the fabric is 1/4 inch smaller than the paper at the edges, they know the cutting room spread the fabric too tight or the fabric has already begun relaxing inward.
Here is a real example from last July. We were cutting a rayon challis midi skirt for a client in Miami. Rayon is notorious for relaxation shrinkage. During the cut panel audit, we found the size Large front panel was 3/8 inch narrower than the pattern at the hem. That 3/8 inch at the hem translates to a 3/4 inch loss in total sweep circumference. We caught it before a single seam was sewn. We re-cut those panels from a new lay with lower spreading tension. The alternative would have been 600 skirts with a tight hem that did not drape correctly. The audit took 45 minutes. It saved the order.
How Do You Establish a Binding Tolerance Table?
Most purchase orders say “Standard tolerance applies.” This phrase is legally meaningless. “Standard” means different things to different factories.
You must define tolerance in the PO and in the Tech Pack. Do not use percentages. Use absolute measurements in inches or centimeters.
Here is a sample tolerance table we recommend clients insert into their contract:
| Measurement Point | Sample Size Medium (Inches) | Acceptable Range (Inches) | Tolerance (+/-) |
|---|---|---|---|
| Chest (1″ below armhole) | 20.0 | 19.5 – 20.5 | 0.5 |
| Body Length (HPS) | 28.0 | 27.5 – 28.5 | 0.5 |
| Sleeve Length (CB) | 34.0 | 33.75 – 34.25 | 0.25 |
| Shoulder Width | 15.0 | 14.75 – 15.25 | 0.25 |
| Armhole Depth (Curve) | 9.5 | 9.25 – 9.75 | 0.25 |
| Collar Circumference | 16.0 | 15.875 – 16.125 | 0.125 |
Notice the tighter tolerance on collar and sleeve length. These are “fit-critical” points. A 0.5 inch error on a collar makes the shirt unwearable with a tie. A 0.5 inch error on the chest is usually acceptable. By defining this upfront, you eliminate the post-production argument. The tape measure is the judge.
Conclusion
Sizing discrepancies with a garment supplier feel like a betrayal. You trusted them with your design and your money. When the measurements are wrong, that trust shatters. But as we have walked through today, the fastest path to resolution is not emotional escalation. It is clinical documentation and pragmatic compromise.
You learned that fabric relaxation and steam pressure can steal inches from your garment without anyone touching the pattern. You learned that a video showing the tape measure zero-point is worth more than twenty angry emails. You learned that funding a local tailor in Dallas is faster and cheaper than shipping a container back to Shanghai. And most importantly, you learned that preventing this problem starts with a cut panel audit and a binding tolerance table in your next purchase order.
At Shanghai Fumao, we have built our quality management system around the reality that fabric moves and operators get tired. We do not pretend these things do not happen. We build processes to catch them. We offer our clients the transparency of inline measurements. We do not hide behind “standard tolerance” as an excuse for poor fit. When a problem occurs, we pick up the video call and look at the tape measure together.
If you are tired of fighting sizing battles with suppliers who deflect and delay, we operate differently. We believe that a well-fitted garment is the foundation of a successful apparel brand. We measure before we sew. We measure while we sew. And we measure before we pack.
If you are ready to partner with a factory that treats fit as seriously as you do, I encourage you to reach out to our team. We can discuss implementing a cut panel audit and inline measurement protocol for your next production run. Let’s make sure your next shipment measures exactly the way your customer expects it to.
You can contact our Business Director, Elaine, directly. She can walk you through our quality assurance process and provide a sample tolerance table template for your specific garment category.
Email: elaine@fumaoclothing.com