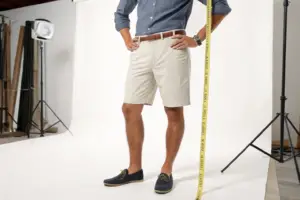
You have a sample. You try it on. Something is wrong. The shoulders are too wide. The waist is too tight. You know it doesn't fit. But how do you tell the factory? You write: "The shoulders are off." The factory receives your note. They are confused. What does "off" mean? Too wide? Too narrow? By how much? They guess. They make changes. You receive the next sample. It is still wrong. This cycle repeats. Weeks pass. Your launch date slips. I have seen this happen countless times. The problem is not the factory. The problem is the fit notes.
Based on our experience fitting thousands of garments, clear fit notes are the bridge between design and production. They must be specific, measurable, and visual. For example, last year we worked with a brand from San Francisco. Their fit notes were vague. They said things like "the jacket is too boxy." We worked with them to develop a fit note system. They learned to say: "At the waist, take in 1 inch total. At the hips, add 0.5 inches total." They started using photos with arrows. The next sample was perfect. The brand saved 3 weeks of fit rounds. That is the power of clear fit notes.
So, how do you communicate fit notes to your clothing manufacturer? Let me break it down. I will give you a format. I will show you the language to use. I will explain how to use visuals. And I will share common fit issues and how to describe them.
What Is the Right Format for Fit Notes?
The format of your fit notes matters. I remember a client from New York. They sent fit notes in long paragraphs. The pattern maker had to read through pages of text to find the changes. Important details were missed.
The best format for fit notes is structured and visual. Use a template with a garment sketch. Mark the location on the sketch. Write the issue and the amount of change. Use bullet points. For the New York client, we created a fit note template. It had a front and back sketch. The client marked the sketch with numbers. They wrote the corresponding notes in a table. The pattern maker could see exactly what to change. For woven shirts, the template includes key measurement points: chest, waist, shoulder, sleeve length, and body length. For knits, it includes stretch measurements. For outerwear, it includes armhole depth and back width.
The template should also include the sample round number, the date, and the fit model's measurements. This creates a record for future seasons.

What Should a Fit Note Template Include?
A good fit note template should include:
- Style name and number
- Sample round number (e.g., "Fit Sample Round 2")
- Fit model measurements (height, chest, waist, hip)
- Front and back garment sketch
- Space for notes with location, issue, and amount
- Space for overall comments
- Approver signature and date
For a denim client, the template also includes rise, thigh, and leg opening measurements.
How Do You Organize Fit Notes for Multiple Changes?
Organize changes by location. Group all changes related to the upper body together. Group all changes related to the lower body together. Use a numbered list. For a women's dress client, the fit notes were:
- Shoulders: Reduce shoulder width by 0.5 inches.
- Bust: Lower bust dart by 0.5 inches.
- Waist: Take in waist by 0.75 inches total.
- Hem: Shorten length by 1 inch.
The pattern maker worked down the list. Nothing was missed.
What Language Should You Use in Fit Notes?
Language matters. I remember a client from Chicago. They used words like "floaty," "drapy," and "tight-ish." The pattern maker had no idea what these meant. The changes were wrong.
Fit notes should use standard, measurable language. Use action verbs: reduce, increase, raise, lower, shorten, lengthen, take in, let out. Always include the amount in inches or centimeters. For the Chicago client, we created a fit note dictionary. "Floaty" was replaced with "add 0.5 inches to hem circumference." "Tight-ish" was replaced with "at the waist, let out 0.5 inches total." For woven shirts, we use precise measurements. "At the center back, from the collar seam to the hem, reduce length by 0.5 inches." For knits, we account for stretch. "At the chest, reduce by 0.5 inches total. The knit will stretch to fit."
We also use standard location names. Center front, center back, side seam, shoulder seam, armhole, bust point, waist seam, hip line, hem.

What Action Verbs Should You Use?
Use these action verbs:
- Reduce: make smaller
- Increase: make larger
- Raise: move up
- Lower: move down
- Shorten: make shorter
- Lengthen: make longer
- Take in: make narrower (at a seam)
- Let out: make wider (at a seam)
- Add: add volume (e.g., ease)
- Remove: remove volume
For a sportswear client, a fit note might be: "At the armhole, lower by 0.25 inches." This is clear and actionable.
How Do You Specify the Amount of Change?
Always specify the amount. Use fractions of inches. "Reduce by 0.5 inches" is clear. "Take in a little" is not. For a denim client, we use eighths of inches for precision. "At the inseam, reduce by 0.375 inches." The pattern maker can execute exactly.
How Do You Use Visuals to Communicate Fit Notes?
Words alone are not enough. I remember a client from Boston. They wrote a detailed fit note. But the pattern maker misunderstood the location. The change was made in the wrong place.
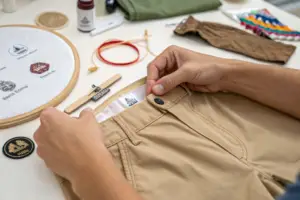
Visuals are essential. Use pins, tape, or markers on the physical sample. Take photos. Add arrows and notes to the photos. For the Boston client, we now require photos with every fit note. The client pins the sample where changes are needed. They take a photo. They add an arrow and a note. The pattern maker sees exactly where the issue is. For complex garments, we use video calls. The client sees the sample on the fit model. They point to the issue. The pattern maker sees it live.

How Do You Mark a Sample for Photos?
Use colored pins or tape. Red pins indicate areas to reduce or take in. Blue pins indicate areas to increase or let out. Green pins indicate areas that are correct. For a women's blouse client, they used red pins at the waist to indicate "take in." They used blue pins at the bust to indicate "let out." The photos were clear.
What Digital Tools Help with Visual Fit Notes?
We use shared platforms like Asana, Trello, or specialized fit note software. The client uploads photos. They add arrows and notes. The pattern maker can zoom in and see details. For a sportswear client, we use a shared folder. Each fit round has its own subfolder. Photos are labeled with the issue. The pattern maker reviews them before making changes.
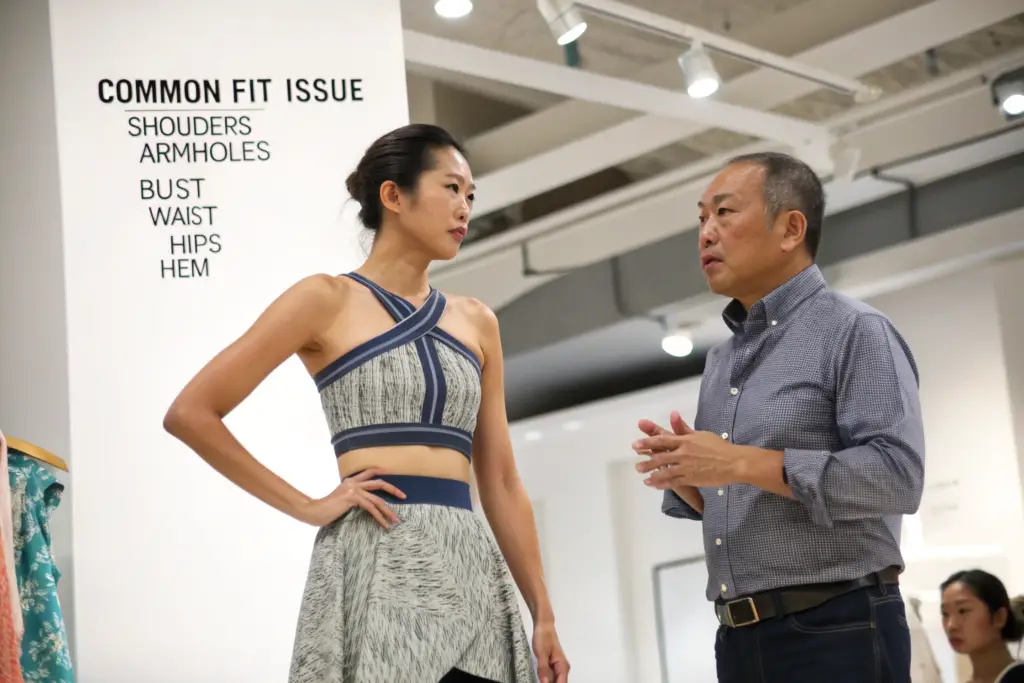
What Are the Most Common Fit Issues and How Do You Describe Them?
Certain fit issues appear again and again. Knowing how to describe them saves time. I remember a client from Seattle. They kept having issues with armholes. They did not know how to describe it. Each fit round produced a different result.
Common fit issues have standard descriptions. For shoulders too wide: "At the shoulder seam, reduce by 0.5 inches from the neck point to the armhole." For armholes too tight: "Lower the armhole by 0.25 inches." For waist too loose: "At the waist, take in 0.5 inches total at the side seams." For the Seattle client, we created a fit issue checklist. They learned the standard descriptions. For denim, common issues include: "The rise is too short. Add 0.5 inches to the front rise." "The thigh is too tight. Add 0.25 inches to the inner thigh." For outerwear, common issues include: "The armhole is too high. Lower by 0.5 inches to allow layering."
We also document fit issues by garment type. A t-shirt fit issue is different from a jacket fit issue.
How Do You Describe Shoulder and Armhole Fit Issues?
Shoulder issues:
- "Shoulder seam too wide. Reduce by 0.5 inches from neck to armhole."
- "Shoulder seam too narrow. Add 0.5 inches from neck to armhole."
- "Shoulder seam sloping. Raise the shoulder point by 0.25 inches."
Armhole issues: - "Armhole too tight. Lower by 0.25 inches."
- "Armhole too loose. Raise by 0.25 inches."
- "Armhole binding when raising arm. Add 0.5 inches to sleeve cap height."
For a tailored jacket client, the fit note was: "At the shoulder seam, reduce by 0.5 inches. This will bring the shoulder point inward."
How Do You Describe Waist and Hip Fit Issues?
Waist issues:
- "Waist too tight. Let out 0.5 inches total at side seams."
- "Waist too loose. Take in 0.5 inches total at side seams."
- "Waist sits too high. Lower waist seam by 0.5 inches."
Hip issues: - "Hips too tight. Add 0.75 inches total at side seams."
- "Hips too loose. Reduce 0.5 inches total at side seams."
- "Hip curve not smooth. Add 0.25 inches to hip curve at side seam."
For a women's trouser client, the fit note was: "At the hip line, 7 inches below the waist, add 0.5 inches total at side seams. This will reduce pulling across the front."
Conclusion
Communicating fit notes clearly is essential for fast, accurate sample development. Use a structured format with a template. Use standard, measurable language with action verbs and amounts. Use visuals like pins and photos to show exactly where changes are needed. Learn the standard descriptions for common fit issues.
At Shanghai Fumao, we have developed a fit note system over 20 years. We provide templates. We train our clients on fit note language. We use digital tools to share photos and notes. We make sure that what you mean is what we make.
Let us help you with your next fit sample. Contact our Business Director, Elaine, directly at elaine@fumaoclothing.com. Ask about our fit note template. We will show you how to communicate fit clearly.