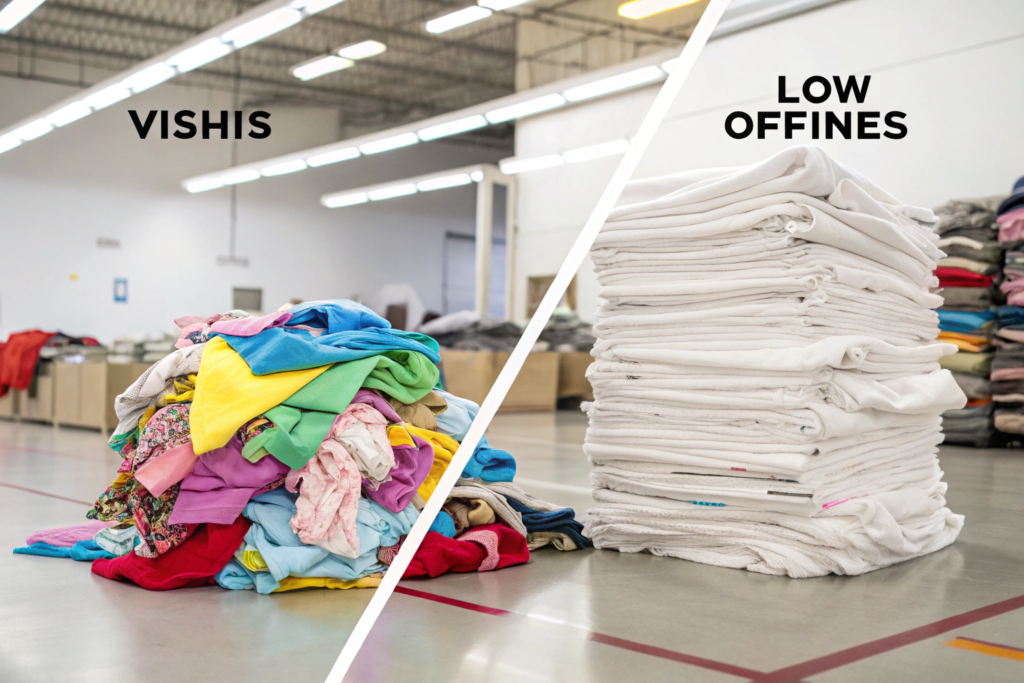
You get the final invoice from the factory. You look at the line item for "Fabric Consumption." Your heart sinks. You budgeted for 1.8 yards per jacket. The factory says it took 2.2 yards. That is a 22% overage. On a 1,000-unit order with $8 fabric, that is $3,200 in unexpected cost. And that is just the money. That extra 400 yards of fabric is also 400 yards of waste—cut off scraps, edge trim, and panel gaps—heading to the landfill or the incinerator. You feel like you are burning cash and hurting the planet at the same time.
Ensuring maximum fabric yield requires a multi-step technical approach that starts long before the cutting knife touches the fabric. It involves optimizing the marker layout using CAD software, selecting the correct fabric width for the specific garment pattern, engineering the pattern pieces themselves to have compatible seam allowances, and implementing strict cut ticket tracking to hold the cutting room accountable for efficiency targets.
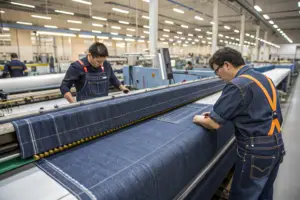
I run Shanghai Fumao. I see the cutting room floor every day. I know where the inches disappear. I know how a lazy marker maker can cost you 8% on a simple t-shirt. You do not need to be a pattern maker to fix this. You just need to know the right questions to ask and the right standards to demand. Let's walk through the process of squeezing every inch out of that roll of fabric.
What Is Fabric Yield and Why Does a 5% Difference Devastate Your Margins?
You might think fabric yield is just a technical term for the factory's efficiency. You focus on the Cost of Make (CM) and the fabric price per yard. But the yield—the percentage of fabric that actually ends up in the garment—is the silent multiplier. A small change in yield has a huge impact because fabric is often 50-70% of your total garment cost.
Fabric yield is the ratio of the net weight or area of the cut garment pieces to the gross weight or area of the fabric used. A 5% difference in yield does not just add 5% to the fabric cost. It adds 5% to the cost of the most expensive component. For a garment with a $10 fabric cost, a 5% yield loss is $0.50 per unit. Over 10,000 units, that is $5,000 in pure lost profit. In an industry with single-digit net margins, this is the difference between a winning season and a losing one.
How Do Marker Makers Actually Calculate "Efficiency Percentage"?
When you see a number like "85% Efficiency" on a cutting report, what does that actually mean?
Imagine a perfect rectangle of fabric. That is your total area. Now, lay out your pattern pieces on that rectangle. They are odd shapes—curved armholes, tapered legs. They cannot fill 100% of the rectangle. There will always be gaps.
Efficiency Percentage = (Area of Pattern Pieces / Total Area of Fabric Used) x 100
Here is the practical reality based on garment type and marker length:
| Garment Type | Fabric Width | Typical Marker Efficiency | Why? |
|---|---|---|---|
| Basic T-Shirt | 72" Tubular | 82-88% | Simple shapes, can nest sleeves in body gaps. |
| 5-Pocket Jean | 60" Open Width | 78-84% | Curved yokes and pockets create awkward gaps. |
| Tailored Jacket | 60" Open Width | 70-78% | Complex pieces, must match stripes/plaids (adds 5-10% waste). |
| Circle Skirt | 60" Open Width | 55-65% | The circle is the most wasteful shape to cut from a rectangle. |
Now, let's talk about the Marker Maker. This is the person (or software) who arranges the pieces. A skilled marker maker can find an extra 3-5% efficiency just by how they arrange the pieces.
We had a client who made men's woven boxer shorts. They were using a generic marker from their previous factory. When we brought the pattern into our system, our CAD specialist noticed the fly pieces were placed at a 90-degree angle to the grain line for "ease of cutting." By rotating them 2 degrees to align with the waistband curve, we saved 1.2 inches of fabric per layer. With 100 layers in a spread, that is 120 inches (over 3 yards) saved per spread. The client was shocked. They had been paying for that waste for two years.
The lesson: Do not just accept the first marker efficiency number. Ask to see a Marker Plot (a printed map of the layout). Look for large blank spaces. Those are dollar bills being thrown in the trash.
What Happens When You Choose the Wrong Fabric Width for Your Pattern?
This is a technical detail that separates amateur buyers from professional ones. You find a great price on a 58-inch wide fabric. Your pattern was made for 60-inch wide fabric. "It's only 2 inches," you think. "Close enough."
It is not close enough.
If your marker is built for 60 inches, and you use 58 inches, the pieces that were designed to sit right at the edge (the Selvage) no longer fit. They get pushed inward. The entire layout collapses. Pieces that were nested together nicely now overlap. The marker maker has to pull pieces out and place them on a new layer.
That 2-inch difference in width can drop your efficiency from 85% to 75%. That is a 10% increase in fabric consumption.
I saw this happen with a client who found a "deal" on deadstock fabric. They saved $0.50 per yard on the fabric price. But because the width was 58" instead of 60", their consumption went from 1.5 yards to 1.7 yards per unit. They saved $0.75 on the yard price but spent an extra $1.60 on total yardage. They lost money on the "deal."
Rule of Thumb: Always confirm the actual usable width of the fabric. The usable width is the total width minus the selvage (the woven edge that is usually discarded). For knits, the usable width is the tube width times two. You must provide this exact width to the pattern maker before they make the marker. If the factory buys a different width, the marker must be re-engineered.
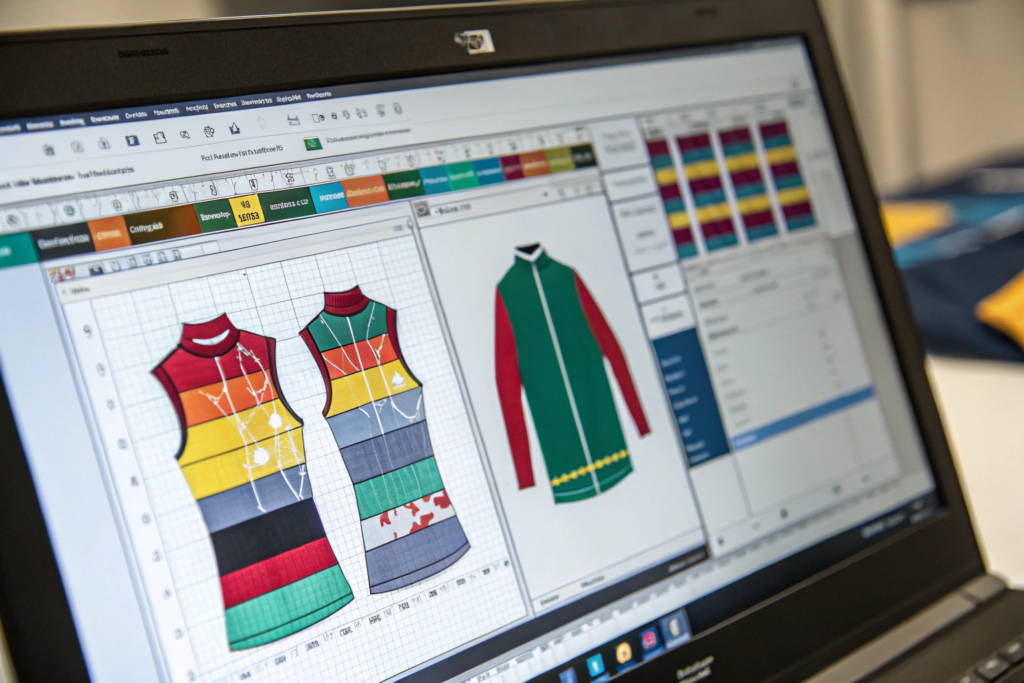
How Can CAD Pattern Nesting Software Slash Your Consumption by 8%?
You might think factories still use paper patterns and scissors. Some do. But any factory serious about saving you money uses CAD (Computer-Aided Design) software for marker making. The difference between a manual marker and a computer-optimized one is night and day. The computer can try millions of combinations in seconds. A human cannot.
CAD pattern nesting software slashes fabric consumption by 5-8% on average by using algorithms to find the tightest possible fit between irregular shapes. It can perform "micro-rotation" of pieces (tilting them by 1-2 degrees) without affecting the grain line integrity, and it can generate "multi-size" markers that mix Small, Medium, and Large pieces together to fill gaps that would otherwise be wasted space.
Why Does "Micro-Rotation" Save Fabric Without Ruining the Drape?
This is a common fear. "If you rotate my sleeve pattern to save fabric, won't the sleeve twist on the arm?"
The answer is: It depends on the Grain Line. The grain line is the direction of the warp yarns. For most woven garments, the center front and center back must be perfectly parallel to the selvage. That is non-negotiable. If you rotate the body panel, the shirt will hang crooked.
But what about Facings, Pocket Bags, and Waistbands? These internal pieces do not affect the external drape. A pocket bag inside a pair of chinos can be cut at a 5-degree angle to the grain with zero impact on the look or feel of the pant. The CAD software identifies these "non-critical" pieces and rotates them slightly to fill in the awkward gaps left by the rigid body panels.
We used this technique for a client making a structured work jacket. The inside chest pocket facing was a rectangular piece. By rotating it 3 degrees, the software was able to slide it into a gap between the collar and the armhole curve. That single rotation saved 0.8 inches of fabric per jacket. On a 2,000-unit order of $12/yard canvas, that small rotation saved roughly $500.
Here is a simplified breakdown of how CAD improves on manual placement:
| Marker Type | Process | Efficiency Gain | Impact on Garment Quality |
|---|---|---|---|
| Manual (Paper) | Human traces pieces with chalk | Baseline | High (Human error in spacing) |
| Basic CAD | Computer places pieces at 0/90 deg | +3-5% | None (Respects grain line) |
| Advanced CAD Nesting | Algorithm with micro-rotation | +5-8% | None on interior pieces; Minimal on others |
| Automatic Multi-Size Nesting | Mixes S, M, L in one marker | +2-4% (on top of above) | None (Efficient for low-quantity orders) |
The key is to ensure the factory is using Licensed, Updated CAD Software. Older software or pirated versions lack the advanced nesting algorithms. At Shanghai Fumao, we invest in the latest version of Optitex and Gerber software specifically because the algorithmic improvements year-over-year pay for themselves in fabric savings for our clients.
How Do "Splice Marks" in the Marker Allow for Fabric Defect Bypass?
Fabric is not perfect. It has holes, stains, or thick yarns. These are called Defects. In a cheap factory, the cutter just cuts right through the defect. That defect ends up in the finished garment. The brand gets a return. Everyone loses.
In a quality factory, the cutter has to stop the machine, cut around the defect, and then restart the layer. If the marker is not designed for this, you lose a lot of fabric.
Splice Marks are pre-planned "break points" in the CAD marker. The marker maker designates a specific line across the width of the fabric where the cutting can be interrupted and restarted with minimal waste.
For example, imagine a marker that is 10 yards long. Without splice marks, if there is a defect in yard 3, the cutter might have to discard a 2-yard section across the entire width to avoid the spot.
With a splice mark at yard 2.5, the cutter can cut up to the splice mark. Stop. Pull out the defective 12 inches of fabric. Then overlap the next section and continue. This Splice Loss is minimized.
We tracked this data for a denim client. Denim has a high rate of loom defects. By using a CAD marker with 4 strategic splice marks instead of 1, we reduced their "end loss" (fabric thrown away at the end of the roll) by 1.2%. Over a year of production, that 1.2% saved them over $8,000 in fabric cost. That is pure profit that would have been in the trash bin.
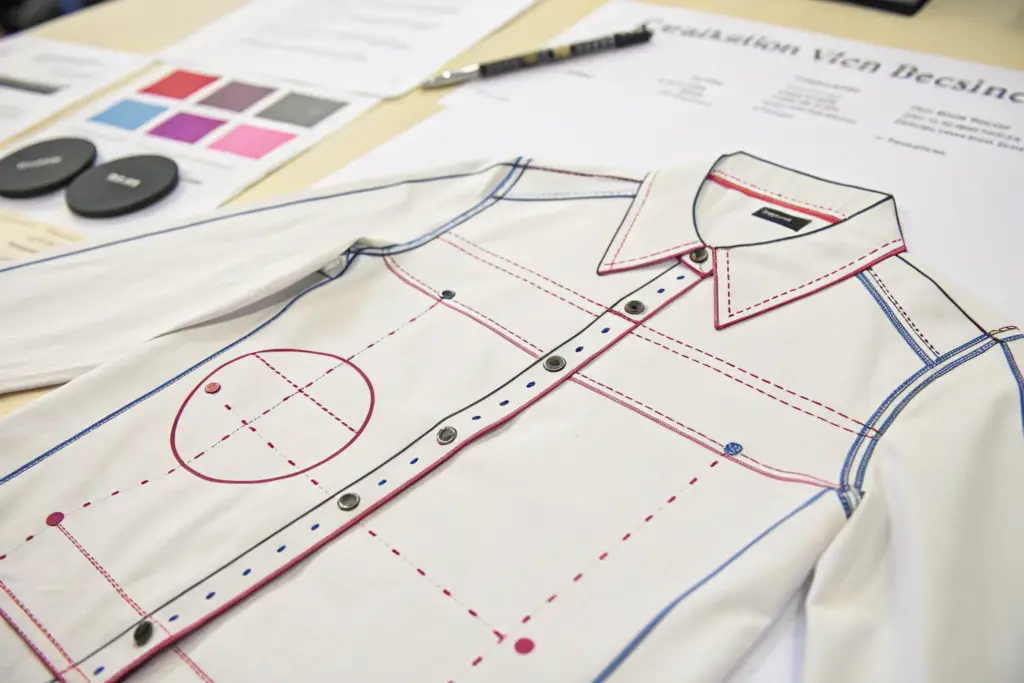
What Are the Best Pattern Engineering Tricks for Zero-Waste Cutting?
Sometimes the problem is not the marker layout. The problem is the Shape of the Pieces. Fashion designers love curves, dramatic flares, and asymmetrical hems. These are beautiful. They are also fabric hogs. You do not have to sacrifice design to save fabric. You just need to make small, invisible adjustments to the pattern engineering.
Pattern engineering tricks for zero-waste cutting focus on altering seam lines and internal shapes without changing the visible fit or style. The most effective techniques include "squaring off" the underarm curve of a sleeve by 1-2 degrees, converting a curved shirt hem to a straight hem with a side slit, and designing self-fabric waistbands that utilize the "negative space" between leg panels on a pant marker.
Can You "Square the Curve" of an Underarm Without Affecting Fit?
Yes. And this is one of the most common ways we save fabric on cut-and-sew knits and wovens.
Look at the underarm curve of a standard set-in sleeve. It is a deep "U" shape. This is for mobility. But the very bottom of that "U" is often stitched at 1/2" seam allowance and trimmed. The exact shape of the bottom 1/2 inch of that curve does not affect how the arm moves. The arm moves at the pivot point higher up near the armpit.
By slightly flattening or "squaring off" just the bottom 1/2 inch of the underarm curve on both the bodice and the sleeve, you change the geometry of the piece. It becomes easier to nest. The two pieces fit together like puzzle pieces with less wasted space in the crotch of the curve.
We did this for a women's blouse program. The designer had a beautiful, deep scoop underarm. We asked to adjust the Grade Rule (the mathematical formula for how the pattern grows). We kept the upper armhole curve identical. We straightened the lowest 0.75 inches of the curve. The change was invisible. Even the designer could not tell the difference on the sewn sample. But in the marker, the fabric consumption dropped from 1.45 yards to 1.39 yards. That is 0.06 yards per blouse. Over 5,000 units of $4 silk charmeuse, that was $1,200 in savings just from looking at a curve.
Why Do Self-Fabric Pocket Bags and Waistbands Reduce Landfill Waste?
This is a favorite trick of sustainable denim brands, but it works for chinos and shorts too.
Traditionally, pocket bags are made from cheap poly-cotton Pocketing Fabric. It is thin and cheap. Waistband interlining is made from stiff Fusible Interfacing.
These are separate materials. They require separate inventory. They create cutting waste in their own right.
But look at your pant marker. What is in the gap between the leg panels? That space is usually a long, tapering wedge of fabric that is too narrow for a full pant leg but too big to just throw away. It is called Negative Space.
By engineering a Self-Fabric Pocket Bag, you take that wedge and you cut your pocket bags out of it. Now, you do not have to buy the separate pocketing fabric. You have used up the "waste" space in the marker. You have increased the overall yield.
We implemented this for a Los Angeles brand making premium twill shorts. We changed from separate poly pocketing to Self-Fabric Pocket Bags cut from the space between the crotch curves. The fabric consumption for the main body stayed the same (because we were using waste space), but we eliminated the cost of the pocketing fabric entirely. The savings was about $0.35 per pair. More importantly, the product was now 100% cotton and fully recyclable. It was a sustainability win that also saved money.
Here is a quick guide to which waste spaces can be re-purposed:
| Waste Space Location | Best Use | Savings Type |
|---|---|---|
| Crotch Wedge (Pants) | Pocket Bags, Fly Shield | Eliminates pocketing fabric cost |
| Sleeve Crown Wedge | Collar Stand Interlining | Eliminates fusible scrap |
| Neckline Cutout | Hanger Loops, Small Labels | Zero cost trim |
| Hem Cutoff (T-Shirt) | Binding for neckline (if tubular) | Reduces rib trim cost |
These techniques require a factory that thinks like an engineer, not just a sewer. You need a partner who looks at the marker and asks, "What can we make from this empty space?"
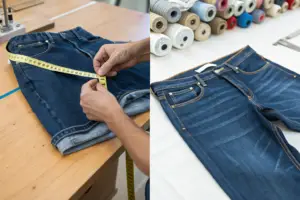
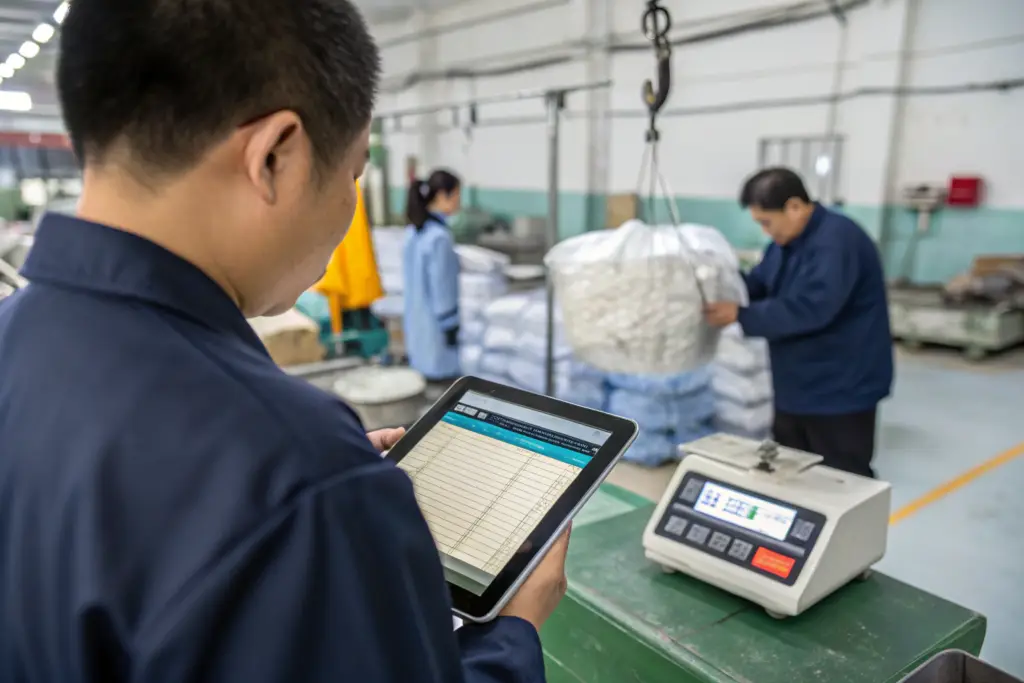
How Do You Audit Your Factory's Cutting Room for "Hidden" Yield Loss?
You have the perfect marker. The CAD says 85% efficiency. The fabric arrives. The cutting is done. But the final consumption report comes back at 82%. Where did the 3% go? It went into the "hidden losses" of the cutting room. If you do not audit for these, you are paying for fabric that is not in the box and not in the garment.
Auditing for hidden yield loss requires tracking three specific metrics beyond the CAD marker: End Loss (fabric wasted at the start and finish of each roll), Splicing Loss (overlap waste when bypassing defects), and Spreading Tension Loss (fabric that relaxes and shrinks in width after cutting). You should demand a "Cut Ticket Variance Report" that compares the actual fabric issued to the cutting table against the theoretical fabric required by the marker.
What Is "End Loss" and How Much Should You Tolerate?
When a roll of fabric arrives at the cutting table, the ends are usually crumpled, dirty, or have stickers on them. The cutter cuts off the first 2-4 inches to get a clean edge. This is End Loss.
But lazy cutters cut off more. A foot here. A foot there. It adds up.
Standard Tolerance for End Loss:
- Knits: 2-3 inches per end (due to edge curl).
- Wovens: 1-2 inches per end.
If you have a 50-yard roll, that is 1,800 inches. A 3-inch cut is 0.16%. That is acceptable.
If the cutter cuts off 12 inches because "the end was crooked," that is 0.66% waste.
The only way to know is to check the Roll Trash Weight. We instruct our QC team to weigh the bag of end cuts from each spread. If the weight is higher than expected, we investigate. I recall a situation where we found a cutter was cutting off 18 inches from every roll because it made it easier to clamp onto the spreading machine. He was saving 30 seconds of setup time. He was costing the brand $0.80 per roll in fabric. Over a year, that was thousands of dollars.
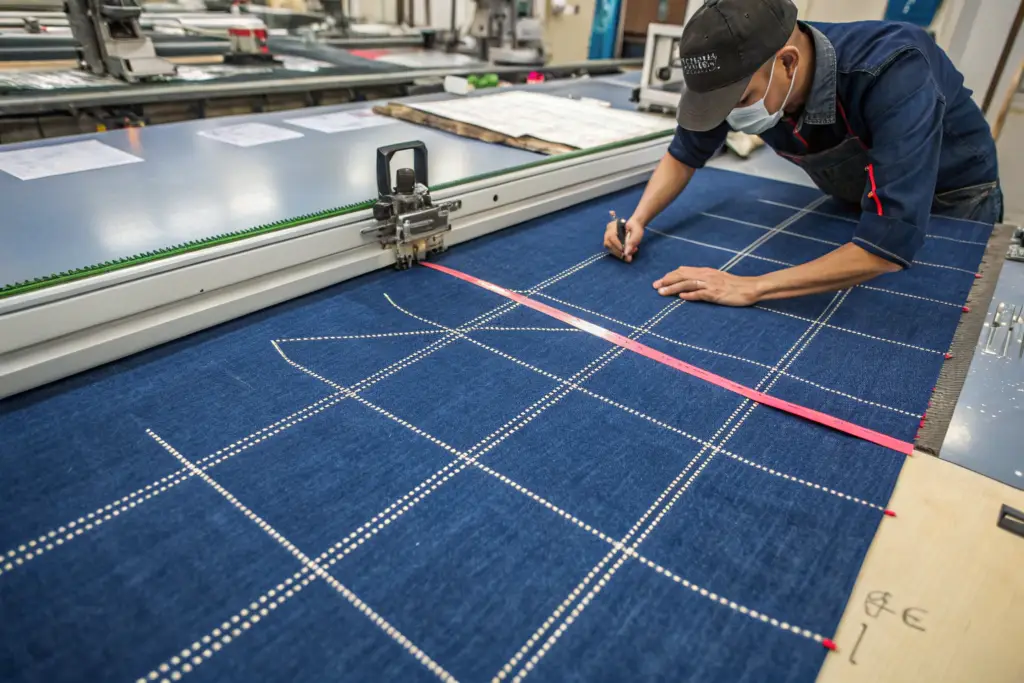
How Can You Verify the Factory Is Using the Correct Marker Length?
This is the oldest trick in the book. The factory tells you the marker length is 6.5 yards. But when they spread the fabric, they stretch it. They pull the knit fabric tight to make it narrower so they can fit more layers on the table. Or they just cut the spread 2 inches longer than the marker to be "safe."
You pay for the length of fabric spread, not the length of the marker.
The Audit: Demand a photo of the End of Ply (EOP) sticker or chalk mark. This mark shows where the spread ends. Measure the distance from the start of the cut to the EOP. Compare it to the Marker Length.
Spreading Tension is a bigger issue with stretchy fabrics like rib knit or jersey. If the fabric is stretched tight when cut, the pieces shrink when they relax. A sleeve cut at 24 inches long might relax to 23.5 inches. That is a fit issue and a yield issue. The factory used less fabric on the table than the marker required, but you still paid for the marker length.
The Fix: Require Relaxation Time. Fabric must be unrolled and allowed to rest for 12-24 hours before cutting. This allows the internal tension to release. The cut pieces will be dimensionally stable. This is a non-negotiable step for quality basics. At Shanghai Fumao, we have a dedicated "Fabric Resting Area" with controlled humidity. It costs us space, but it saves our clients from shrinkage returns.
Conclusion
Maximizing fabric yield is one of the highest-leverage activities you can focus on in garment production. You started this article feeling the sting of that overage invoice and the guilt of the waste. Now you have a technical roadmap to prevent it.
We broke down the math of efficiency percentage and saw how a simple thing like choosing the wrong fabric width can cost you 10% in hidden consumption. We looked inside the computer at CAD nesting software, understanding how micro-rotation and splice marks can legally steal back 5-8% of the fabric that used to go in the trash. We put on our pattern engineering hats and learned how to square a curve and repurpose the negative space for pocket bags, turning waste into a feature.
Most importantly, we talked about how to hold the cutting room accountable. You now know the specific questions to ask: "What was the end loss? Show me the marker plot. Let me see the splice points." These are not annoying questions. These are the questions of a professional buyer who understands that in this business, the inches are where the money hides.
You do not have to be a designer or a pattern maker to demand efficiency. You just need a factory partner who is transparent and who treats your fabric like it is their own.
If you are tired of mystery overages and want a partner who will show you the marker and explain exactly where every inch of fabric is going, let's talk. We can audit your current styles and likely find a way to reduce your consumption.
Reach out to our Business Director, Elaine. She can coordinate a marker review for your existing products or help you engineer new ones for maximum yield. Email her at elaine@fumaoclothing.com. Let's stop burning money and start saving fabric with Shanghai Fumao.