In the summer of 2024, a brand owner from Denver called me in a state of frustration that I recognized immediately. She had just received her production shipment of 2,800 linen-blend shirts. The shirts were beautifully sewn. The fabric matched the approved swatch. The measurements were within tolerance. But the buttons were attached with a cross-stitch pattern instead of the parallel stitch she had specified in a single comment buried in an email thread six months earlier. The cross-stitch was visible. The brand's customer-facing photos showed a parallel stitch. The retail buyer noticed the discrepancy during a spot check and issued a chargeback for "product not as specified." The cost of the chargeback was $4,200. The cost of the email specifying the stitch pattern was zero, but the cost of that specification not being in the tech pack was everything. The tech pack is the single source of truth in garment production. When a detail lives only in an email, a WeChat message, or a verbal conversation, it does not exist in the production process. It will be missed.
The most overlooked details in a garment tech pack that cause production issues are seam construction specifications, stitch density requirements, label and hangtag placement diagrams with precise measurements from reference points, interlining and fusible specifications with product codes, and quality tolerance thresholds for each measurement point. These five categories share a common characteristic: they are technical details that a designer often considers implicit or "standard," but that have no universal standard in global manufacturing. A "standard hem" in a New York design studio means one thing. A "standard hem" on a factory floor in Shanghai can mean something completely different unless the tech pack specifies it explicitly.
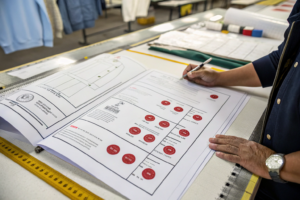
At Shanghai Fumao, I have built a tech pack review process that catches these overlooked details before production begins. My production team reviews every incoming tech pack against a 40-point checklist. The checklist was not built from theory. It was built from every production error we have encountered over two decades of manufacturing. Each item on the checklist corresponds to a mistake that happened once, cost someone money, and was prevented from happening again by adding a mandatory field to our tech pack requirements. Let me walk through the most critical overlooked categories and how to specify them correctly.
Why Do Seam Construction and Stitch Types Need Explicit Specification?
A seam is not just a seam. It is a specific construction method that affects the garment's durability, appearance, comfort, and cost. A designer who writes "sew side seam" on a tech pack has not specified a seam. They have stated a location. The factory will fill the gap with its default seam construction, which may be an overlocked seam, a safety stitch, a French seam, or a plain seam with raw edges, depending on the factory's equipment, the fabric type, and the production manager's judgment. That judgment may not match the brand's expectation.
Seam construction must be specified with both a visual diagram and a written callout that references an industry-standard seam type code, such as those defined in ISO 4915. The callout should specify the seam class, the stitch type using the ISO 4915 stitch classification, the number of needle threads, the stitch density in stitches per inch or stitches per 2.5 centimeters, and the seam allowance width. A callout that reads "Side Seam: Superimposed Seam, 301 Lockstitch, 12 SPI, 1cm SA" is unambiguous. A callout that reads "sew side seam" is an invitation for the factory to guess.
The most common seam-related production error I encounter is a mismatch between the fabric type and the seam finish. A brand specifies a plain seam on a lightweight woven fabric that frays easily. The factory sews the plain seam as specified. The garment is washed, and the seam allowance frays to the stitch line. The seam fails. The brand blames the factory for poor workmanship. The factory followed the specification. The error was in the specification, not the execution. A French seam or a bound seam would have been appropriate for the fabric, but the tech pack did not specify it. Here is how to use industry-standard codes and how stitch density requirements affect fabric behavior.
How to Use ISO Seam and Stitch Codes to Eliminate Ambiguity?
The ISO 4915 standard classifies every possible seam construction into a numerical code system. A superimposed seam is class 1. A lapped seam is class 2. A bound seam is class 3. A flat seam is class 4. Each class has sub-types that specify the number of fabric plies, the folding configuration, and the stitching pattern. The ISO 4915 stitch type classification defines every stitch type, a 301 lockstitch, a 504 overedge stitch, a 516 safety stitch, a 406 coverstitch, with a corresponding diagram.
A tech pack that uses these codes eliminates ambiguity across language barriers. "Seam Type: 1.01.01" means a simple superimposed seam with one row of stitching. This code means the same thing to a pattern maker in Shanghai, a sewing operator in Ho Chi Minh City, and a quality inspector in Los Angeles. The codes are a universal technical language. I recommend every brand include an ISO seam code reference table in their tech pack template and require their designers to specify the seam code for every construction seam. The investment in learning the codes is small. The reduction in production errors is substantial.
Why Does Stitch Density Need to Be Specified for Every Fabric Type?
Stitch density, the number of stitches per inch or per 2.5 centimeters, directly affects seam strength, seam elasticity, and seam appearance. A stitch density that is appropriate for a heavy denim, 8 to 10 stitches per inch, will pucker a lightweight silk, which requires 12 to 15 stitches per inch. A stitch density that is appropriate for a woven fabric will cause a knit fabric to seam grin, where the seam opens under tension because the stitch density is insufficient to hold the knit loops.
The factory's default stitch density is typically 10 to 12 stitches per inch, which is a reasonable all-purpose setting. But "reasonable all-purpose" is not correct for every fabric. A tech pack that does not specify stitch density is delegating this decision to the sewing operator, who will use the machine's current setting. I recommend brands specify a target stitch density and a tolerance range for every seam on every fabric type. The specification should account for the fabric weight, the fabric construction, woven or knit, and the seam function, structural versus decorative. A structural seam on a heavyweight denim jacket requires a different specification than a decorative topstitch on a lightweight blouse. The tech pack must differentiate.
What Interlining and Fusible Specifications Do Brands Routinely Forget?
Interlining is the invisible skeleton of a garment. It determines the shape of a collar, the roll of a lapel, the crispness of a cuff, and the stability of a button placket. It is hidden between the face fabric and the lining, invisible to the consumer but felt in every interaction with the garment. A tech pack that specifies the face fabric, the lining fabric, and the trim, but does not specify the interlining, has left the garment's internal structure to chance.
The interlining specification must include the product code or brand name of the specific interlining material, the fiber composition, the weight in grams per square meter, the fusing conditions including temperature, pressure, and dwell time, and the component to which it is applied, collar, cuff, placket, front facing, hem. A specification that reads "use fusible interlining" is insufficient. The factory's default interlining may be too heavy, too light, too stiff, or incompatible with the face fabric's heat sensitivity. A collar that was designed to have a soft, relaxed roll will arrive with a stiff, boardy interlining because the tech pack did not specify the difference.
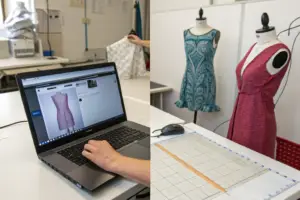
I keep a library of approved interlining samples in our development office. When a brand partner submits a tech pack without an interlining specification, I cut samples of three interlining options from our library, fuse them to the face fabric, and send photographs of the resulting collar roll, cuff stiffness, and placket drape. The brand selects the option that matches their design intent. The selected interlining product code is then locked into the tech pack for all future production. This process adds one day to the development timeline and prevents a production error that would affect every unit in the order. Here is how interlining choice affects garment aesthetics and how fusible and non-fusible options differ.
How Does Interlining Weight Affect Collar Roll and Cuff Stiffness?
The weight and stiffness of the interlining determine how a collar rolls. A lightweight, soft interlining, a 30 GSM woven fusible, produces a collar with a gentle, natural roll, appropriate for a casual shirt or a relaxed blazer. A heavyweight, stiff interlining, an 80 GSM non-woven fusible, produces a collar that stands rigidly upright, appropriate for a formal dress shirt or a structured jacket. The difference is immediately visible and tactile. A consumer who buys a shirt expecting a soft collar and receives a stiff collar will return the shirt.
The same principle applies to cuffs, plackets, and waistbands. The interlining weight must be specified for each component, not just a global "medium weight fusible" for the entire garment. A shirt might require a medium-weight interlining in the collar for structure, a lightweight interlining in the cuff for flexibility, and no interlining in the back yoke for drape. These differentiated specifications are what separate a well-engineered garment from a generic one. The tech pack must specify them component by component.
What Is the Difference Between Fusible and Sew-In Interlining in Production?
Fusible interlining is bonded to the face fabric using heat and pressure. It is fast to apply, consistent in production, and is the standard for most volume apparel. Sew-in interlining is stitched to the face fabric at the seam allowances and floats freely between the seams. It produces a softer, more natural drape and is used in high-end tailored garments and in fabrics that are sensitive to heat, such as certain synthetics or delicate silks.
The production implications are significant. Fusible interlining requires a fusing press, specific temperature and pressure settings, and a dwell time that must be calibrated for the specific fabric and interlining combination. If the temperature is too low, the interlining will delaminate after washing. If the temperature is too high, the face fabric will scorch, shrink, or develop a surface shine. The tech pack must specify the fusing conditions or reference the interlining manufacturer's recommended settings. Sew-in interlining requires additional sewing operations, which increase the labor cost and the production time. The tech pack must specify which interlining type is required for each component so the factory can plan the production process and quote the cost accurately.
How Should Label and Hangtag Placement Be Diagrammed to Avoid Errors?
Label placement is the most deceptively simple detail in a tech pack. It seems obvious. The main label goes at the center back neck. The care label goes in the side seam. The hangtag goes through the main label. How could this go wrong? It goes wrong constantly. The main label is sewn 2 centimeters lower than specified, and it peeks out above the back neckline on smaller sizes. The care label is sewn into the left side seam instead of the right, and the consumer cannot find it. The hangtag is attached with a plastic swift tack that leaves a hole in a delicate silk garment. These errors are small individually, but they generate customer returns, retail chargebacks, and brand perception damage that is disproportionate to their size.
Every label and hangtag placement must be specified with a diagram that shows the exact location using measurements from fixed reference points, typically the center back neck seam for the main label, the side seam hem for the care label, and the main label location for the hangtag. The diagram must specify the distance from the reference point to the top edge of the label, the label orientation, folded or flat, and the attachment method, sewn on four sides, sewn at top edge only, looped through a slit, attached with a specific swift tack type. A written description without a diagram is insufficient. A diagram without precise measurements is insufficient. Both are required.
At Shanghai Fumao, I maintain a label placement verification station at the end of every finishing line. The inspector checks the label placement on every garment against the diagram in the tech pack using a transparent ruler. A deviation of more than 0.5 centimeters is flagged for correction. This single quality gate has eliminated label placement errors from our production. Here is how to specify main label positioning across a size range and what the consequences of care label placement errors actually cost.
How to Specify Main Label Positioning Across a Full Size Run?
A main label centered at the back neck on a size Small may not be centered on a size 3XL if the neck width changes across the size range. The label placement must account for the size grade. The specification should be "center label horizontally on back neck, position top edge of label 1.5 cm below neck seam at center back, all sizes." The horizontal centering is relative to the neck width at each size, not a fixed distance from a side seam, which would shift as the neck width changes.
If the label is looped through a slit in the neck binding rather than sewn flat, the slit position must be specified, the slit length, and the slit finishing method, bar-tacked ends to prevent tearing. A slit that is too long will allow the label to slide. A slit that is not reinforced will tear during wear. The diagram must show the slit position relative to the neck seam, the slit length, and the bartack specification. These are not minor details. They are the difference between a label that stays in place for the life of the garment and a label that twists, slides, or tears.
What Are the Consequences of Incorrect Care Label Placement?
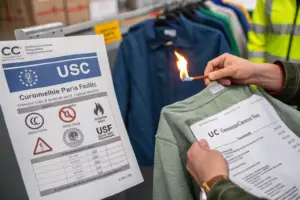
The care label is a legal requirement, not a design choice. In the US, the FTC requires that care labels be permanently attached and easily accessible to the consumer. In the EU, the textile labeling regulation requires care information to be available in the official language of the member state. A care label that is sewn into a seam such that it is difficult to find, or that is printed on a hangtag that the consumer discards, is a legal violation.
The practical consequence of a care label sewn into a scratchy seam location is a consumer who cuts the label out. The consumer can no longer read the care instructions. The garment is washed incorrectly. The fabric shrinks, the color bleeds, or the finish degrades. The consumer blames the brand, not their own missing care label. The return is processed. The review is written. The care label placement, specified correctly in the tech pack, could have prevented the entire chain of events. I recommend brands specify the care label placement in the left side seam, 3 to 5 centimeters above the hem, with the printed side facing outward so it can be read without turning the garment inside out. This placement is comfortable for the consumer, accessible for reading, and compliant with US and EU regulations.
Why Must Quality Tolerance Thresholds Be Defined for Each Measurement Point?
A measurement specification without a tolerance is a demand for perfection. Perfection is not achievable in cut-and-sew manufacturing. Fabric stretches during cutting. It relaxes during sewing. It shrinks during pressing. A chest measurement specified as "55 cm" will be 54.8 cm on some units and 55.2 cm on others. The brand that does not specify a tolerance is implicitly demanding zero deviation, which the factory cannot achieve. The result is either unnecessary rework on units that are within a commercially reasonable range, or a dispute at final inspection when the brand rejects units that the factory considers within a normal production variance.
Every measurement point on the spec sheet must include a target measurement and a plus/minus tolerance, expressed in the unit of measurement used on the spec sheet, typically centimeters or inches. The tolerance should be differentiated by measurement point. Critical measurements that affect fit, chest, waist, hip, body length, sleeve length, typically have a tighter tolerance of plus or minus 0.5 cm to 1 cm. Less critical measurements, pocket placement, hem width, label position, have a wider tolerance of plus or minus 0.5 cm to 1.5 cm. The tolerance range should reflect the garment's price point and the customer's expectations. A luxury garment demands tighter tolerances than a mass-market garment.
The most common tolerance-related production dispute I encounter is the "cumulative tolerance" problem. A garment has five horizontal measurements across the body, each with a tolerance of plus or minus 0.5 cm. The factory produces a unit where three of the five measurements are at the upper tolerance limit. The garment fits a full size larger than the target, even though every individual measurement is within tolerance. This happens because the tolerances were specified individually but not as a system. I recommend brands include a note in the tolerance section: "Cumulative deviation across primary circumferential measurements shall not exceed 1.5 cm total." This single sentence prevents the most common tolerance dispute in garment production. Here is how to differentiate tolerances and how to structure a practical measurement table.
How to Differentiate Tolerances for Structural Versus Cosmetic Measurements?
A structural measurement is one that affects the fit of the garment on the body. Chest, waist, hip, shoulder width, sleeve length, body length. A deviation in a structural measurement changes the size of the garment relative to the size label. A Medium that measures as a Small is a mislabeled product, which is a major defect.
A cosmetic measurement is one that affects the appearance of a design detail but not the fit. Pocket placement, embroidery position, stripe matching at a side seam, label position. A deviation in a cosmetic measurement may be visually noticeable but does not change the wearability of the garment. The tolerance for structural measurements should be tight, typically plus or minus 0.5 cm to 1 cm for critical fit points. The tolerance for cosmetic measurements can be slightly wider, typically plus or minus 0.5 cm to 1.5 cm, depending on the visibility of the detail. The tech pack must distinguish between these two categories, either by color-coding the measurement chart or by listing structural and cosmetic measurements in separate tables with separate tolerance columns.
What Measurement Points Are Most Frequently Missing from Spec Sheets?
The most frequently missing measurement points are the ones that are not on the standard size chart but are essential for fit consistency. The across shoulder measurement on a set-in sleeve garment. The bicep circumference on a sleeve. The thigh circumference on a pant. The leg opening on a tapered trouser. The front rise and back rise on any bottom. The neck width on any top with a collar. The hood height and hood width on any hooded garment. The pocket bag depth on any garment with pockets. The placket width on any button-front shirt.
These measurements are not on the standard graded size chart because they do not change proportionally with the size grade in the same way as chest, waist, and hip. They must be specified individually for each size, based on the pattern maker's design intent and the brand's fit preference. A tech pack that omits these measurements is leaving the fit of these critical areas to the pattern maker's discretion. That discretion may produce a garment that fits the brand's customer, or it may not. The only way to ensure consistency is to specify the measurements and the tolerances explicitly.
Conclusion
A garment tech pack is not a formality. It is the legal and operational contract between the brand and the factory. Every detail that is not specified in the tech pack will be filled in by the factory's default practices. Those defaults may be reasonable, but they are not the brand's design. The accumulated weight of unspecified details, the seam construction that was "standard," the interlining that was "medium weight," the label that was placed "in the usual spot," is what separates a garment that matches the designer's vision from a garment that is merely a physical approximation of it.
At Shanghai Fumao, I invest time in tech pack review because I have learned that the cost of catching a specification gap before production is measured in minutes. The cost of catching it after production is measured in chargebacks, returns, and lost reorders. My production team reviews every incoming tech pack against a checklist that has been hardened by two decades of production experience. We send a pre-production query document back to the brand with every gap we find. The document is not a criticism of the tech pack. It is the final quality check on the production blueprint.
If you are developing a collection and you want a manufacturing partner who will review your tech packs with the same rigor you expect from your own team, let us discuss your development process. We can share our tech pack checklist, walk through your current specifications, and identify the gaps before they become production problems. Reach out to our Business Director, Elaine, at elaine@fumaoclothing.com. A tech pack that specifies every detail is a tech pack that produces exactly the garment you designed.