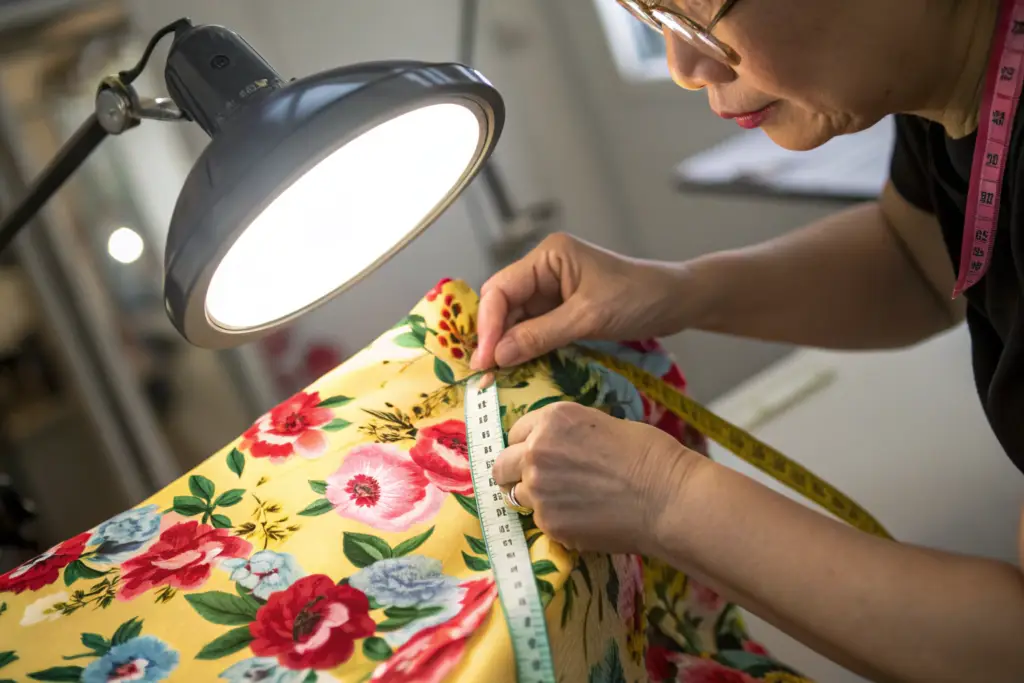
A boutique owner from Charleston called me two years ago. She had sourced 500 A-line floral dresses from a low-cost supplier. The sample was gorgeous. The fabric was a beautiful rayon crepe with a vintage rose print. The price was incredible. Six weeks after the dresses hit her shop floor, the returns started. A customer brought a dress back. The shoulder seam had split open when she reached for a glass. Another customer returned a dress where the hem had completely unraveled in the wash. The stitches were there, but they were weak, uneven, and too close to the edge of the fabric. The sample had hidden the truth. The bulk production had exposed it. She spent $3,000 on local repairs and lost a dozen customers who never came back.
Premium stitching is defined by four measurable factors: stitches per inch, seam allowance depth, stitch tension balance, and seam finish type. On an A-line floral dress, the side seams, shoulder seams, and hem should have at least 10 to 12 stitches per inch for lightweight fabrics, a clean 3/8 to 1/2 inch seam allowance, perfectly balanced tension with no puckering, and a finished edge that prevents fraying. Stitching is not just about holding the dress together. It is about how the dress moves, how it survives washing, and how it looks on a customer’s body.
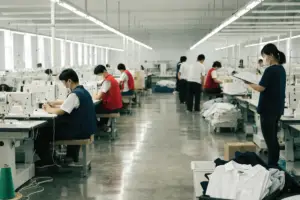
I have inspected stitching on hundreds of thousands of dresses. I know which seam will fail after five washes. I know which hem will twist after one dry clean. I want to show you exactly what to look for, what to measure, and how to tell the difference between a dress that is sewn to a price and a dress that is sewn to a standard.
What Is the Correct Stitch Density for a Lightweight Floral Dress?
Stitch density is the heartbeat of a seam. It determines how much thread is holding the fabric together. Too few stitches, and the seam is a dotted line waiting to tear. Too many stitches, and the needle has perforated the fabric into a tear-off strip. The right density balances strength with fabric integrity. On a lightweight floral dress fabric, like rayon, viscose, or cotton lawn, the stitch count is critical because the fabric itself is delicate.
The industry standard for premium stitching on a lightweight woven floral dress is 10 to 12 stitches per inch. Below 8 stitches per inch, the seam is weak and prone to grinning, where the threads are visible between stitches under tension. Above 14 stitches per inch, the needle can damage the fabric, causing seam puckering or weakening the fibers along the stitch line. The stitch length for a premium dress should be approximately 2.5mm.
A low SPI is often the first sign of a factory cutting corners to sew faster. Fewer stitches mean the sewing machine moves faster. It saves labor time. It costs you durability. I check stitch density on every pre-production sample with a simple tool.
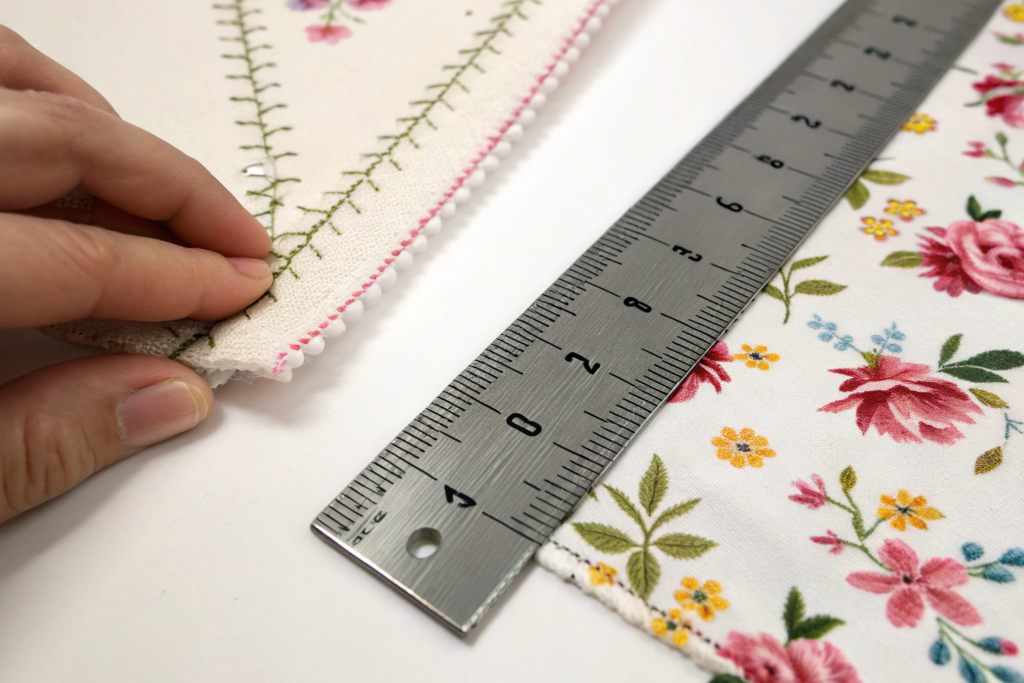
How Do You Measure Stitches Per Inch on a Finished Garment?
You do not need a lab coat. You need a standard ruler or a small sewing gauge. Lay the dress on a flat table. Find a section of a main structural seam, like the side seam or the shoulder seam. Place the ruler along the stitch line. Count the number of individual stitches in a one-inch segment. Use a needle or a pin to point at each stitch if the thread blends into the fabric. Count carefully. Do this in three different spots on the same seam. The count should be consistent.
If the count is 8 or 9, the dress is sewn to a budget standard. It will hold together, but it will not withstand repeated stress. If the count is 10 or 11, the dress meets the commercial premium standard. If the count is 12 or 13, the factory has invested extra time in durability. This is a sign of pride in workmanship.
A client in Nashville once sent me a competitor’s dress to benchmark. The side seam had 7 stitches per inch. I pulled the seam gently, and the threads grinned open like a zipper. The dress looked fine on the hanger. The seam would fail after a few wears. The SPI told the story before the customer ever put the dress on.
Why Does Stitch Tension Matter as Much as Stitch Density?
Stitch density is the number of stitches. Stitch tension is the balance of the top thread and the bobbin thread. If the tension is too tight, the seam puckers. The fabric bunches up along the stitch line like a gathered curtain. If the tension is too loose, the seam is weak. The threads loop on the surface or the underside. You can pull the seam apart with your fingers.
A perfectly tensioned seam lies flat. The top thread and the bobbin thread interlock in the exact middle of the fabric layers. The seam is smooth. You cannot feel the stitches when you run your finger along them.
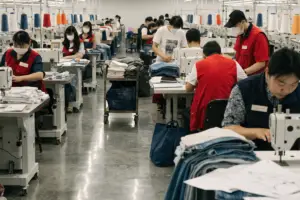
The pull test reveals tension. Hold the seam with both hands, one on each side of the stitch line. Pull gently but firmly. Does the seam hold? Do you see the threads appear between the fabric layers? This is called “seam grinning.” It means the tension was too loose, or the stitch density was too low. The seam will fail under stress. A well-tensioned seam does not grin. The fabric may eventually tear, but the threads hold. I train my QC team at Shanghai Fumao to do the pull test on 10% of every production batch. The seam must not grin. The fabric must not pucker. This is a pass/fail check.
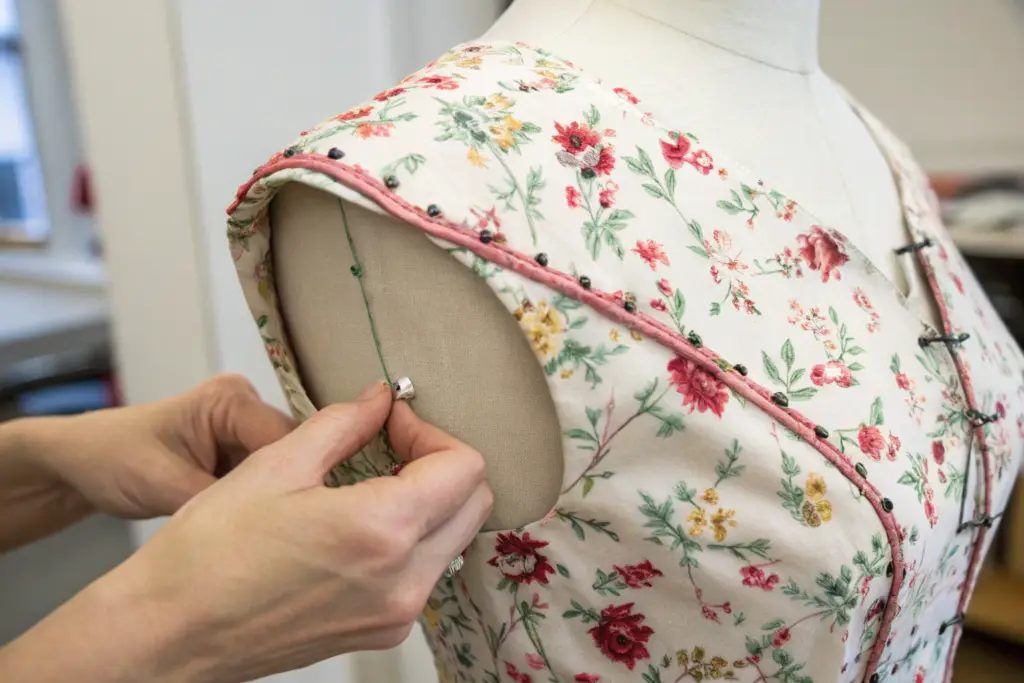
How Can You Evaluate Seam Allowances and Finishes on an A-Line Dress?
The outside of a dress tells a story. The inside of a dress tells the truth. Flip the dress inside out. The seams you see are the factory’s signature. A premium dress has clean, finished seams that look intentional. A cheap dress has raw, cut edges that are already starting to fray before the customer even tries it on. The seam finish is the biggest visible difference between a $40 dress and a $140 dress.
Premium seam finishes for a lightweight A-line floral dress include French seams, bound seams, or clean-finished serged seams. The seam allowance should be a consistent 3/8 to 1/2 inch. The finish must completely enclose the raw fabric edge so that no loose threads or fraying fibers are visible. A raw, overlocked edge with no additional finishing is a budget standard that will fray with repeated washing.
The interior is where factories hide their shortcuts. I always inspect the inside of a sample first.
What Is the Difference Between a French Seam and a Basic Serged Edge?
A French seam is the gold standard for lightweight, sheer, or delicate floral fabrics. It is a seam within a seam. The fabric is first sewn wrong sides together with a narrow seam. Then it is turned and sewn right sides together, encasing the raw edge completely inside a clean tunnel of fabric. The interior of the dress shows a neat, flat-felled line with no visible raw edges. Nothing can fray because nothing is exposed.
A basic serged edge, also called an overlocked edge, is a single pass of a serger machine. It trims the fabric edge and wraps it in a chain of threads. It is fast. It is strong. It is standard for knitwear and casual woven garments. But on a lightweight floral rayon or cotton lawn, a serged edge can feel scratchy against the skin. The thread can be bulky. The edge can still fray slightly over time if the serger blade was dull.
A bound seam is a strip of fabric, often a lightweight cotton, folded over the raw edge and stitched down. It looks like a clean ribbon hiding the cut edge. It is comfortable, durable, and visually luxurious.
At Shanghai Fumao, I recommend French seams for A-line floral dresses made from fine, lightweight fabrics. The cost is about 15% more in sewing time. The result is a dress interior that looks as beautiful as the exterior. A client in San Francisco switched her production to French seams last year. She photographed the inside of the dress on her product page. Her conversion rate increased by 8%. Customers trust a brand that shows the inside.
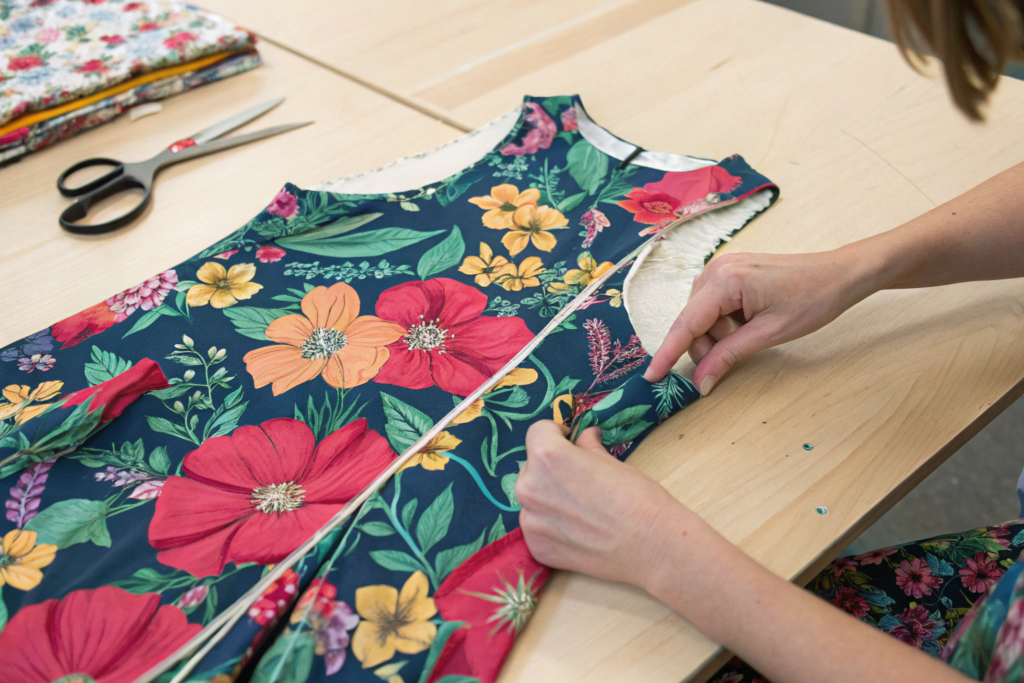
How Much Seam Allowance Is Necessary for Durability and Alterations?
The seam allowance is the strip of fabric between the stitch line and the raw edge. A standard seam allowance for woven garments is 3/8 inch, or 1 centimeter. This gives enough fabric for the seam to hold securely without adding bulk. A 1/2 inch allowance is even better. It allows for minor alterations. A customer can let out the side seams slightly if needed.
A budget seam allowance is 1/4 inch, or 6 millimeters. This is the minimum. It saves fabric. It also creates a weak seam. There is very little fabric for the threads to grip. If the seam is stressed, the threads can tear through the edge of the fabric. The seam fails. The dress is unrepairable because there is no extra fabric to work with.
I check seam allowance on every pre-production sample. I cut a small section of the seam, turn it inside out, and measure the distance from the stitch line to the cut edge with a ruler. It must be a full 1 centimeter. If it is less, the pattern is adjusted. A 3-millimeter shortage on a seam allowance seems small. Across 5,000 dresses, it saves the factory a few meters of fabric and creates a 5% return rate. The math is clear. Protect the seam allowance.
Why Does Hem Construction Reveal the True Quality of a Dress?
The hem is the last thing the factory sews. It is the first thing the customer sees when the dress hangs on a rack. A hem that waves, puckers, or twists tells the customer the dress was made in a hurry. A hem that hangs straight and invisible tells the customer the dress was made with care. The hem is also structurally critical. The A-line silhouette has a curved hem. A curved hem is more difficult to sew than a straight hem. The factory must ease the extra fullness of the curved edge smoothly into the hem allowance without creating tucks or waves.
The premium standard for an A-line floral dress hem is a blind-stitch machine hem, which is nearly invisible from the right side, or a clean double-fold topstitched hem with even spacing. The hem depth should be at least 1 inch for a lined dress and 1.5 to 2 inches for an unlined dress. The hem should hang parallel to the floor with no twisting, puckering, or visible stitch tension on the front of the fabric.
The hem is my final QC checkpoint before a dress is packed. It tells me the skill level of the sewer who finished the garment.

How Can You Spot a Poorly Executed Blind Hem?
A blind hem is sewn with a special machine that takes a tiny bite of the front fabric every third or fourth stitch. On the right side, the stitches should be almost invisible. Tiny, evenly spaced dots. You should not see a continuous line of thread. If you see a straight line of stitching running across the front of the hem, the machine was set up incorrectly. The hem is no longer blind. It looks cheap.
A wavy hem is another common defect. The fabric was stretched as it went through the blind hem machine. The hem now has a rippled, lettuce-edge effect. It does not hang straight. The dress looks deformed. This cannot be fixed without unpicking the entire hem and re-sewing it. It is a sign that the sewer was working too fast or the fabric was not properly handled.
The hem depth also matters. A shallow hem of half an inch lacks weight. The A-line skirt does not hang properly. It flips up in the wind. It looks flimsy. A deep hem of 1.5 inches gives the skirt weight and swing. It hangs beautifully. It also allows for alterations. A customer can take the hem down an inch if needed. A shallow hem cannot be altered.
I specify a 1.5-inch blind hem for all my unlined A-line floral dresses. A client in Atlanta told me her customers frequently ask about the hem because it hangs so perfectly. The hem is the silent detail that separates a good dress from a great one.
What Does a Topstitched Hem Reveal About Machine Setup?
Some A-line floral dresses use a visible topstitched hem as a design feature. A double row of straight stitching around the hemline. This is common on more casual styles or cotton dresses. The quality of the topstitching reveals the machine setup.
The stitching must be perfectly parallel to the hem edge. The distance from the edge, usually 1/4 inch, must be consistent all the way around the circle. The two rows of stitching must be evenly spaced. The stitching must not waver or wobble.
A wobbly topstitch line means the sewer was not guiding the fabric smoothly. The hem may have been pulled or pushed unevenly through the machine. The result looks amateurish. It catches the eye for the wrong reason. A perfectly parallel topstitch is a sign of a skilled operator with a well-maintained machine and a proper guide foot.
Check the inside of the hem. The raw edge inside the double-fold hem should be completely enclosed. No loose threads. No fraying. A clean hem interior is a mark of care.
What Are the Signs of High-Quality Seam Construction at Stress Points?
A dress is not a static object. It moves. The customer reaches for a shelf. She dances at a wedding. She pulls the dress over her head. These actions create concentrated stress at specific points on the garment. The armhole. The top of the zipper. The side seam pocket opening. A premium dress has reinforcement at these points. A budget dress does not. The difference is whether the dress survives a normal day of movement.
High-stress points on an A-line floral dress must have a bar-tack reinforcement, a back-tack stitch, or a properly secured seam end. A bar-tack is a dense, zigzag stitch about 1/8 inch wide and 1/2 inch long. It acts like a rivet. It locks the seam end and prevents the seam from tearing open under stress. A seam that simply ends with a loose thread tail is a failure point waiting to happen.
The first place I look on a dress sample is the underarm. The seam joining the bodice side seam, the sleeve, and the armhole curve is a complex intersection of three or four fabric layers. It is the most stressed point on any dress.
Where Are the Critical Bar-Tack Points on a Floral Dress?
There are four critical points. First, the armhole underarm, where the side seam meets the sleeve. Second, the top of the center back zipper. The zipper opening takes stress every time the dress is put on or taken off. Third, the pocket openings if the dress has side seam pockets. A hand pushing into a pocket stresses the seam ends. Fourth, the end of the waistline seam or any horizontal seam that carries the weight of the skirt.
At each of these points, a bar-tack should be visible. It is a small, dense rectangle of thread. It looks like a tiny column of zigzag stitches. It is not decorative. It is structural. If the dress has a lining, the bar-tack may be hidden between the shell and the lining. You may need to feel for it with your fingers.
A dress without bar-tacks at these points is not built to last. The seam will eventually tear. The customer will return the dress. A bar-tack costs a fraction of a cent in thread and two seconds of machine time. Its absence is a deliberate cost-cutting measure that sacrifices the garment’s lifespan.
How Do You Check That a Seam End Is Properly Secured?
Not every seam needs a bar-tack. But every seam needs a secured end. The standard method is a back-tack. The sewing machine stitches forward for a few stitches, then reverses and stitches backward over the same stitches, then goes forward again. This locks the thread so it cannot unravel.
Look at the end of any seam. The inside hem. The neckline facing. The waistband. You should see a slight buildup of thread where the machine reversed. If you see a loose thread tail, or if the seam unravels when you gently pick at it with your fingernail, the back-tack was missed. The entire seam is at risk of unraveling in the wash.
A simple fingernail test works. Find the end of a seam. Scrape your fingernail gently across the last stitch. If the thread moves or loosens, the seam is not locked. Over time, washing and wearing will unravel that seam like a loose thread on a sweater. The dress will develop holes at the seam ends. I train my QC inspectors to do the fingernail test on every seam end of every audited garment. A loose seam end is an automatic failure.
Conclusion
Premium stitching is not a marketing claim. It is a measurable, verifiable set of physical properties. Stitch density of 10 to 12 stitches per inch provides strength without damaging the fabric. Balanced thread tension creates a flat, smooth seam that does not pucker or grin. A seam allowance of a full centimeter provides durability and alterability. A French seam or a clean-finished edge elevates the interior to match the exterior. A blind hem, deep and straight, gives the A-line skirt its graceful swing. Bar-tacks at stress points ensure the dress survives a season of joyful movement. Every one of these details can be checked with a ruler, a fingernail, and an attentive eye.
When you hold a floral dress, turn it inside out. Measure the stitches. Pull the seams. Scrape the thread ends. Look at the hem. The quality is not in the brand name. It is in the construction. A well-stitched dress looks beautiful on the body and stays beautiful for years. A poorly stitched dress looks fine in a photo and falls apart in the closet.
If you are sourcing A-line floral dresses and you want a manufacturing partner who cares about these details, I invite you to inspect our work. Our Business Director, Elaine, can send you a pre-production sample of our current dress with the seams turned out so you can see every stitch. Email her at elaine@fumaoclothing.com. Ask for the stitching quality sample. Do the tests. Measure the SPI. Find the bar-tacks. Check the hem. I am confident the dress will pass your inspection. Because premium stitching is not something we claim. It is something we prove, one seam at a time.