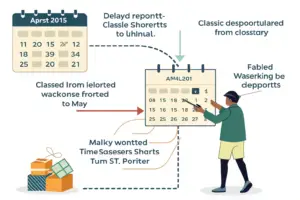
You have a vision for a custom short. You can see it perfectly in your mind. The fabric, the fit, the pocket detail, the label placement. You send an email to the factory. You describe the short in a few paragraphs. You attach a mood board image from Pinterest. You wait for the sample. It arrives. It is wrong. The fabric is too heavy. The rise is too low. The pocket is the wrong shape. You are frustrated. The factory is frustrated. You exchange a series of emails trying to explain the corrections. The second sample is also wrong. Time is slipping away. Your launch date is in danger. You wonder why the factory cannot just understand your vision. The problem is not the factory. The problem is the communication. Vision lives in your head. The factory only sees what you send them. If what you send is vague, the result will be wrong.
Communicating a custom shorts design to a factory efficiently requires a structured package of three elements: a written tech pack with measurements and material specifications, a visual reference that shows the silhouette and details, and a physical reference garment whenever possible. The tech pack is the legal specification. The visual reference is the aesthetic guide. The physical garment is the tactile proof. When these three elements are aligned and frozen before sampling begins, the factory can produce a first sample that is close to your vision. The sampling process becomes a refinement, not a guessing game. Efficient communication saves weeks of back-and-forth, thousands of dollars in sampling costs, and the frustration of a launch delayed by miscommunication.
At Shanghai Fumao, I have received design briefs from hundreds of brand owners. Some are crystal clear. The first sample lands within 10% of the final product. Some are vague. The sampling process drags on for months. The difference is always the quality of the communication package. This article is a practical guide to building that package. It covers the essential documents, the visual tools, the terminology to use, and the common mistakes to avoid. After reading it, you will be able to brief a factory like a professional and receive a sample that matches your vision.
What Documents Must You Prepare Before Contacting a Factory?
The most efficient communication happens before the first email is sent. A brand owner who contacts a factory with a complete document package gets a fast, accurate response. A brand owner who contacts a factory with a vague idea gets a slow, confused response. The document package is the foundation. It transforms your vision into a set of objective specifications that the factory can execute. It eliminates ambiguity. It provides a reference for dispute resolution. It shows the factory that you are a professional buyer who knows what they want.
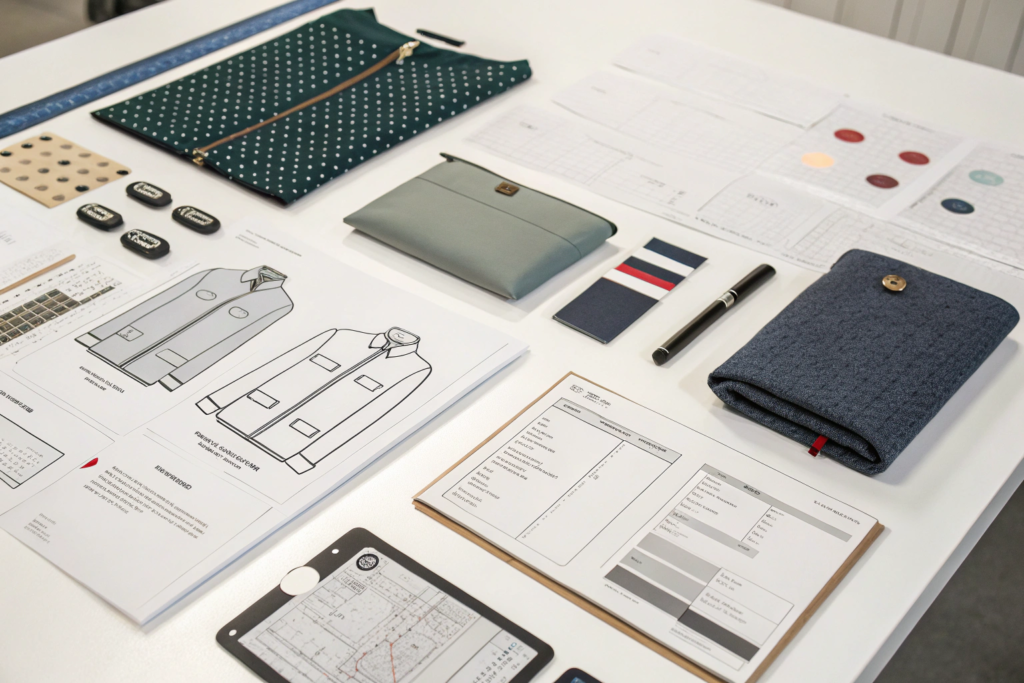
I receive inquiries every day. The ones that get priority are the ones with a clear tech pack attached. The ones that say "I want to make shorts, what is your price?" go to the bottom of the pile. The tech pack signals seriousness. It shows that the brand has done the design work. The factory can assess the complexity and provide an accurate quote. The garment tech pack preparation guide explains the essential components. A complete document package contains a tech pack, a bill of materials, artwork files, and a reference sample or image. Let's detail each document.
The tech pack is the central document. It is the contract between you and the factory. Everything else supports it. Let's examine what a production-ready tech pack must include.
What Is a Tech Pack, and Why Is It the Single Most Important Document?
A tech pack, short for technical package, is a document that contains every specification needed to produce a garment. It includes flat sketches of the front and back with all design details labeled. A measurement chart with all points of measure, graded sizes, and tolerances. A bill of materials listing every fabric, trim, and component with exact specifications. A colorway breakdown. Label and branding placement diagrams. Packing instructions. A tech pack is a complete blueprint for the short.
Without a tech pack, the factory is guessing. The factory's guess will not match your mental picture. With a tech pack, the factory has a clear target. The first sample will be based on the tech pack. If the tech pack is accurate, the sample will be close to correct. If the tech pack has errors, the sample will have errors. The how to create a tech pack for shorts guide provides a template. A tech pack does not need to be created by a professional designer. It can be a simple document with clear measurements and a clear sketch. The key is that it is complete and frozen before it is sent.
What Information Belongs on a Bill of Materials for Classic Shorts?
A bill of materials, or BOM, lists every physical component of the short. The shell fabric. The pocket lining fabric. The interlining or interfacing. The zipper. The button or closure. The thread. The labels, main label, care label, size label. The hang tag and tag string. The polybag. For each component, the BOM specifies the material, the size, the color, the supplier if known, and the placement.
For example, "Shell: 280 GSM 100% cotton twill, garment-dyed, color Pantone 15-1215 Sesame. Pocket lining: 120 GSM 100% cotton voile, natural. Zipper: YKK #5 metal zipper, antique brass, 15cm fly length. Button: 20L Corozo nut, natural, with custom laser engraving." The BOM ensures that every trim is ordered correctly. It prevents the factory from substituting a cheaper component. The bill of materials for garment production guide explains the format. A detailed BOM is the difference between a premium product and a generic one.
How Can You Use Visual References to Bridge the Language Gap?
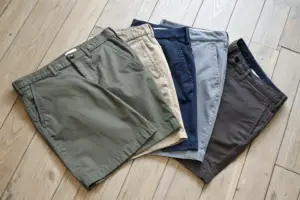
Language is a barrier. Even when both parties speak English, design terminology can be misunderstood. A "relaxed fit" to one person is a "baggy fit" to another. A "medium rise" has no universal definition. Visual references cut through the language barrier. A photograph of the desired silhouette, a sketch of the pocket detail, a close-up of the fabric texture. These images communicate instantly what words struggle to describe. The factory can see exactly what you mean.
I have received sketches drawn on napkins. They were better than a thousand words. The sketch showed the shape, the pocket placement, the length. It was rough, but it was clear. The factory pattern maker could interpret it and create a first pattern. The visual communication tools for fashion design guide emphasizes the importance of visuals. A combination of a flat sketch and reference photos is the most efficient way to communicate the aesthetic intent. Let's explore the most effective visual tools.
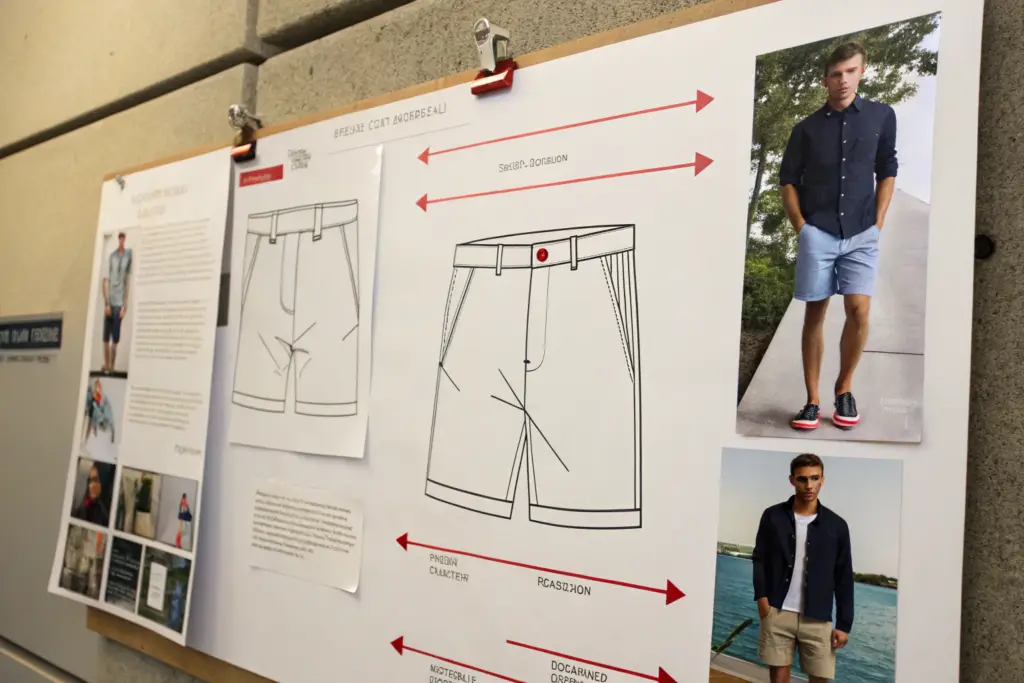
Why Is a Technical Flat Sketch Worth More Than a Mood Board?
A mood board is a collection of images that convey a feeling. A sunset, a vintage car, a piece of architecture. A mood board is useful for conveying the brand's aesthetic direction. It is not useful for conveying specific design details. A technical flat sketch is a line drawing of the garment laid flat, showing the front and back. All seams, pockets, pleats, and closures are drawn accurately. The flat sketch shows the factory exactly what to make.
A mood board says "this is the vibe." A flat sketch says "this is the pocket shape, this is the inseam length, this is the waistband width." The factory needs the flat sketch. The mood board is optional. The flat sketch is essential. The how to draw a technical flat sketch for apparel guide provides instructions. You can draw a flat sketch by hand, use Adobe Illustrator, or hire a freelance technical designer. The investment in a good flat sketch will save multiple sampling rounds.
How Do You Use Reference Garments to Communicate Fit and Construction?
A physical reference garment is the most powerful communication tool. It is a pair of shorts that has the fit, the fabric hand feel, or the construction detail you want to replicate or modify. You send the reference garment to the factory. The factory pattern maker can measure it, analyze its construction, and understand exactly what you are aiming for. A reference garment is worth ten tech packs.
Write notes directly on the reference garment with small tags or masking tape. "I like this pocket depth." "I want the leg opening 2cm wider than this." "Use this waistband construction." "Match this fabric softness." The notes connect the physical garment to your specific requirements. The using reference samples in garment development guide explains this process. A reference garment plus a tech pack is the gold standard of design communication.
What Specific Terminology Prevents Misunderstandings in Production?
Words matter. In garment production, specific words have specific meanings. Using the wrong word can result in the wrong construction. A "hem" is different from a "cuff." A "pleat" is different from a "dart." A "safety stitch" is different from a "lockstitch." A professional buyer learns the correct terminology. It speeds up communication. It earns the factory's respect. It prevents costly mistakes caused by verbal ambiguity.
I once had a buyer ask for a "folded hem." We made a standard double-turn hem. What he actually wanted was a cuffed hem, where the fabric is turned up on the outside. He used the wrong term. We made the wrong finish. The sample was rejected. The delay was two weeks. The garment construction terminology glossary is essential learning for anyone developing custom clothing. Learning the correct terms for your design details is a small investment with a high return in time saved and errors avoided.
Measurements are the universal language. Words can be interpreted. Numbers cannot. Every key design feature should be described with a measurement, not just an adjective. Let's look at the two areas where terminology is most critical.
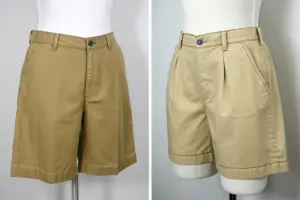
What Are the Correct Terms for Rise, Inseam, Leg Opening, and Waistband Types?
The front rise is the distance from the crotch seam to the top of the waistband. The back rise is the same measurement on the back. The inseam is the distance from the crotch seam to the hem along the inside leg. The leg opening is the circumference of the hem. These four measurements define the fit of the short. Specify them with exact numbers and tolerances. Do not say "medium rise." Say "Front rise: 28cm for size 32."
Waistband types have specific names. A flat waistband has no elastic. A half-elastic waistband has elastic only in the back. A full-elastic waistband has elastic all around. A paperbag waistband is wider and cinched with a belt or tie. A curved waistband is shaped to the body's contour. A straight waistband is cut straight. Use the correct term. Show a photo if possible. The measurement terms for shorts guide provides definitions and diagrams for every term. Language precision is production precision.
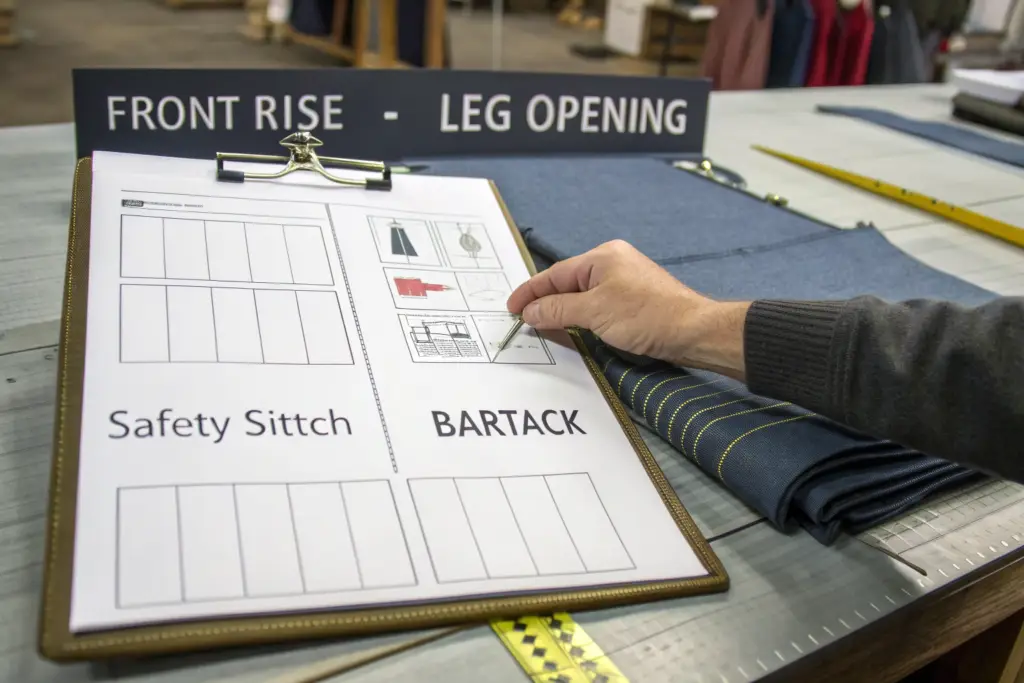
How Do You Describe Stitch Types, Seam Finishes, and Pocket Constructions Correctly?
A lockstitch is a straight stitch, strong but no stretch. A chainstitch has stretch and is used for seams that need to move. A safety stitch combines a chainstitch and an overlock, used for stress points like the back rise. A coverstitch is used for hems on knit garments. A bar tack is a dense, reinforced stitch used at pocket corners and belt loops. A topstitch is a visible stitch on the outside of the garment.
A French seam encloses the raw edge inside the seam. An overlock finish wraps the raw edge with thread. A bound seam covers the raw edge with a strip of fabric. A flat-felled seam is a strong, self-enclosed seam used on jeans. A welt pocket is a pocket with a finished slit opening. A patch pocket is sewn onto the outside. A slash pocket is set into a seam. A bellows pocket expands with a pleat. The stitch types and seam finishes guide provides visual references. Using the correct terms ensures the factory uses the correct construction.
Why Is Freezing the Design Before Sampling the Key to Speed?
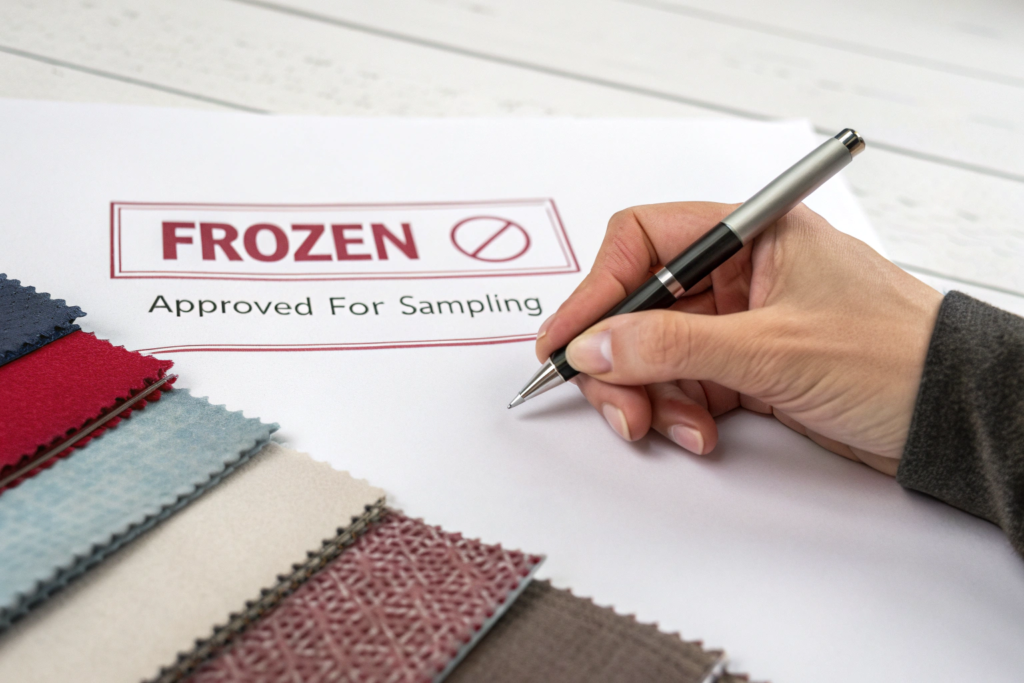
The fastest sampling process is the one that does not go in circles. The most common cause of a slow sampling process is the buyer changing their mind. A new fabric choice after the first sample is cut. A new pocket design after the second sample is sewn. Each change resets the clock. The factory must re-source materials, re-program machines, and re-cut fabric. A two-day decision to change a detail adds two weeks to the timeline. Freezing the design before the first sample is cut is the single most powerful action you can take to accelerate your time to market.
I have a firm policy at Shanghai Fumao. We cut the first sample only after the client has signed the tech pack and the BOM as "frozen." We explain that changes after freezing will incur additional sampling fees and time. This policy protects both the client and the factory. It forces the client to finalize their decisions. It allows the factory to plan the sampling process without the risk of disruption. The product development timeline best practices guide emphasizes the importance of a frozen design brief. Speed comes from clarity and commitment, not from rushing.
The sampling process is a sequential process. It is not a design exploration. The design exploration should happen before the factory is engaged. The factory engagement is for execution. Let's examine the sequence and the cost of changes.
What Happens When You Change a Detail Mid-Sampling?
When you change a fabric, the factory must source new fabric. This takes 7 to 21 days. The cut panels in the old fabric are wasted. When you change a pocket style, the factory must create a new pattern for that piece, potentially re-cut affected panels, and re-set the sewing machine folder attachments. This takes 3 to 5 days. When you change a measurement, the factory must re-grade the pattern for all sizes, potentially re-cut, and re-sew the sample. This takes 2 to 4 days.
Each change, however small it seems in an email, has a physical impact in the factory. The cost of design changes in production analysis shows the true cost in time and money. A frozen design is not a restriction on creativity. It is a decision to commit. The creativity happens before the freeze. The execution happens after. Separating these two phases is the mark of a professional brand.
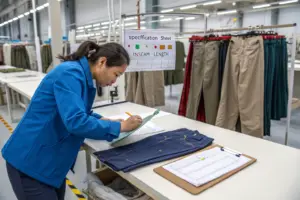
How Do You Organize a Final Pre-Production Review to Confirm Every Detail?
Before you approve the pre-production sample and release the order for bulk production, conduct a final, systematic review. Check every measurement against the tech pack. Check every trim against the BOM. Check every label placement. Wash the sample three times and check for shrinkage, color fading, and seam integrity. Wear the sample. Sit in it. Walk in it. Put items in the pockets. Experience the short as your customer will experience it.
Document any final, minor adjustments. These should be adjustments of millimeters, not redesigns. Sign the pre-production sample approval form. This sample and this document become the sealed reference standard for bulk production. The pre-production sample approval checklist provides a systematic process. The final review is the last chance to catch an error before it is multiplied across thousands of units. Do it carefully. Do it once. Then freeze.
Conclusion
Efficient communication with a factory is a skill. It is built on preparation, clarity, and commitment. Prepare a complete document package before you send the first email. A tech pack with measurements and flat sketches. A bill of materials with every component specified. A vector logo file for branding. Use visual tools to bridge the language barrier. A technical flat sketch. Reference photos of specific details. A physical reference garment with notes attached. Learn the correct terminology for the design features you want. Use measurements, not adjectives. Freeze the design before sampling begins. Resist the temptation to change details mid-process. Conduct a thorough final review of the pre-production sample before releasing to bulk.
This structured approach transforms the factory relationship from an adversarial guessing game into a collaborative execution partnership. The factory respects a buyer who communicates clearly. The buyer receives a sample that matches their vision. The sampling process is fast. The product is right. The launch is on time. The investment in communication is the most profitable investment you can make in your clothing brand.
At Shanghai Fumao, we provide every new client with a tech pack template, a BOM template, and a terminology guide. We assign a dedicated product developer who speaks fluent English and understands garment construction. We guide you through the sampling process with clear timelines and regular photo updates. If you have a custom shorts design you want to bring to life, contact our Business Director, Elaine, at elaine@fumaoclothing.com. Send her your ideas, your sketches, your reference images. She will help you build the communication package that gets your vision into production efficiently and accurately. Let us turn your vision into a sample with fewer rounds, less stress, and faster results.