I have sat in dozens of sample review meetings with brand owners who began their careers in finance, operations, or sales, not in fashion design. The conversation often starts the same way. They hold the sample up, squint at it, and say, "I think it looks good, but I am not a designer. I do not know how to judge this." They feel unqualified. They worry that they will approve a mediocre sample that their customers will reject. They defer the aesthetic decision to a designer who may not understand the production implications, or worse, they approve the sample without conviction and hope for the best. This discomfort is costly. A sample that is approved without a structured evaluation is a production order that arrives with aesthetic problems baked into 5,000 units. By then, it is too late.
A non-designer owner can evaluate the aesthetic quality of a garment sample by focusing on four objective, observable criteria that do not require design training: proportion and silhouette alignment against the approved tech pack, color and material accuracy against the approved lab dip and fabric swatch, construction finish quality at the visible touchpoints a customer will interact with, and comparative benchmarking against a competitor's garment that the owner knows succeeds in their target market. Taste is subjective. These four criteria are measurable. An owner who evaluates these four things can make a confident, defensible approval decision without a design degree.
At Shanghai Fumao, I work with many brand owners who are not designers. Some are former accountants who saw a market opportunity in sustainable workwear. Some are sales professionals who built a brand around a specific customer need. Some are e-commerce operators who know how to sell but not how to sketch. They are not disadvantaged by their lack of design training. They are advantaged by their understanding of their customer. The aesthetic evaluation of a sample is not about whether the owner personally likes the garment. It is about whether the garment will sell to the customer the owner knows intimately. Here is a structured, repeatable process for making that evaluation.
How to Assess Silhouette and Proportion Without Design Training?
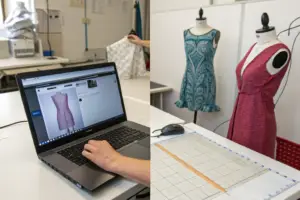
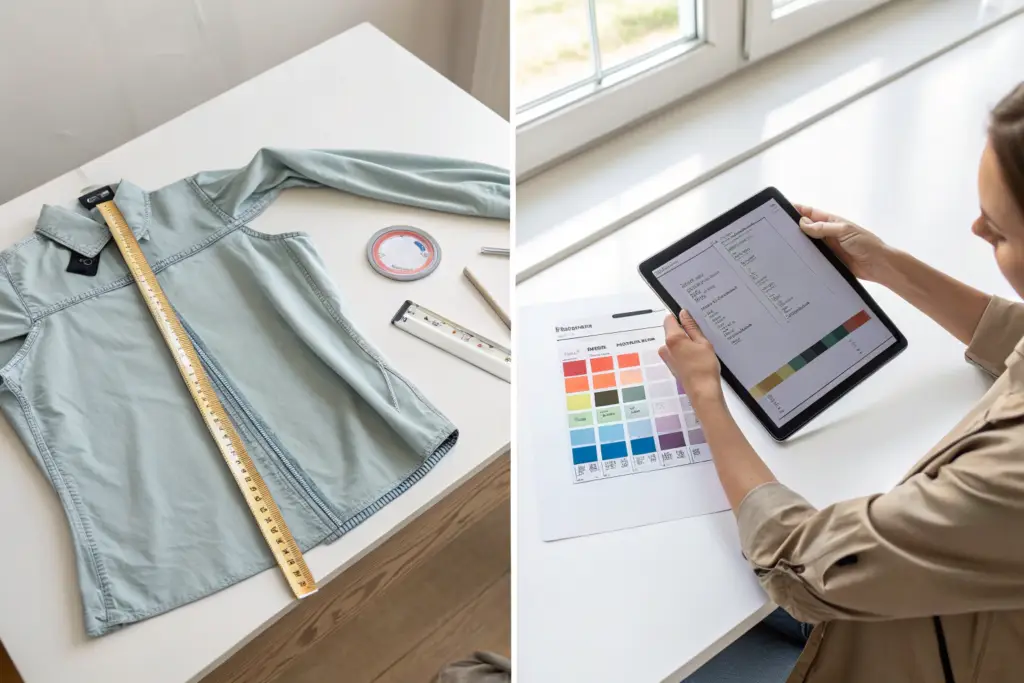
The silhouette is the first thing a customer sees, even if the customer does not consciously register it. It is the outline of the garment against the body. Does the jacket hang straight or does it pull at the button? Do the trousers taper cleanly or do they bag at the knee? Does the dress flare where the design intended it to flare? These are not questions of artistic judgment. They are questions of whether the physical sample matches the two-dimensional drawing and the measurement chart. A non-designer owner can answer these questions with a dress form, a measuring tape, and the tech pack.
The silhouette evaluation process for a non-designer involves three checks: the static fit check on a dress form or fit model using the spec sheet measurements, the visual proportion check comparing the sample against the tech pack flat sketch from a fixed distance, and the movement check where the garment is worn and the owner observes whether the silhouette distorts during natural motion, arm raises, sitting, walking. A garment that looks correct on the hanger but pulls, twists, or collapses during movement has a silhouette failure that no amount of beautiful fabric can rescue.
The customer will not measure the garment. The customer will try it on and look in the mirror. If the silhouette flatters, the garment stays in the fitting room and goes to the register. If the silhouette distorts, the garment goes back on the rack. The owner who evaluates silhouette objectively is making the same decision the customer will make, just earlier in the process. Here is how to use the tech pack as a decision tool and how to train a non-designer eye to spot proportion issues.

How to Use a Tech Pack for Silhouette Verification?
The tech pack is the owner's evaluation script. It contains the flat sketch, which is the line drawing of the garment, and the spec sheet, which is the table of measurements for each size. The owner does not need to understand how to create a tech pack. The owner needs to understand how to read one against a physical sample.
The process is mechanical. Lay the sample flat on a table. Take each measurement from the spec sheet and verify it on the sample with a measuring tape. Chest width at the armhole. Body length from the high point shoulder to the hem. Sleeve length from the shoulder seam to the cuff. Waist width at the specified point. The measurements must fall within the tolerance range specified in the tech pack, typically plus or minus half an inch for most points. If the measurements match, the sample is dimensionally correct. If the sample is dimensionally correct but the silhouette still looks wrong, the issue is in the pattern shape, not the measurements. That is a conversation for the pattern maker, but the owner's role is to identify the discrepancy, not to solve it. The owner's job is to say, "The measurements are correct, but the sleeve pitch is causing the arm to twist forward. Please adjust the pattern." The tech pack gives the owner the vocabulary and the data to make that statement with confidence.
What Visual Checks Reveal Proportion Imbalance?
Proportion is about the relationship between the parts of the garment. A jacket with a body length that is too short for its chest width looks boxy. A dress with a waist seam that sits too low makes the torso look elongated and the legs look short. These imbalances are visible to any observer, regardless of design training, if the observer knows what to look for.
The simplest proportion check is the rule of thirds. Divide the garment visually into three horizontal sections. On a jacket, the shoulder-to-chest section, the chest-to-waist section, and the waist-to-hem section. Do the sections feel balanced, or does one dominate? On a dress, the bodice, the waist-to-hip, and the skirt. A common proportion error in factory samples is a bodice that is cut too long because the pattern was graded from a larger size without adjusting the vertical proportions. The owner can spot this by comparing the sample to a reference garment that is known to fit well. Lay the reference garment over the sample. Compare the key proportion points. If the waist of the sample sits two inches lower than the reference, the proportion is off. The fix is a pattern adjustment. The owner does not need to make the adjustment. The owner needs to flag the discrepancy. The Alvanon fit standards provide body form data that many brands use to establish their fit block, but a reference garment from a successful competitor or the brand's own best-selling style serves the same benchmarking purpose.
How to Judge Fabric Quality and Color Accuracy Objectively?
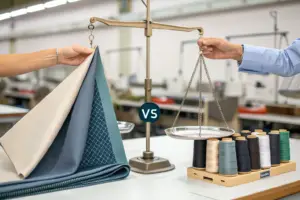
Fabric is the substance of the garment. The customer touches the fabric before they check the stitching. If the fabric feels cheap, the customer associates the entire brand with cheapness, regardless of the construction quality. A non-designer owner can evaluate fabric quality through sensory tests that require no textile science background: hand feel, weight, opacity, and color accuracy against a reference standard.
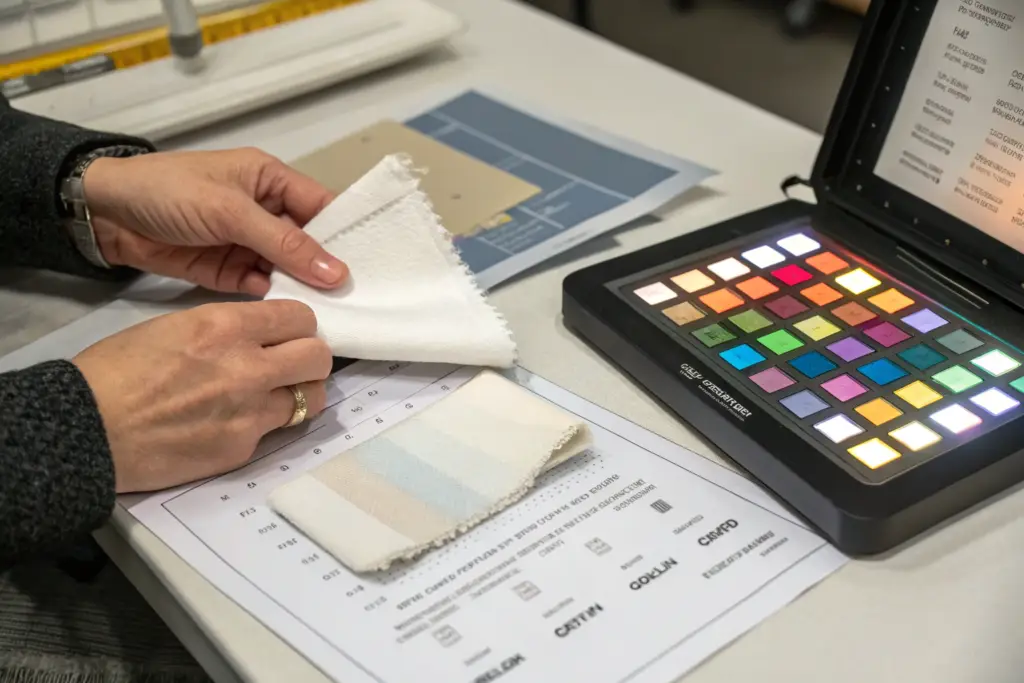
Fabric evaluation for a non-designer consists of four sensory checks: the hand feel test comparing the sample fabric against the approved swatch for softness, drape, and surface texture, the weight test using a simple GSM scale or the "density in hand" comparison, the opacity test holding the fabric up to light to check for undesirable transparency, and the color accuracy test comparing the sample under D65 daylight lighting against the approved lab dip. These checks do not require technical vocabulary. They require attention and a reference standard for comparison.
The reference standard is the key. The owner should have the approved fabric swatch and lab dip in hand during the sample evaluation. Aesthetic judgment without a reference standard is just opinion. Aesthetic judgment with a reference standard is verification. The owner is not deciding if the fabric is "nice." The owner is deciding if the fabric matches what was ordered. This is a binary, objective question. Here is how to test for defects that the customer will notice and how to verify color accuracy without professional equipment.
What Simple Physical Tests Reveal Fabric Quality?
The hand feel test is the most important. Rub the fabric between your fingers. Does it feel the same as the approved swatch? Is it softer, stiffer, thinner, or rougher? If it feels different, the customer will notice. The hand feel must match the reference.
The wrinkle recovery test is simple. Ball the fabric up in your fist for ten seconds. Release it. How quickly do the wrinkles fall out? Compare to the reference swatch. A fabric that holds wrinkles longer than the reference will look disheveled after a customer sits through a meeting or a commute. The opacity test is critical for lightweight fabrics. Hold the fabric up against a window or a bright light. Is it more transparent than the reference? A white blouse that is more transparent than the approved sample will generate returns because the customer cannot wear it without a specific undergarment. The seam slippage test is a quick durability check. Hold the fabric at a seam and pull gently in opposite directions. Do the threads separate at the seam line, exposing gaps? If the fabric seam slips easily, the garment will develop holes at stress points after a few wears. These tests require no equipment, only hands, eyes, and the reference sample. They catch the fabric defects that generate customer returns.
How to Verify Color Accuracy Without a Professional Spectrophotometer?
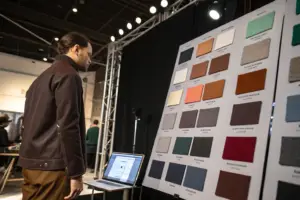
A professional spectrophotometer is the gold standard, but an owner evaluating a single sample can achieve a practical color check with two tools: the approved lab dip and consistent lighting. The lighting is the critical variable. A color viewed under warm yellow factory lights will look different from the same color viewed under cool white office lights, which will look different from the same color viewed in natural daylight. The customer will wear the garment in all three lighting conditions.
The standard for color evaluation is D65 daylight, which simulates natural noon daylight. If the owner has access to a light booth, the evaluation is done under D65. If not, the next best option is natural daylight near a window, but not direct sunlight, which has a strong yellow cast at low angles. Hold the sample and the lab dip side by side, touching. The human eye is very good at detecting side-by-side color differences. If the sample appears noticeably lighter, darker, or shifted in hue compared to the lab dip, the color is not a match. The owner should also check for metamerism, a color shift under different lighting. Look at the sample and lab dip under daylight, then under fluorescent office lights, then under warm incandescent light. If they match under daylight but diverge under fluorescent, the fabric has a metamerism problem that will be visible to customers in department store fitting rooms. The fix is a dye formula adjustment. The owner's role is to catch the mismatch, not to formulate the fix.
What Construction Details Indicate a Well-Made Garment?
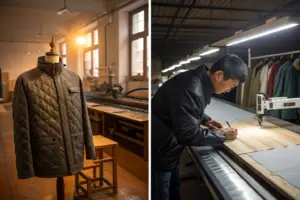
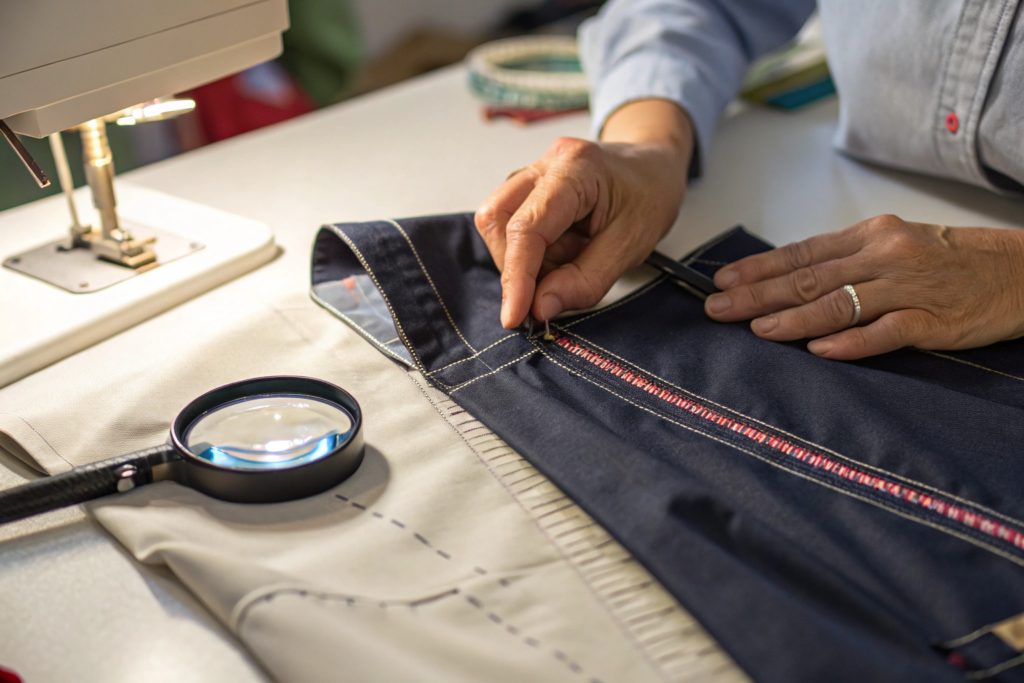
The inside of a garment tells the truth about its quality. The outside is for the customer. The inside is for the evaluator. A non-designer owner can learn more about a garment's quality by turning it inside out and examining three areas—the seams, the stress points, and the finishing—than by looking at the outside for an hour. The customer will never see the inside seams, but the customer will feel them if they are rough, and the customer will experience a failure if they are weak.
The construction quality evaluation for a non-designer focuses on three areas: seam finishing, whether the raw edges are cleanly finished with an overlock stitch, a French seam, or a bound seam rather than left raw, stress-point reinforcement, whether pocket corners, zipper ends, and button attachments have bar tacks or extra stitching to prevent tearing, and hem and collar finishing, whether the stitching is straight, the stitch density is consistent, and the fabric is not puckered or wavy. These are visible, objective checks. A well-made garment has clean, consistent, reinforced construction. A poorly made garment has raw edges, skipped stitches, and unreinforced stress points.
The customer will not articulate these details in a return reason. The customer will say "it fell apart" or "it felt cheap." But the root cause is always in the construction details that were visible during the sample evaluation and were either missed or accepted. Here are the specific stress points that predict garment longevity and how to evaluate seam finishes.
How to Identify Weak Points That Predict Early Returns?
Stress points are the locations on a garment where fabric is pulled in multiple directions during normal wear. On a jacket, the armhole seam where the sleeve joins the body. On trousers, the crotch seam. On a shirt, the side seam at the underarm. On a dress with a zipper, the bottom of the zipper where the slider stops. These points concentrate force, and if the construction is weak, they fail first.
The owner should grab the fabric on either side of a stress point and apply gentle but firm pulling pressure. The seam should not separate. The fabric should not tear. The stitching should remain intact. Then turn the garment inside out and look at the stress point. Is there a bar tack, a dense zig-zag stitch that reinforces the point? Is there an extra row of stitching? Is the seam allowance cleanly finished or is it fraying? On a well-made garment, stress points are reinforced. On a cheaply made garment, stress points are no different from any other seam, and they will fail. This check takes two minutes and predicts the return rate more accurately than any aesthetic judgment.
What Seam Finishes Distinguish Premium from Budget Production?
The seam finish is how the raw edge of the fabric is enclosed or treated to prevent fraying. The cheapest seam finish is no finish at all, a raw edge that will unravel in the first wash. The next level is a serged or overlocked edge, where a thread wraps around the raw edge to contain it. This is standard for mainstream apparel. The premium level is a French seam, where the raw edge is fully enclosed within a second seam, visible only as a clean fold on the inside. Another premium finish is a bound seam, where a strip of fabric is wrapped around the raw edge and stitched down, commonly seen on unlined jackets and high-end shirts.
The owner does not need to know the names of these finishes. The owner needs to look at the inside seams and ask one question: "Can I see a raw edge?" If the answer is yes, and the garment is marketed as a premium product, the seam finish is inadequate. The customer will see loose threads inside the garment and associate the brand with poor quality. If the inside seams are clean, enclosed, and smooth to the touch, the construction quality is aligned with a premium positioning. The seam finish tells the story of the factory's quality standards more honestly than any certificate.
How to Use Benchmarking to Calibrate Your Quality Judgment?
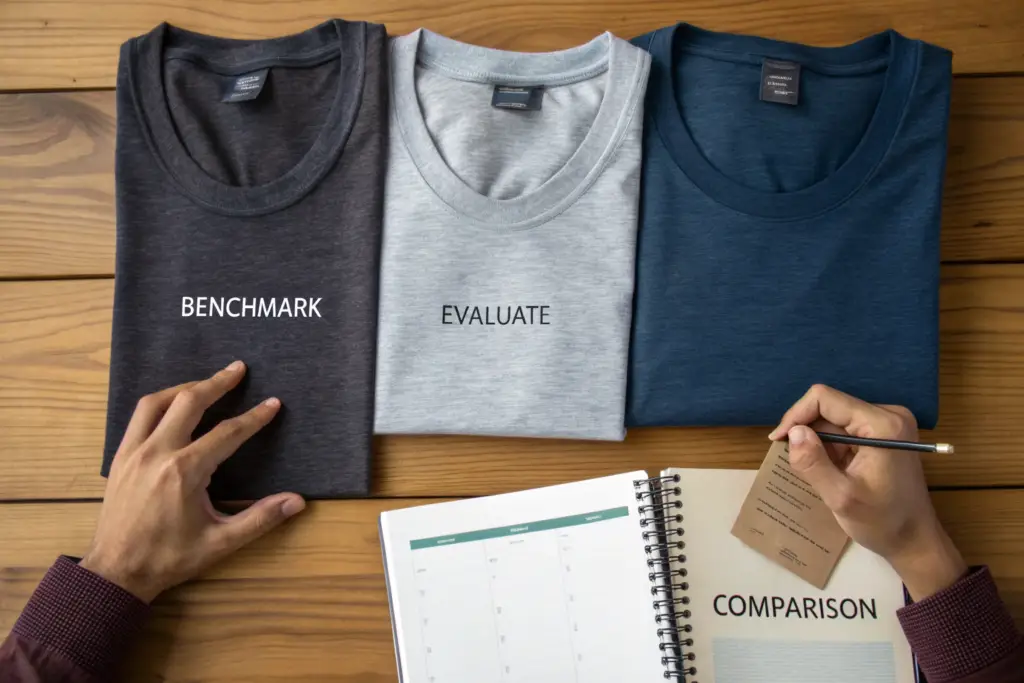
The single most effective tool for a non-designer owner evaluating a sample is a benchmark garment. This is a garment from a competitor or from the owner's own previous production that represents the quality standard the brand aspires to meet or exceed. The benchmark transforms an abstract evaluation into a concrete comparison. The question shifts from "Is this sample good?" which is subjective and difficult, to "Is this sample as good as this benchmark?" which is objective and answerable.
Benchmarking calibrates the non-designer owner's quality judgment by providing a physical reference standard. The process involves selecting a benchmark garment that succeeds in the target market at the target price point, laying the sample and the benchmark side by side, and comparing each element—fabric weight, seam finish, button attachment, hem straightness, label placement—directly. If the sample matches or exceeds the benchmark on the elements that matter to the customer, it is approved. If it falls short, the specific shortfalls are documented and sent to the factory for correction.
The benchmark approach removes the owner's personal taste from the equation. The owner may personally prefer a softer collar, but if the benchmark has a structured collar and the target customer buys the benchmark, the sample should match the structured collar. The owner is not the customer. The benchmark represents the customer. Here is how to select the right benchmark and how to structure a comparison checklist.
What Criteria Should the Benchmark Garment Meet?
The benchmark garment must be commercially successful in the owner's target market segment and price point. A brand selling $68 casual shirts should benchmark against a $68 shirt that is selling well at a retailer that serves the same customer, not against a $200 shirt from a luxury brand. The luxury benchmark sets an unrealistic standard that the factory cannot meet at the $68 cost price. The irrelevant benchmark provides no useful guidance.
The ideal benchmark is a garment from a direct competitor that the owner has purchased at retail. The owner knows the retail price, has observed the customer response, and can reverse-engineer the perceived quality level that the market expects. If the competitor's garment has single-needle stitching with 10 stitches per inch, that is the market standard. The owner's sample should meet or slightly exceed that standard, 11 stitches per inch, not dramatically exceed it, 14 stitches per inch, which would increase the cost without a proportional increase in perceived value. The benchmark defines the quality target that the customer is willing to pay for.
How to Build a Simple Aesthetic Scorecard for Sample Evaluation?
The scorecard is a one-page document that structures the evaluation and creates a record of the decision. It prevents the owner from being swayed by a single strong positive or negative feature and missing the overall assessment. The scorecard has rows for each evaluation criterion and columns for the sample rating and the benchmark comparison.
| Evaluation Criterion | Sample vs. Benchmark | Pass/Adjust/Reject | Notes |
|---|---|---|---|
| Silhouette on Form | Matches benchmark drape | Pass | Sleeve pitch correct |
| Fabric Hand Feel | Softer than benchmark | Adjust | Request firmer finish |
| Color vs. Lab Dip | 0.8 Delta E, visually matched | Pass | Check under D65 and TL84 |
| Seam Finishing | French seams on all internal | Pass | Cleaner than benchmark |
| Button Attachment | Hand-sewn shank, no bar tack | Reject | Missing bar tack on stress button |
| Hem Straightness | 2mm variance across hem | Pass | Within tolerance |
| Label Placement | Centered, no tilt | Pass | Matches tech pack positioning |
The scorecard creates an objective record. The "Adjust" items become specific instructions to the factory. The "Reject" items are non-negotiable fixes required before approval. The "Pass" items are documented evidence that the evaluation was thorough. The scorecard also serves as a training tool. Over time, the owner builds a library of scorecards that reveal patterns in factory performance and in customer preferences. The evaluation process becomes faster and more confident with each sample reviewed.
Conclusion
The belief that only a trained designer can evaluate a garment sample is a myth that costs brand owners money. Aesthetic quality is not a mystery. It is a set of observable, measurable characteristics: the silhouette matches the tech pack, the fabric matches the reference swatch, the construction is clean and reinforced, and the overall quality meets or exceeds a successful benchmark. A non-designer owner who evaluates these four things makes a better approval decision than a designer who evaluates only whether the garment matches their personal creative vision.
At Shanghai Fumao, I have developed sample evaluation protocols specifically for brand owners who come from business backgrounds. I do not expect my clients to understand pattern engineering or dye chemistry. I expect them to understand their customer. My job is to translate their customer knowledge into technical specifications and to produce samples that can be evaluated against those specifications using a structured, objective process. The owner who brings a benchmark garment, a tape measure, and a scorecard to a sample review is an owner who will receive consistent, improvable production quality.
If you are preparing to review samples for your next collection and you want a partner who provides clear specifications, reference standards, and a structured evaluation process, reach out to our team. We can walk you through our sample submission package and show you how we support non-designer owners in making confident approval decisions. Contact our Business Director, Elaine, at elaine@fumaoclothing.com. You do not need a design degree to know what your customer wants. You need a factory that translates that knowledge into a measurable sample.