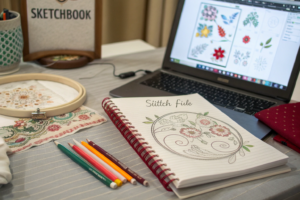
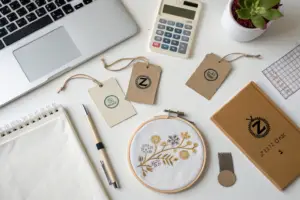
A brand owner from Miami called me three weeks ago, stressed about a spreadsheet. She was launching her first collection of women's linen dresses. Her budget was tight. She had allocated $2.50 per unit for branding. Her branding agency had proposed a full package: a custom woven neck label, a double-sided hang tag with foil stamping, and an embroidered logo on the chest. The combined cost was $4.80 per unit. She did not know what to cut. She did not know which branding element mattered most to her customer. She asked me, "If I can only afford one really nice thing, which one should it be?"
The cost differences between custom labels, hang tags, and embroidery branding are driven by three factors: setup tooling costs, per-unit material and labor costs, and minimum order quantities. Custom labels, whether woven or printed, have low per-unit costs but moderate setup costs for the loom or plate. Hang tags have very low setup costs for simple designs but escalate quickly with specialty paper, foil stamping, and die-cut shapes. Embroidery has the highest per-unit cost due to stitch-by-stitch machine time, especially for large or complex designs, and significant setup costs for the digitization of the artwork. The total cost depends on how these fixed and variable costs interact with your order volume.
Understanding these cost drivers allows you to allocate your branding budget strategically, not emotionally. You might choose to invest in a premium embroidered logo that stays on the garment forever, and economize on the hang tag that the customer discards before wearing. Or you might invest in a beautiful, tactile hang tag that tells your brand story on the retail rack, and choose a simpler printed label inside. The right choice depends on your brand positioning, your sales channel, and your customer's priorities. At Shanghai Fumao, we source and apply all three branding types for our clients. Let me break down the real costs of each, so you can make the decision that is right for your brand and your budget.
How Do Woven Labels and Printed Labels Compare in Setup and Per-Unit Cost?
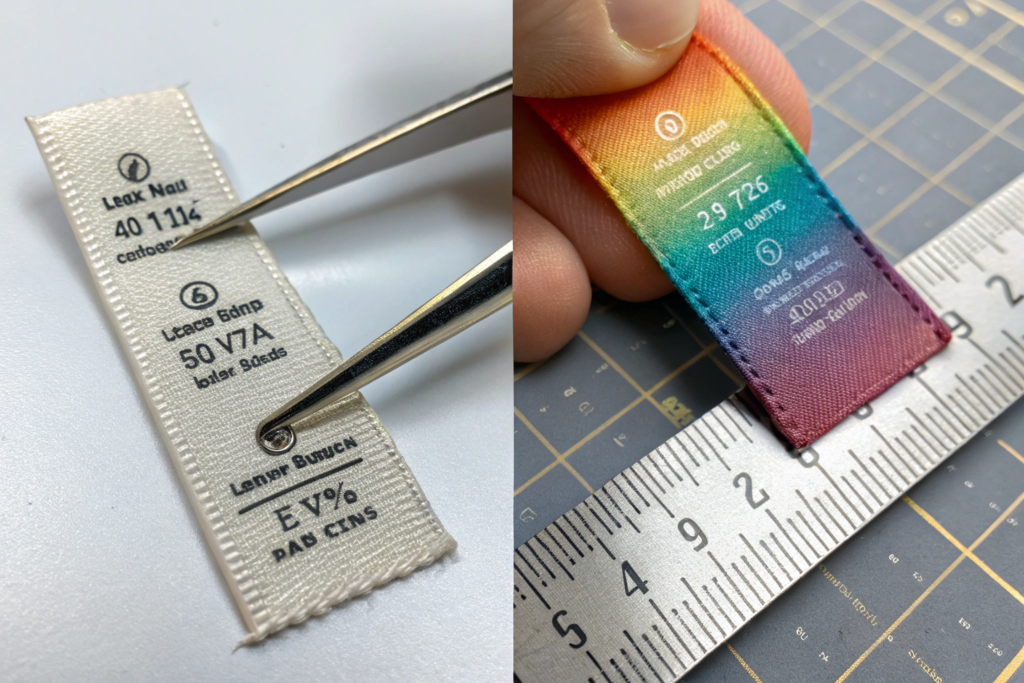
The label sewn into the neck or side seam of a garment is the permanent identifier of your brand. It stays with the garment for its entire life. It is seen by the customer every time they put the garment on or take it off. Because it is permanent and frequently seen, the quality of the label communicates the quality of the brand. A scratchy, poorly printed label undermines the perception of a well-made garment. A soft, beautifully woven label elevates it.
Woven labels have a higher setup cost, typically $80 to $180 for the weaving loom setup or the jacquard loom programming, but a lower per-unit cost of $0.08 to $0.25 for a standard size. Printed labels have a lower setup cost, often $40 to $80 for the printing plate, but a higher per-unit cost of $0.10 to $0.30 for comparable quality. Woven labels are more durable and feel more premium. Printed labels allow for more complex, multi-colored designs and photo-realistic gradients. The volume at which woven becomes more cost-effective than printed is typically around 2,000 to 3,000 units.
The choice between woven and printed is not purely economic. It is also aesthetic and functional. Woven labels have a texture and a depth that printed labels cannot replicate. They feel substantial. They look like they belong on a premium garment. Printed labels can achieve a level of color complexity and detail that woven labels cannot match. If your logo has a gradient, a drop shadow, or a photographic element, woven cannot do it. The technology simply cannot render those effects in thread.
What Is the Cost Impact of Label Size, Colors, and Special Finishes?
Label size drives material consumption. A standard neck label is roughly 3cm by 6cm. A larger label, perhaps a 4cm by 8cm center-back label for a jacket, uses more yarn or fabric. The cost increases proportionally with the area. A label that is 50% larger will cost roughly 40% to 50% more per unit.
The number of colors in a woven label has a direct impact on cost. A simple one-color logo on a single background color is the cheapest to weave. Each additional color requires an additional set of yarns and increases the complexity of the loom setup. A woven label with four colors will cost significantly more per unit than a woven label with one color. The setup cost also increases with color count.
Printed labels are less sensitive to color count. The printing process, whether it is screen printing or digital printing, can reproduce multiple colors without a significant per-color cost increase. This makes printed labels more economical for complex, multi-colored logos.
Special finishes add cost. A hot-cut edge, which seals the edge of a polyester label to prevent fraying, adds a small per-unit cost. A folded label, where the label is folded and sewn into the seam, adds a labor cost for the folding. A laser-cut label with intricate edge detail adds a setup cost for the laser programming. An ultrasonic cut, which creates a very soft, sealed edge ideal for baby garments, adds a per-unit cost.
We produced woven labels for a children's wear brand that required an ultrasonic-cut edge for softness against sensitive skin. The setup cost for the ultrasonic tooling was $60. The per-unit cost was $0.04 higher than a standard hot-cut edge. The brand owner decided the customer experience benefit justified the cost. Parent feedback specifically mentioned the soft label, which did not scratch the child's neck. The small cost increment delivered a tangible customer experience improvement.
How Do Minimum Order Quantities for Labels Affect Small Brand Budgets?
The label industry has minimum order quantities, or MOQs, that can be a barrier for small brands. Woven labels typically have a minimum order of 1,000 to 2,000 units per design. Printed labels can have lower minimums, sometimes as low as 500 units. The MOQ constraint means a small brand launching with a 300-unit production run may be forced to order more labels than they need, increasing their per-garment branding cost because the label cost is spread over fewer actual garments.
The workaround is to design labels that are not season-specific. A label that says your brand name, without a collection name or a year, can be used across multiple seasons. You order the MOQ of 2,000 labels and use them over several production runs. The effective per-unit cost is the label cost divided by the total number of garments you eventually produce with those labels, not just the first run.
We advise small brands to avoid dating their labels. A label that says "Summer 2026" is dead stock after that season. A label that says your brand name is timeless stock. The cost of the label is amortized over its entire usable life.
A small brand client orders woven labels in batches of 2,000 units, the mill's MOQ. She uses approximately 500 labels per season across four seasons. The label batch lasts her two years. Her effective label cost per garment is $0.12, the label unit price. If she had ordered 500 labels with a low-MOQ premium, her per-unit label cost would have been closer to $0.40. The MOQ batch strategy saves her $0.28 per garment, which compounds across her production volume.
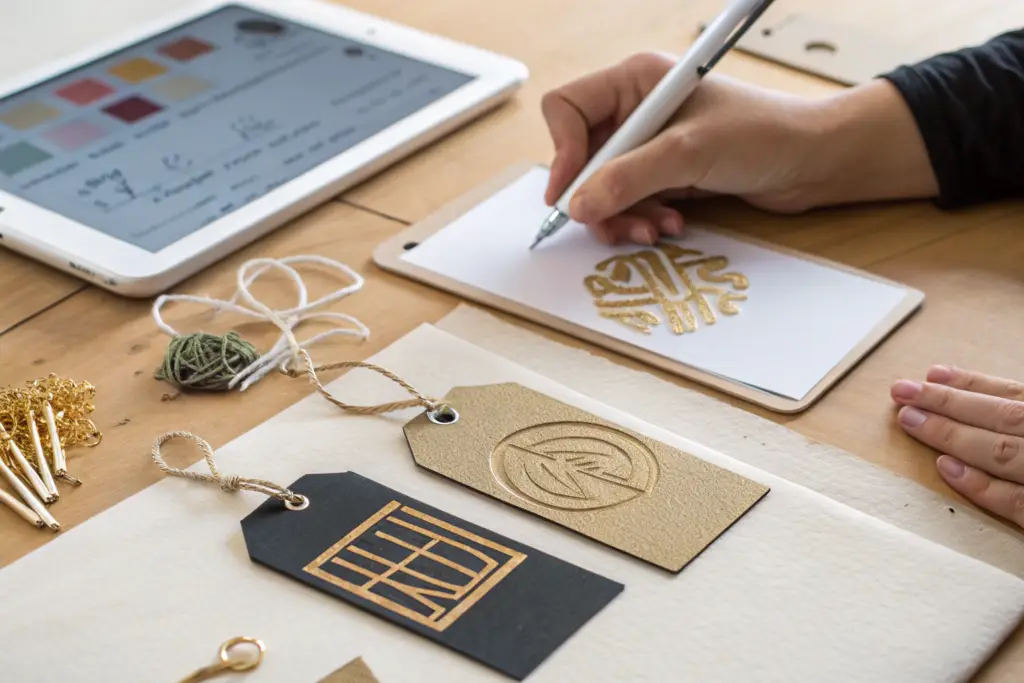
What Are the Hidden Costs in Designing a Premium Hang Tag?
The hang tag is the storyteller. It is the first piece of branding the customer sees on the retail rack. It carries the brand name, the price, the size, the care instructions, and often a snippet of brand narrative. It is handled by the customer before the garment is touched. A flimsy, poorly printed hang tag suggests a cheap product. A heavy, textured, beautifully printed hang tag suggests a premium product. The hang tag is a silent salesperson.
The hidden costs in designing a premium hang tag are not in the cardstock itself, which is cheap, but in the special finishing techniques. Foil stamping requires a custom metal die that costs $80 to $250. Embossing or debossing requires a separate die. Die-cutting into a custom shape requires a cutting die. A hang tag with foil stamping on both sides, an embossed logo, and a die-cut shape can have $400 to $600 in total setup dies before a single tag is printed. The per-unit cost of a premium hang tag can range from $0.15 for a simple one-color print on standard cardstock to $0.80 or more for a complex, multi-finish tag.
The per-unit cost of the premium hang tag is often higher than the per-unit cost of the woven label. This surprises many brand owners. The material, paper, is cheaper than the yarn used in a woven label. But the finishing processes, the foil, the embossing, the die-cutting, are specialized and slow. They add labor and machine time that compound with each additional finish.
How Do Foil Stamping, Embossing, and Die-Cut Shapes Escalate the Quote?
Foil stamping is the process of applying a thin metallic foil to paper using a heated metal die and pressure. The die is custom-made for your design. It has a setup cost and a limited lifespan. The foil itself adds a material cost per tag. Double-sided foil stamping requires two passes, effectively doubling the per-unit cost of the foil process.
Embossing creates a raised design on the paper. Debossing creates a recessed design. Both require a custom metal die, separate from the printing plate and separate from the foil die. The embossing die costs $100 to $200. The per-unit embossing cost is moderate, but the die cost is a fixed upfront expense.
Die-cutting cuts the hang tag into a shape that is not a simple rectangle. The shape might be a circle, a garment silhouette, or a custom outline that follows the contours of your logo. The cutting die is a custom-made metal form. It has a setup cost and wears out over time, requiring replacement.
The cost escalation is cumulative. A simple rectangular tag with one-color printing might cost $0.12 per unit with a $40 printing plate. That same design, made into a die-cut circle with double-sided foil stamping and an embossed logo, might cost $0.65 per unit with $480 in total setup dies. The per-unit cost has multiplied by five. The setup cost has multiplied by twelve. The premium hang tag is an investment.
A women's dress brand I work with uses a beautiful hang tag. It is a thick, textured cream cardstock, die-cut into a gentle oval shape, with their logo in matte gold foil on one side and a short brand story in dark grey ink on the other. The setup cost for their oval cutting die and their gold foil die was $350 total. Their per-unit cost is $0.42. They consider this cost a marketing expense, not a packaging expense. The tag is so attractive that customers often keep it, pin it to a board, or use it as a bookmark. The tag becomes a small piece of brand advertising in the customer's home. The $0.42 is not just a cost. It is a media placement.
What Are the Most Cost-Effective Attachment Methods for Hang Tags?
The attachment method, how the hang tag is physically attached to the garment, is a small cost that is often overlooked. The three most common methods are cotton string, safety pins, and plastic swift-tack fasteners.
Cotton string is the cheapest and most traditional. A length of natural cotton string, threaded through the hang tag hole and looped around a button or through a seam label, costs fractions of a cent. It is suitable for casual, natural, and eco-friendly brand aesthetics. It requires manual threading, which adds a small labor cost.
Safety pins are slightly more expensive than string, both in material cost and in attachment labor. They are secure and give a slightly industrial or utilitarian aesthetic. They are often used for denim and workwear brands. They carry a small safety risk and some retailers prefer to avoid them.
Plastic swift-tack fasteners, also called kimble attachments or tagger guns, are the fastest to apply and the most secure. The fastener gun shoots a plastic filament through the garment and the hang tag. The attachment takes a second. The cost per fastener is very low. However, the plastic is not biodegradable and is increasingly disliked by environmentally conscious brands. Some brands are switching to biodegradable or recycled swift-tack alternatives, which cost slightly more but align with sustainability messaging.
The attachment choice affects the labor cost at the factory finishing stage. A string attachment might take ten seconds per garment. A swift-tack attachment takes two seconds. Over a production run of 5,000 units, the time difference is meaningful. The string attachment for 5,000 garments requires approximately fourteen hours of labor. The swift-tack attachment requires three hours. The labor cost difference can outweigh the material cost of the fastener.
We present the attachment options to our clients with a clear cost and time breakdown. A workwear brand chose safety pins despite the higher cost because the aesthetic fit their brand identity perfectly. A sustainable fashion brand chose organic cotton string despite the higher labor cost because it aligned with their zero-plastic commitment. The choice is strategic, not just financial.
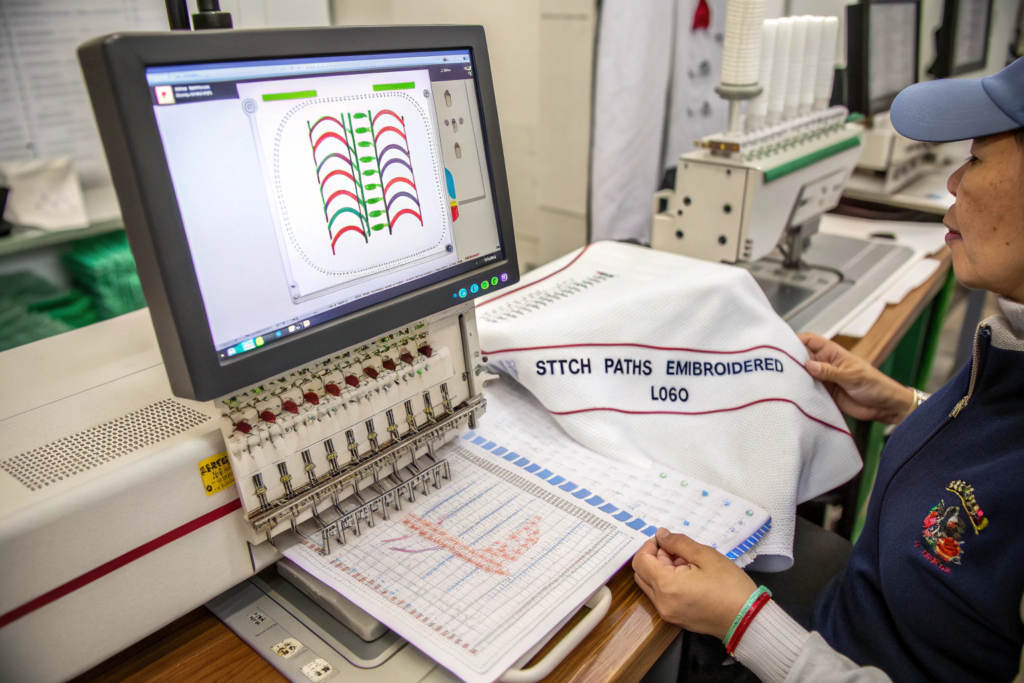
How Is Embroidery Digitization Charged and Why Does Stitch Count Matter?
Embroidery is fundamentally different from labels and hang tags. A label is a product that is manufactured and then attached to the garment. Embroidery is a process that is performed directly on the garment. The logo is stitched onto the fabric, thread by thread, by a computer-controlled embroidery machine. The process is slow relative to label attachment. A large embroidered logo can take several minutes of machine time to stitch. The machine time, the thread consumed, and the digital preparation all contribute to the cost.
Embroidery digitization is the process of converting your logo artwork into a stitch file that the embroidery machine can read. It is a one-time setup cost, typically ranging from $25 to $75 for a standard logo depending on complexity. The per-unit embroidery cost is driven primarily by the stitch count, the number of individual needle penetrations required to form the logo. Stitch count is determined by the size and complexity of the design. A small, simple logo might be 3,000 stitches and cost $0.60 per unit. A large, complex logo might be 15,000 stitches and cost $3.00 per unit. The thread cost is relatively small. The dominant cost is machine time.
The stitch count is not a number you guess. It is the output of the digitization process. The digitizer analyzes your artwork, determines the optimal stitch path, and calculates the exact stitch count. The stitch count is then used to quote the per-unit embroidery cost. Understanding this process allows you to design your logo in a way that minimizes stitch count and therefore cost, without compromising visual impact.
What Logo Design Choices Drive Up Embroidery Costs Unnecessarily?
Several common logo design choices significantly increase stitch count without adding proportional visual impact. The most expensive choice is a large, solid filled area. Embroidery creates filled areas by stitching back and forth, row by row, across the entire area. A solid block of color, like a filled rectangle or a large, thick letterform, consumes thousands of stitches. Reducing the filled area, or converting a filled shape to an outline shape, can cut the stitch count by 60% or more.
Tight color gradients are expensive. Embroidery cannot blend colors like printing. A gradient must be approximated by changing thread colors in discrete steps. A five-color gradient requires five thread changes, which add time and complexity. Reducing the number of colors in the design reduces the thread changes and simplifies the digitization.
Very small text is expensive because it requires a very fine, dense stitch to remain legible. The letters must be stitched with tiny, precise stitches that are slow to produce. Small text is also less durable. It can become illegible after washing. Enlarging the text, or simplifying the font to a clean, bold sans-serif, reduces the stitch count and improves durability.
A startup brand came to us with a logo that was a complex, hand-drawn illustration with multiple colors and fine details. They wanted it embroidered on the chest of their t-shirts. The digitization quote was $90 for the complex artwork, and the stitch count was 18,000, giving a per-unit cost of $3.40. We worked with them to create an "embroidery-optimized" version of their logo. We simplified the illustration to a clean line drawing, reduced the color palette to two colors, and enlarged the key details. The optimized logo digitized for $40, had a stitch count of 6,500, and a per-unit cost of $1.15. The visual impact was 80% of the original, at a third of the cost. The optimized logo was also more legible and looked more intentional on the garment.
How Does the Number of Embroidery Locations Multiply the Total Cost?
Embroidery cost is linear per location. A logo embroidered on the left chest costs X. The same logo embroidered on the left chest and the right sleeve costs 2X, plus a small handling cost for repositioning the garment on the machine. The digitization cost is a one-time charge for the design, regardless of how many times it is stitched.
The handling cost between locations is small but not zero. The garment must be removed from the hoop, repositioned, and re-hooped for each additional location. This labor adds time. For a large run, the cumulative handling cost can be significant.
A brand that wants a left chest logo, a back neck logo, and a sleeve logo on every garment is paying three times the per-unit embroidery cost for that garment, plus two handling charges. The brand owner must decide if the additional branding locations deliver sufficient incremental value to justify the cost. A back neck logo is rarely seen if the garment is worn with the collar down. A sleeve logo is visible but often partially covered. The left chest logo, directly in the line of sight, has the highest visual impact per dollar of embroidery cost.
A client producing premium polo shirts initially specified three embroidery locations, left chest, right sleeve, and back neck. The combined embroidery cost was $2.80 per shirt. We suggested they eliminate the back neck logo, which was invisible when the collar was worn properly, and keep the chest and sleeve. The cost dropped to $1.90 per shirt, a saving of $0.90 per unit. On a 2,000-unit order, the saving was $1,800. The brand perception was unchanged. The back neck logo was an expensive detail that no one noticed.
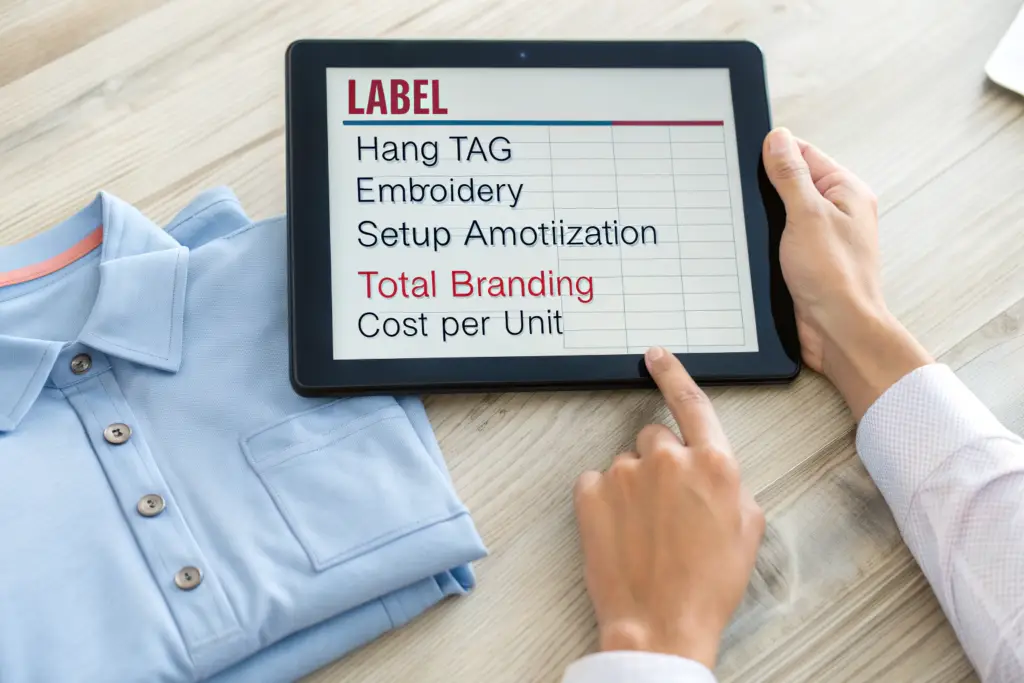
What Is the Total Landed Cost Impact of Your Branding Choices?
The decision about labels, hang tags, and embroidery is not made in isolation. It is a portfolio decision. You have a fixed branding budget per garment. You must allocate that budget across the available branding methods to maximize the perceived value of the garment to your target customer. The optimal allocation is different for a luxury brand than for a mass-market brand. It is different for online sales than for brick-and-mortar retail. The total landed cost impact must be calculated holistically.
The total landed cost impact of your branding choices is the sum of the amortized setup costs, the per-unit material and labor costs for each branding element, and the incremental logistics cost of any branding-related packaging weight or volume. Setup costs are amortized over the total number of units you expect to produce with those tools. A $300 die cost spread over 10,000 units adds $0.03 per unit. The same die cost spread over 500 units adds $0.60 per unit. Volume transforms the economics of setup-intensive branding.
A common mistake is to evaluate branding costs based on the first production run only. A brand launching with a 500-unit test order sees a per-unit branding cost that is inflated by undiluted setup costs. They conclude that premium branding is unaffordable. But if the brand plans to scale, the setup costs should be amortized over the projected lifetime volume, not the initial run. The premium branding may be very affordable at scale.
How Do You Calculate the Amortization of Setup Costs Across Production Runs?
The amortization calculation is straightforward. Total setup costs divided by total projected units across all production runs. The projection requires an honest estimate of your expected volume. If you plan to produce 500 units this season, 800 next season, and 1,000 the season after, your projected two-year volume is 2,300 units. Divide your setup costs by 2,300 to get the amortized setup cost per unit.
If your setup costs for a woven label die and a foil stamp die total $400, amortized over 2,300 units, the per-unit setup cost is $0.17. Add the per-unit material cost of the label, $0.15, and the per-unit material cost of the hang tag, $0.42, and your per-unit branding cost is $0.74, excluding embroidery. This is the true unit cost, reflecting the setup investment spread over its productive life.
The amortization horizon should be realistic. A fashion-forward brand that changes its logo or its aesthetic every season will not amortize setup costs over multiple years. A classic brand with a stable logo can amortize over a longer period. The amortization horizon should match the expected lifespan of the design.
We advise clients to separate their branding elements into stable elements and seasonal elements. The neck label with the brand logo is stable. It should be designed for longevity and its setup costs amortized over a long horizon. The hang tag with the seasonal collection name and campaign imagery is seasonal. Its setup costs are amortized over a single season. This hybrid strategy optimizes the cost-benefit of each element.
How Should You Allocate Your Branding Budget Across Online Versus Retail Channels?
The sales channel changes the relative value of different branding elements. In a brick-and-mortar retail environment, the hang tag is the first point of contact. It must be beautiful. It is a competitive differentiator on a crowded rack. A premium hang tag is a higher priority for retail-focused brands.
In an online environment, the hang tag is never seen before purchase. The customer sees the product photography, the website description, and the reviews. The hang tag arrives in the package, after the purchase decision is made. It is still a brand touchpoint, an unboxing experience element, but it is not a sales driver. A simpler, less expensive hang tag may be appropriate for online-focused brands, with the budget reallocated to the label or the embroidery, which are seen in the product photography.
The label is visible in e-commerce photography if the brand shoots detail shots of the neck or the side seam. A beautiful woven label photographs well and communicates quality in the online environment. The embroidery is even more powerful online. An embroidered logo on the chest is visible in the main product image. It adds texture and a premium cue that flat printing does not.
A client who sells 90% of her volume direct-to-consumer online was spending $0.55 per unit on a premium die-cut, foil-stamped hang tag. We analyzed her customer journey and realized the tag was only seen after purchase. She reduced the hang tag to a simple, elegant printed tag at $0.15, and invested the $0.40 saving into upgrading her neck label from a printed label to a woven label and adding a small embroidered logo on the back neck. Her product photography improved. The woven label and the embroidered logo were visible in the detail shots. Her conversion rate increased slightly, and her return rate decreased. The reallocation of branding budget from an unseen element to seen elements improved her business metrics.
Conclusion
Branding is not decoration. It is communication. Every dollar spent on a label, a hang tag, or an embroidery stitch is a dollar spent telling your customer who you are and what your product is worth. The question is not "which branding method is cheapest?" The question is "which combination of branding methods tells the right story for my brand, to my customer, through my sales channel, at my volume, within my budget?"
We have seen how woven labels offer long-term value and a premium tactile experience, while printed labels provide design flexibility at a lower setup cost. We have unpacked the hidden cost drivers of premium hang tags, the foil dies, the embossing plates, the cutting forms, that transform a piece of paper into a brand artifact. And we have demystified embroidery, showing how stitch count, digitization, and design optimization directly control the cost of stitched branding.
The total cost is the sum of the setup investments, amortized wisely over realistic volumes, and the per-unit material and labor costs. The total value is the impact of those branding elements on the customer's perception of your product. A $0.75 branding package that makes a $40 garment feel like an $80 garment is not a cost. It is an investment with a high return.
At Shanghai Fumao, we guide our clients through these branding decisions for every order. We provide transparent, itemized quotes for each branding element, showing the setup cost, the per-unit cost, and the amortization calculation. We offer our perspective, based on producing millions of branded garments, on what works for different brand types and sales channels. But we never make the decision for you. Your brand's voice is yours. Our job is to give you the cost data and the manufacturing expertise to express that voice at the right volume for your budget.
If you are developing your branding strategy for a new collection, or if you are reviewing your current branding costs and wondering if there is a better allocation, I invite you to contact our Business Director, Elaine. She can provide a detailed branding cost breakdown for your specific logo and product type, with options at different price points and an analysis of the trade-offs. Reach Elaine at elaine@fumaoclothing.com. Let's make sure every label, every tag, and every stitch is working hard for your brand.