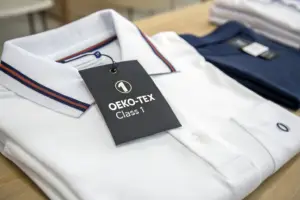
When it comes to garment manufacturing, the final product is only as good as the fabric it’s made from. Yet, even the best designs can be ruined by fabric defects that go undetected until it’s too late—causing costly returns, canceled orders, or brand reputation damage.
To ensure production runs smoothly, you must identify common fabric defects early, inspect raw material thoroughly, and build preventive QC protocols into your sourcing operations.
As a factory owner who supplies U.S. brands and retailers, I’ve seen firsthand how spotting small issues—like a subtle dye streak or missed yarn—can make the difference between success and failure. Here’s how to detect these issues early and avoid downstream production disasters.
What Are the Most Common Fabric Defects in Apparel Production?
Fabric defects can occur during spinning, weaving/knitting, dyeing, or finishing stages. Understanding the most frequent types will help your team know what to look for when inspecting incoming rolls.
The most common fabric defects include broken yarns, misweaves, dye streaks, stains, and print misalignment. These issues directly impact garment quality, especially in visible or stretch-prone areas.

What Weaving and Knitting Defects Should You Look For?
These are mechanical problems from loom or knitting machine malfunctions:
- Slubs: Thick spots caused by uneven yarns
- Broken picks/ends: Gaps in the weave or knit due to thread breakage
- Barre: Horizontal streaks or uneven dyeing in knits
- Uneven loop density: Creates visible tension patterns in knits
Examples and images of these defects can be found on Testex’s Fabric Defect Catalog and Textile School.
What Dyeing or Finishing Issues Are Most Harmful?
Color problems or finishing mishaps can affect entire rolls:
- Color streaks or shading: Dye applied unevenly
- Oil stains or scorch marks: Contamination from machinery
- Print misregistration: Designs not aligned properly
- Off-shade: Fabric doesn’t match approved lab dip
Visual references and inspection checklists are available from QIMA’s textile inspection guide and the American Association of Textile Chemists and Colorists (AATCC).
How to Set Up Fabric Inspection Before Cutting?
Pre-cutting inspection is your last chance to stop defective fabric from entering sewing lines. Even a 2% defect rate can cause issues if concentrated in the visible areas of garments.
Set up a 4-point inspection system, maintain lot control, and assign trained inspectors with proper lighting and tools to check every incoming batch.

What Is the 4-Point Fabric Inspection System?
The 4-point system is the industry standard for evaluating fabric quality. Here’s how it works:
- Defects are graded 1, 2, 3, or 4 points depending on size
- Total allowed points: ≤ 40 per 100 square yards
- Used globally across woven and knit fabrics
Detailed charts and defect classification guides are provided by SGS and Asia Quality Focus.
How Do You Equip a Proper Fabric Inspection Line?
Set up inspection tables with:
- Backlighting or strong top-down inspection lamps
- Fabric meter counters
- Marking stickers or chalks
- Roller system to unroll and rewind fabric
- Defect mapping sheets
You can source equipment from James H. Heal or Qualitex Europe to ensure inspection efficiency.
How to Train Your Staff to Spot Fabric Defects Early?
Even if you have inspection tables and checklists, your staff won’t be effective unless they know what to look for. Many defects are subtle and can be missed if training is rushed or skipped.
You should build a standardized defect library, use real fabric swatches for training, and refresh sessions regularly to keep staff alert.

What Should a Fabric Defect Training Program Include?
A successful program includes:
- Hands-on sessions with real defective swatches
- Defect photo charts by category (weaving, dyeing, printing)
- Scenarios: what to reject, what to repair, what to accept
- Grading systems aligned with 4-point system
Training modules can be modeled on ISO 2859 AQL standards or adapted from Bureau Veritas textile audits.
How Can Visual Aids Improve Defect Identification?
Visual tools like wall charts, flipbooks, and laminated guides make a huge difference on the factory floor. You can download printable guides from Fashion-Incubator’s resources or order fabric defect libraries from SDL Atlas.
These tools reduce misjudgment, align team understanding, and help prevent inconsistent decision-making during busy shifts.
How to Work with Fabric Mills to Reduce Defects at Source?
Even the best inspection can’t replace proactive mill management. If defects keep showing up in certain batches, your inspection strategy should evolve to prevent issues before they happen.
Build collaborative relationships with mills, agree on QC checkpoints, and keep defect scorecards so both sides can improve batch by batch.

How to Track Fabric Supplier Performance Over Time?
Create a defect scorecard for each mill:
| Supplier | Roll Count | Rejected Rolls | Major Defect Type | Defect Rate (%) |
|---|---|---|---|---|
| Mill A | 120 | 8 | Dye streaks | 6.7% |
| Mill B | 95 | 0 | N/A | 0% |
You can automate tracking with software like Inspectorio or Excel templates from Production Planning Helpers. Share this transparently with the mill.
What Preventive Actions Should Fabric Mills Take?
Ask suppliers to:
- Share pre-shipment inspection reports
- Send swatches from every dye lot
- Use barcode labeling for roll tracking
- Implement inline QC (not just post-production)
Top mills listed on Textile Value Chain or Indiamart’s certified vendors often support these protocols and welcome buyers with structured requests.
Conclusion
Fabric defects can silently destroy entire apparel production runs. But when you understand the most common issues—whether slubs, dye streaks, or print misalignment—and take early action, you not only reduce wastage but also build trust with your buyers.
At Fumao Clothing, we’ve built our system to catch these problems early, from sourcing to final inspection. Our clients, like Ron from the U.S., trust that the fabric in their shirts, dresses, or sportswear lines meets their standards from the first stitch.
If your current factory keeps blaming “supplier issues” or only finds problems after sewing, it’s time to rethink your approach. Inspect early. Inspect smart. And partner with a team that’s built for prevention, not damage control.