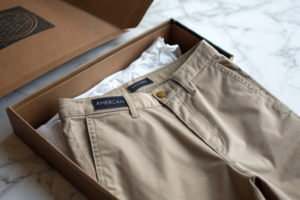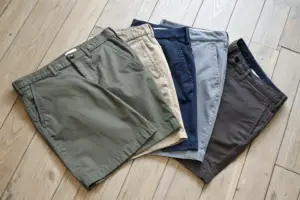
You receive the pre-production sample from the factory. You open the package with a mix of excitement and anxiety. This is the moment of truth. This sample represents what 2,000 pairs of your shorts will look like. If you approve a sample with a hidden flaw, that flaw will be multiplied across the entire bulk order. You will not discover it until the goods arrive at your warehouse, when it is too late and too expensive to fix. You know you need to inspect this sample thoroughly. But what exactly should you check? Where do you start? How do you know if a stitch is strong enough, a zipper is reliable, or a measurement is within tolerance? This is the most important quality gate in the production process. You need a systematic approach.
Inspecting a classic shorts pre-production sample requires a structured, five-zone evaluation: measurement verification against the approved tech pack, fabric and trim confirmation against the bill of materials, stitch and seam integrity testing at stress points, hardware and closure function testing, and overall visual appearance and finishing assessment. Each zone has specific checks, specific tools, and specific pass-fail criteria. A systematic sample inspection takes about 30 minutes and can prevent thousands of dollars in bulk order defects. The pre-production sample is not a formality. It is the final opportunity to catch and correct errors before they are multiplied across the entire production run.
At Shanghai Fumao, we welcome and encourage our clients to inspect the pre-production sample rigorously. We provide the sample along with the measurement chart, the fabric swatch card, and the trim card. We want the client to find any issues at this stage. An issue found on the sample is a conversation. An issue found on the bulk order is a crisis. This article is your step-by-step guide to inspecting a sample like a professional. It covers every check you need to perform, the tools you need, and the standards to apply.
How Do You Verify Measurements Against the Approved Tech Pack?
Measurements are the skeleton of the short. If the measurements are wrong, the fit is wrong. The customer tries on the short. It is too tight in the waist. Too loose in the thigh. The inseam is too short or too long. She returns it. Measurement verification on the sample is the most important inspection step. It confirms that the factory's pattern matches your specification. A sample that measures correctly, within the agreed tolerances, is a sample that will fit your customer. A sample that measures outside tolerance is a sample that will generate returns.
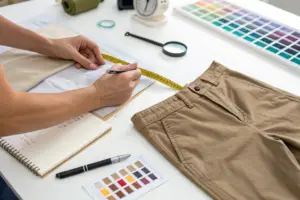
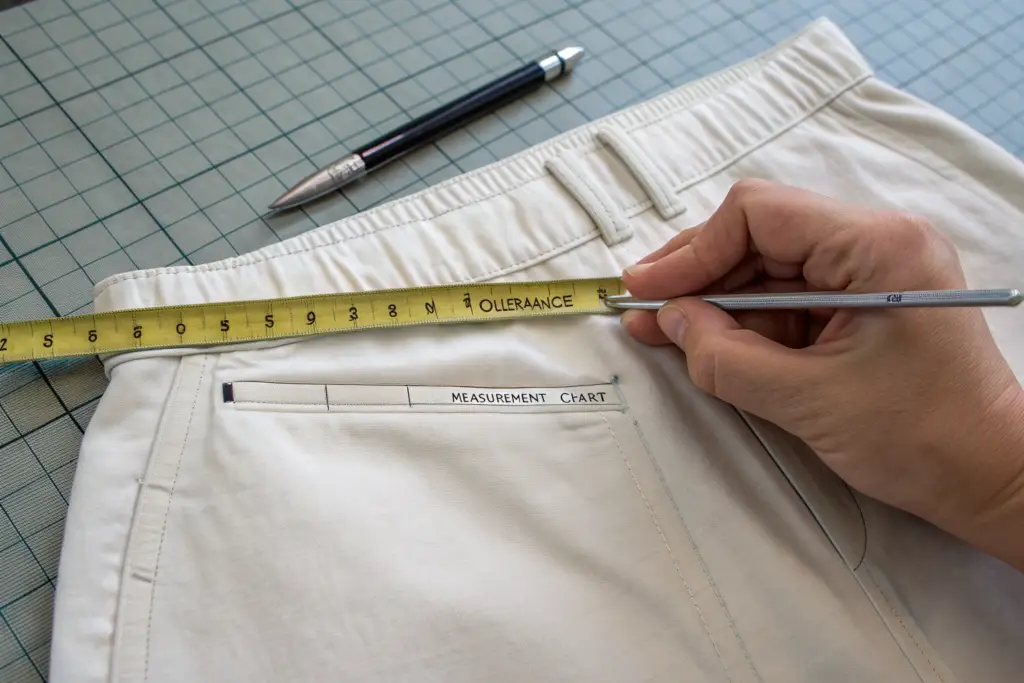
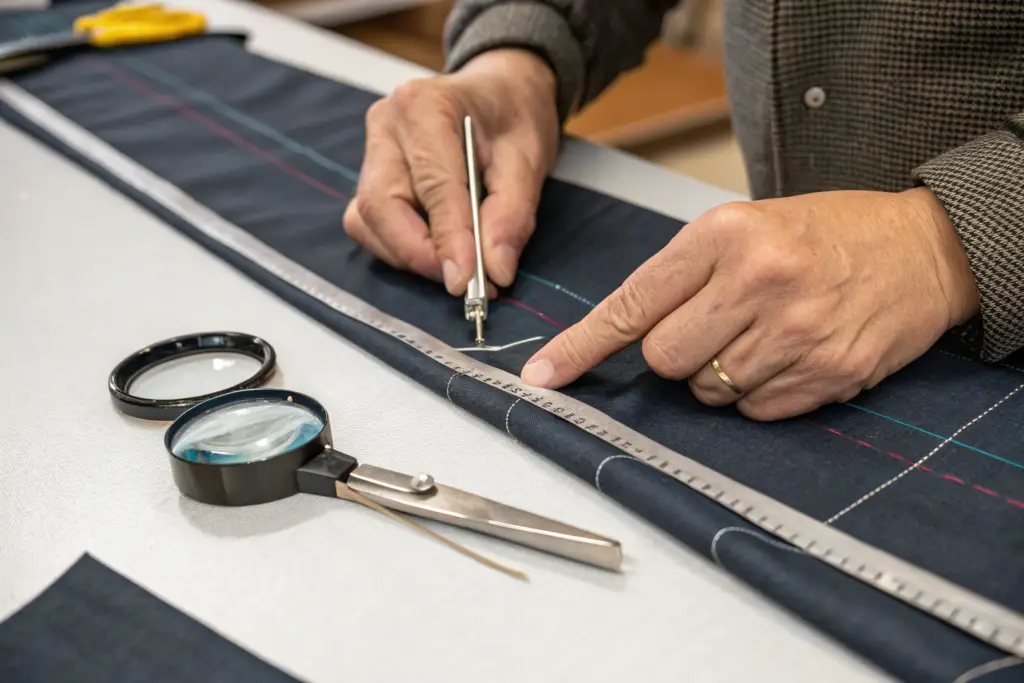
I have seen brands skip measurement verification because the sample "looked good" on a hanger. A short can look good on a hanger and still measure wrong. The only way to verify measurements is with a measuring tape on a flat table. The garment measurement verification guide explains the correct technique for each point of measure. A buyer must lay the short flat, smooth out wrinkles, and measure correctly. Let's walk through the key measurement points and the tools needed.
The measurement process requires the correct tools and the correct technique. A flexible fabric measuring tape can stretch and give inaccurate readings. A rigid metal tape or a ruler is better. The short must be laid flat on a hard surface, not a soft bed or carpet. Let's detail the process.
What Are the Critical Points of Measure and Their Acceptable Tolerances?
The critical points of measure for a classic short are the waist circumference, relaxed and extended, the front rise, the back rise, the hip width at a specified distance below the waistband, the thigh width at the crotch level, the leg opening circumference, and the inseam length. Each measurement has a specified tolerance, usually plus or minus half an inch for circumferences and plus or minus a quarter inch for lengths and rises.
For example, a size medium waist might be specified as 32 inches, relaxed, with a tolerance of plus or minus 0.5 inches. If the sample measures 31.2 inches, it passes. If it measures 31.0 inches, it fails. The measurement tolerance standards for apparel define industry norms. The buyer and the factory should agree on tolerances in the tech pack before sampling begins.
How Do You Properly Measure Rise, Inseam, and Leg Opening?
To measure the front rise, lay the short flat with the front facing up. Smooth the fabric. Place the end of the measuring tape at the crotch seam intersection. Measure straight up to the top of the waistband. Do not follow the curve of the crotch. Measure the straight vertical distance. The back rise is measured the same way, with the back facing up.
To measure the inseam, lay the short flat with one leg extended. Place the end of the tape at the crotch seam. Measure along the inside leg seam to the hem edge. To measure the leg opening, lay the hem flat. Measure the width from one side of the hem to the other. Multiply by two for the circumference. Alternatively, measure the circumference directly by wrapping the tape around the hem. The how to measure shorts correctly guide provides diagrams. Consistent technique is essential. A measurement taken differently by the buyer and the factory will cause disputes.
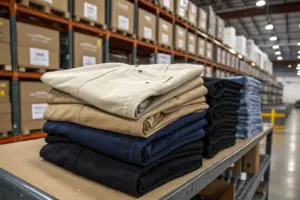
How Do You Confirm the Fabric and Trims Match the Bill of Materials?
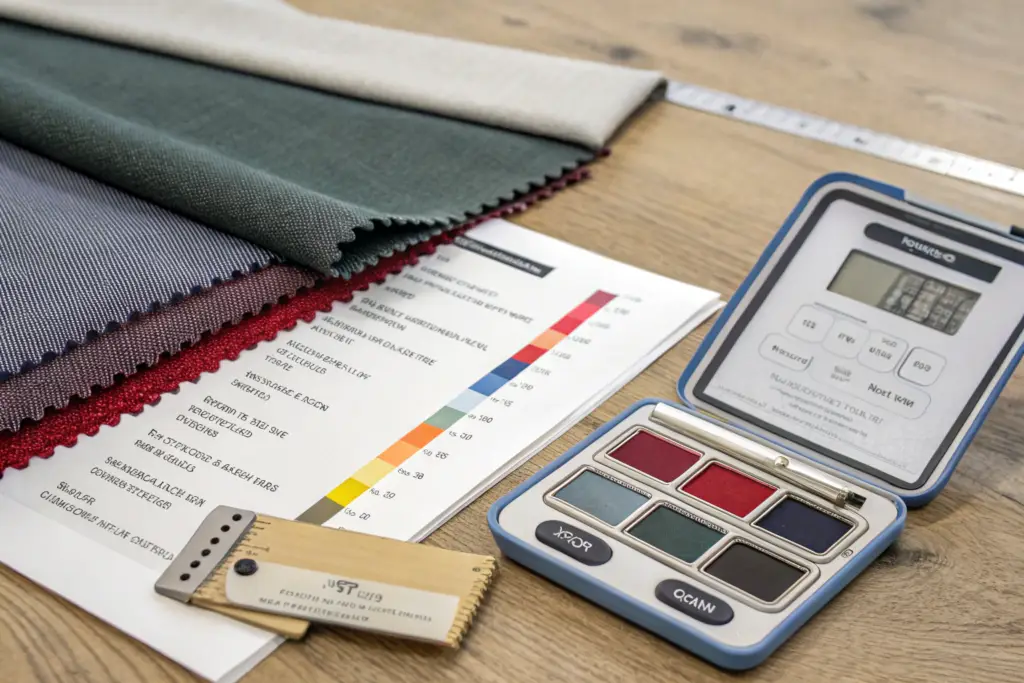
The fabric and trims are the substance of the short. The factory can use the correct pattern but substitute a cheaper fabric or a generic zipper. The sample will look similar in a photo. It will feel different in the hand. The buyer must verify that the fabric weight, color, and hand feel match the approved standard, and that the zipper, button, thread, and labels match the bill of materials. Material substitution is one of the most common quality issues in garment manufacturing.
I recall a brand owner who approved a sample without verifying the fabric weight. The sample was made with the correct 280 GSM twill. The bulk order was cut from a 220 GSM twill. The shorts were lighter, flimsier, and wrinkled more. The brand owner had no recourse because he had approved the sample without documenting the fabric weight. He learned to weigh every sample. The fabric and trim verification for samples guide explains the verification process. A buyer should have the approved fabric swatch and trim card on hand when inspecting the sample.
Fabric weight and color are objective measurements. Hand feel is subjective but important. The buyer uses tools and senses to verify the materials match the approved standard.
What Simple Tests Verify Fabric Weight, Color, and Hand Feel?
Fabric weight is verified with a GSM cutter and a digital scale. If you do not have a GSM cutter, you can cut a precise 10cm by 10cm square of fabric from an inconspicuous area inside the waistband. Weigh it on a scale that measures to 0.1 grams. Multiply the weight by 100. The result is the GSM. Compare it to the specified GSM.
Fabric color is verified under a lightbox. If you do not have a lightbox, check the color under three different light sources: natural daylight near a window, warm indoor light, and cool fluorescent light. The sample fabric must match the approved swatch under all three. Hand feel is verified by touch. Compare the sample fabric to the approved swatch. Rub both between your fingers. They should feel the same. Softness, crispness, thickness. The fabric weight and color verification techniques guide provides methods.
How Do You Check That Zippers, Buttons, and Labels Are the Specified Brands?
Check the zipper. It should have the YKK logo, or the specified brand, stamped on the slider and on the zipper tape. Check the zipper size. A #5 metal zipper has visibly larger teeth than a #3. Check the color. Antique brass, nickel, black. Check the button. It should match the approved button sample in material, size, color, and logo engraving. Check the labels. The main label, care label, and size label should match the approved artwork in text, font, color, and placement.
Pull on the button firmly. It should not crack or detach. Rub the label against itself. The print should not smudge. These small verifications prevent big problems. A generic zipper that fails after ten uses renders the short unwearable. A misprinted care label can cause a customs hold. The trim inspection checklist covers all components.
What Stitch and Seam Tests Ensure the Shorts Will Survive Wear?
A short can look beautiful on the table and fall apart after ten wears. The stitching is the skeleton that holds the garment together. The buyer must test the stitch density, the seam strength, and the construction of the stress points. The back rise seam, the crotch point, the pocket corners, the belt loops. These areas take the most force during wear. A seam failure at any of these points renders the short unwearable.
I have seen a beautiful sample that had a back rise seam sewn with a single-needle lockstitch instead of the required safety stitch. The sample looked fine. The seam would have snapped the first time the wearer sat down in the bulk shorts. The buyer caught the error by pulling on the seam. The lockstitch had no stretch. The safety stitch stretches. The factory corrected the construction before bulk. The stitch and seam testing for garments guide explains the different stitch types and their applications. A buyer must know the difference.
Stitch density is measured with a pick glass. Seam strength is tested with a manual pull test. The buyer does not need a lab. They need their hands, their eyes, and the pick glass.
How Do You Count Stitches Per Inch and Test Seam Strength Manually?
Place the pick glass on the seam. The pick glass has a built-in ruler, usually a half-inch window. Count the number of stitches visible within the half-inch window. Multiply by two. That is the stitches per inch, or SPI. A quality classic short should have 10 to 12 SPI on main seams. Stress points like the back rise and pocket corners should also have 10 to 12 SPI. If the count is below 10, the seam is too loose and may gape or break.
To test seam strength, grip the fabric firmly on both sides of the seam, about an inch from the stitch line. Pull steadily with increasing force. The seam should not open. The thread should not break. The fabric should not tear along the stitch line. Pay special attention to the back rise seam. This is the highest stress seam on a short. Pull it hard. If it holds, it will survive normal wear. The manual seam strength testing method is a simplified version of the ASTM lab test.
What Are the Stress Points That Require Bartack Reinforcements?
A bartack is a dense, reinforced stitch, usually 10 to 16 stitches packed into a very short length. It is used at points of high stress. The pocket corners, the bottom of the zipper fly, the belt loop attachments, the base of a cargo pocket flap. A bartack prevents tearing at these points.
Check every bartack on the sample. The bartack should be tight, dense, and secure. Pull on the fabric around the bartack. The fabric should not tear away. A missing or poorly sewn bartack is a defect. The bartack reinforcement in garment construction guide explains the purpose and the correct appearance. A quality short has bartacks at all specified stress points.
What Final Functional and Visual Checks Complete the Sample Inspection?
The measurements are correct. The fabric is verified. The stitching is strong. Now the buyer must evaluate the short as a whole. How does it look on a body or a dress form? How do the closures function? Are the pockets deep enough? Is the hem even? Are there any visual defects, stains, loose threads, pressing marks? This final functional and visual check simulates the customer's experience.
I recommend that the buyer wear the sample, if possible, or put it on a dress form. Walk in it. Sit in it. Put a phone in the pocket. Zip and unzip the fly ten times. Button and unbutton the waistband. This wear test reveals problems that a flat table inspection misses. The final garment inspection checklist covers all functional and visual checks. A sample that passes the flat table inspection and the wear test is ready for bulk production approval.
The functional tests focus on the closures and pockets. The visual checks focus on overall appearance and finishing quality. Both are essential.
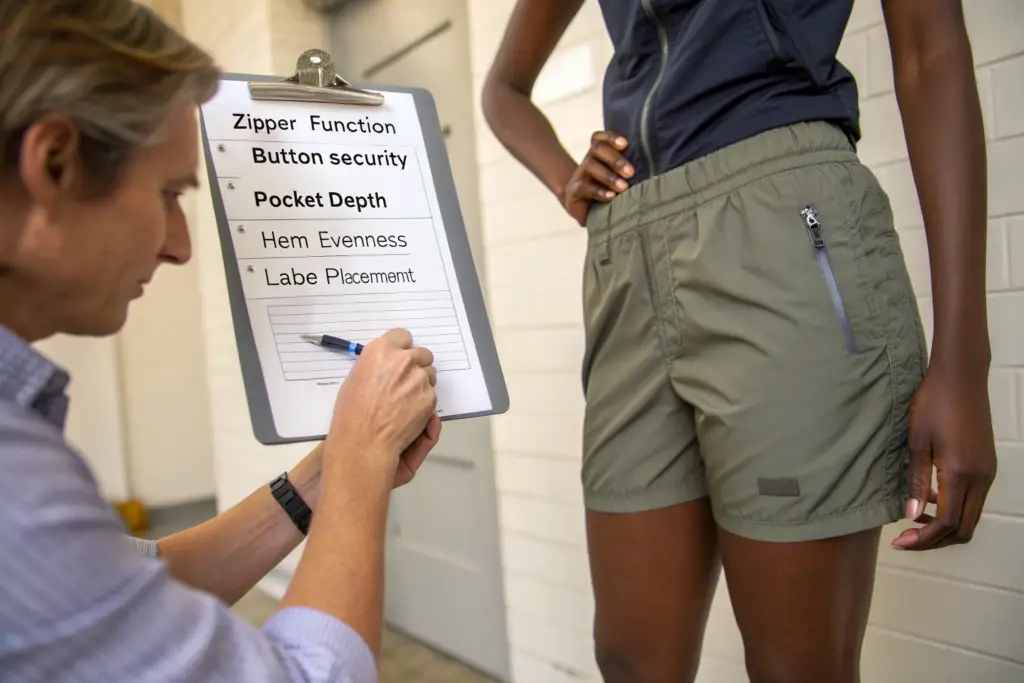
How Do You Test Zipper Function, Button Attachment, and Pocket Depth?
Operate the zipper fly ten times. Zip it up. Zip it down. It should move smoothly without catching. The zipper tape should be securely sewn into the fly, with no raw edges visible. The slider should lock in the down position. Pull the button firmly. Pull it away from the fabric. Twist it gently. The button should not crack. The thread should not break. The buttonhole should be cleanly cut and stitched.
Insert your phone into the front pocket. The pocket should be deep enough that the phone sits fully inside, below the pocket opening. Walk around. The phone should not fall out. Turn the pocket inside out. Check the pocket bag stitching. There should be no holes. The pocket material should match the BOM specification. The garment function testing guide provides a systematic process for testing every functional element.
What Visual Defects Should Cause a Sample to Be Rejected?
Any visible stain, oil spot, dye blotch, or dirt mark is a reject. More than two loose threads longer than 1 centimeter is a reject. An uneven hem, varying by more than half a centimeter around the leg opening, is a reject. Wavy or crooked topstitching is a reject. A misaligned pocket is a reject. A label that is sewn crooked or in the wrong location is a reject. Shade variation between the left and right leg panels is a critical reject.
Press marks, shine from over-pressing, or unpressed wrinkles are rejects. The sample should look like it is ready for a retail floor. The visual defect classification for garments guide provides a standard defect list. The buyer should use this list to evaluate the sample objectively. Do not accept a sample with visual defects on the assumption that "they will fix it in bulk." If the sample has defects, the bulk order will have more defects.
Conclusion
Inspecting a classic shorts pre-production sample is the most important quality gate in the production process. The five-zone inspection covers measurements, materials, stitching, function, and visual appearance. The buyer verifies every measurement against the approved tech pack with a metal measuring tape. The buyer confirms the fabric weight, color, and hand feel against the approved swatch, and checks every trim against the bill of materials. The buyer counts stitches per inch at stress points with a pick glass and tests seam strength with a manual pull test. The buyer operates every zipper, pulls every button, and inserts a phone into every pocket. The buyer examines the short for stains, loose threads, uneven hems, and label placement errors.
A systematic sample inspection takes about 30 minutes. It is the most valuable 30 minutes in the entire production timeline. It catches errors when they affect one piece, not two thousand pieces. It is the difference between a bulk order that builds the brand and a bulk order that damages it. The buyer who inspects the sample thoroughly sleeps well at night. The buyer who skips inspection gambles.
At Shanghai Fumao, we ship every pre-production sample with the measurement chart, the fabric swatch card, and the trim card. We welcome the client's inspection. We want any issues found and corrected at this stage. Our quality control team has already inspected the sample internally before it ships. The client's inspection is the final, independent verification. If you are preparing to receive a pre-production sample from us or from any factory, use this guide as your checklist. If you have questions about the inspection process, contact our Business Director, Elaine, at elaine@fumaoclothing.com. She can walk you through our sample inspection protocol. Let us ensure your sample is right before a single bulk piece is cut.